Build your first discord bot to fetch ethereum NFTs (including ENS) without writing code


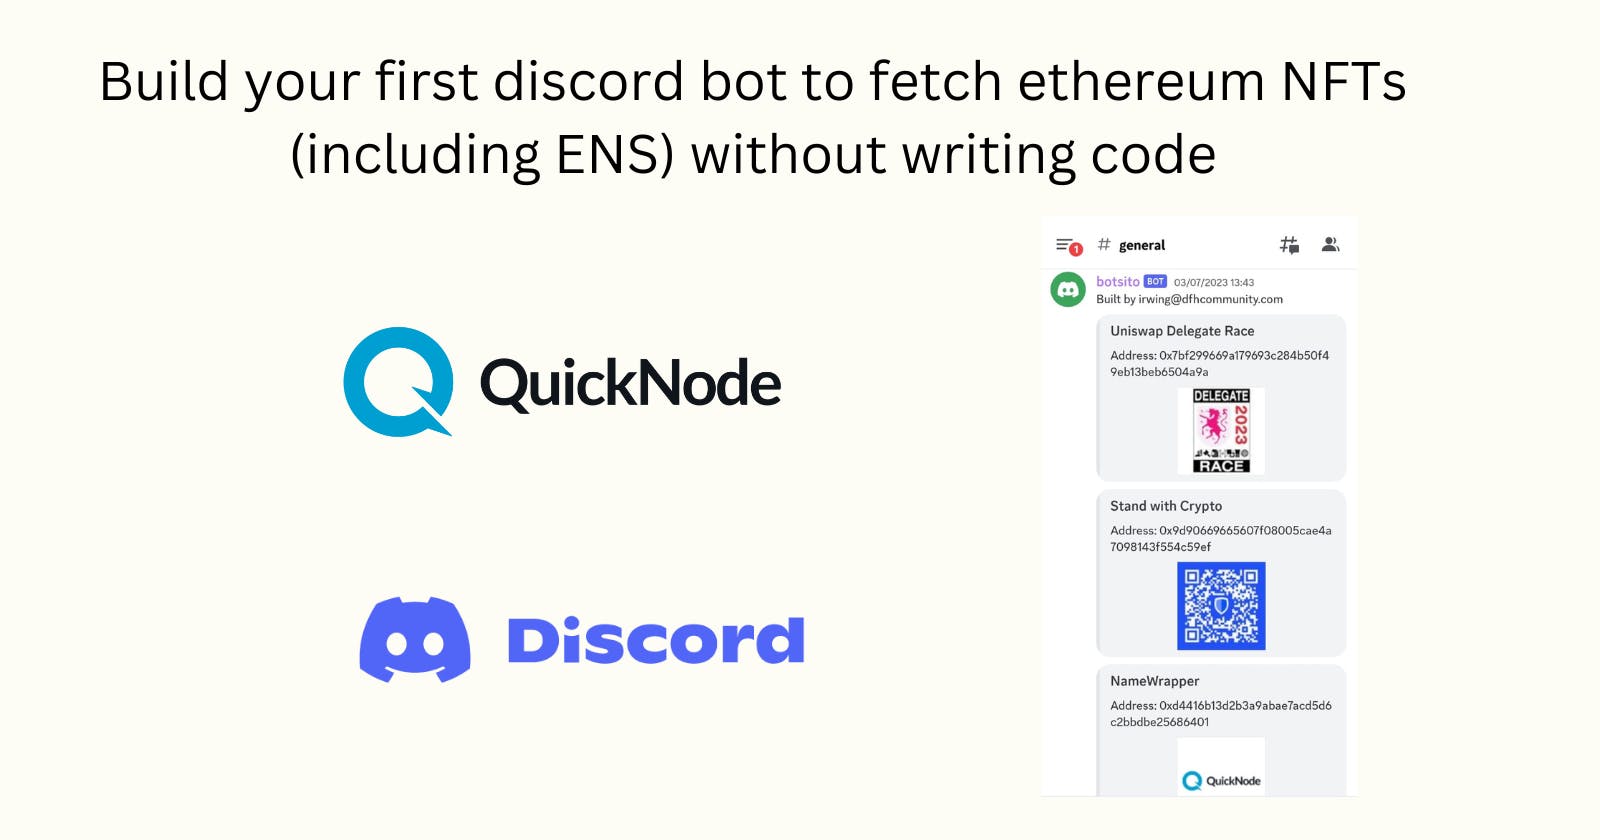
Table of contents
- Overview
- What We Will Do
- What You Will Need
- What is QuickNode?
- What is Discord?
- Creation of our discord bot
- Obtaining information from QuickNode
- Creating a service to retrieve information for our Discord bot
- Setting up our service on Discord
- Exploring your first NFT Discord Bot on your community
- Conclusion
- We ❤️ Feedback!
Overview
Welcome to the tutorial on integrating your ENS address and Ethereum address with Discord to showcase your NFT collection! .
By following the simple steps outlined in this guide, you will be able to seamlessly access and display your NFTs directly on Discord, increasing your visibility and engagement within the community.
Our goal is to provide you with a comprehensive understanding of the integration process, enabling you to navigate it smoothly and enjoy the benefits of sharing your NFTs with other Discord users effortlessly.
Whether you're an avid collector, an artist, or simply curious about the NFT space, this tutorial is designed to equip you with the necessary tools to exhibit your digital assets in a convenient and visually appealing manner on Discord.
What We Will Do
- Configuring our bot service to retrieve data from QuickNode.
What You Will Need
What is QuickNode?
QuickNode offers access to nodes for various blockchain networks:
and more.
Developers and businesses can easily set up and manage their blockchain nodes without having to worry about the complexity of maintaining the infrastructure.
QuickNode provides reliable and high-performance nodes that are always up-to-date with the latest software versions.
In addition to running blockchain nodes, QuickNode also provides:
Tools for monitoring and managing your infrastructure.
APIs for building and deploying decentralized applications.
And more useful tools for your web3 journey!
With QuickNode, developers can focus on building their applications and not worry about the underlying infrastructure.
What is Discord?
Discord is a popular communication platform that offers voice, video, and text chat capabilities. It is widely used by millions of people aged 13 and above as a means to connect with their communities and friends. Whether you're looking to have casual conversations, organize gaming sessions, collaborate on projects, or simply stay in touch with like-minded individuals, Discord provides a versatile platform for various forms of communication and social interaction.
Creation of our discord bot
To activate your Discord bot, you will need two specific values: CLIENT_PUBLIC_KEY and BOT_TOKEN, please save these values, we will need them in this section: "Creating a service to retrieve information for our Discord bot".
Here are the steps to obtain these values:
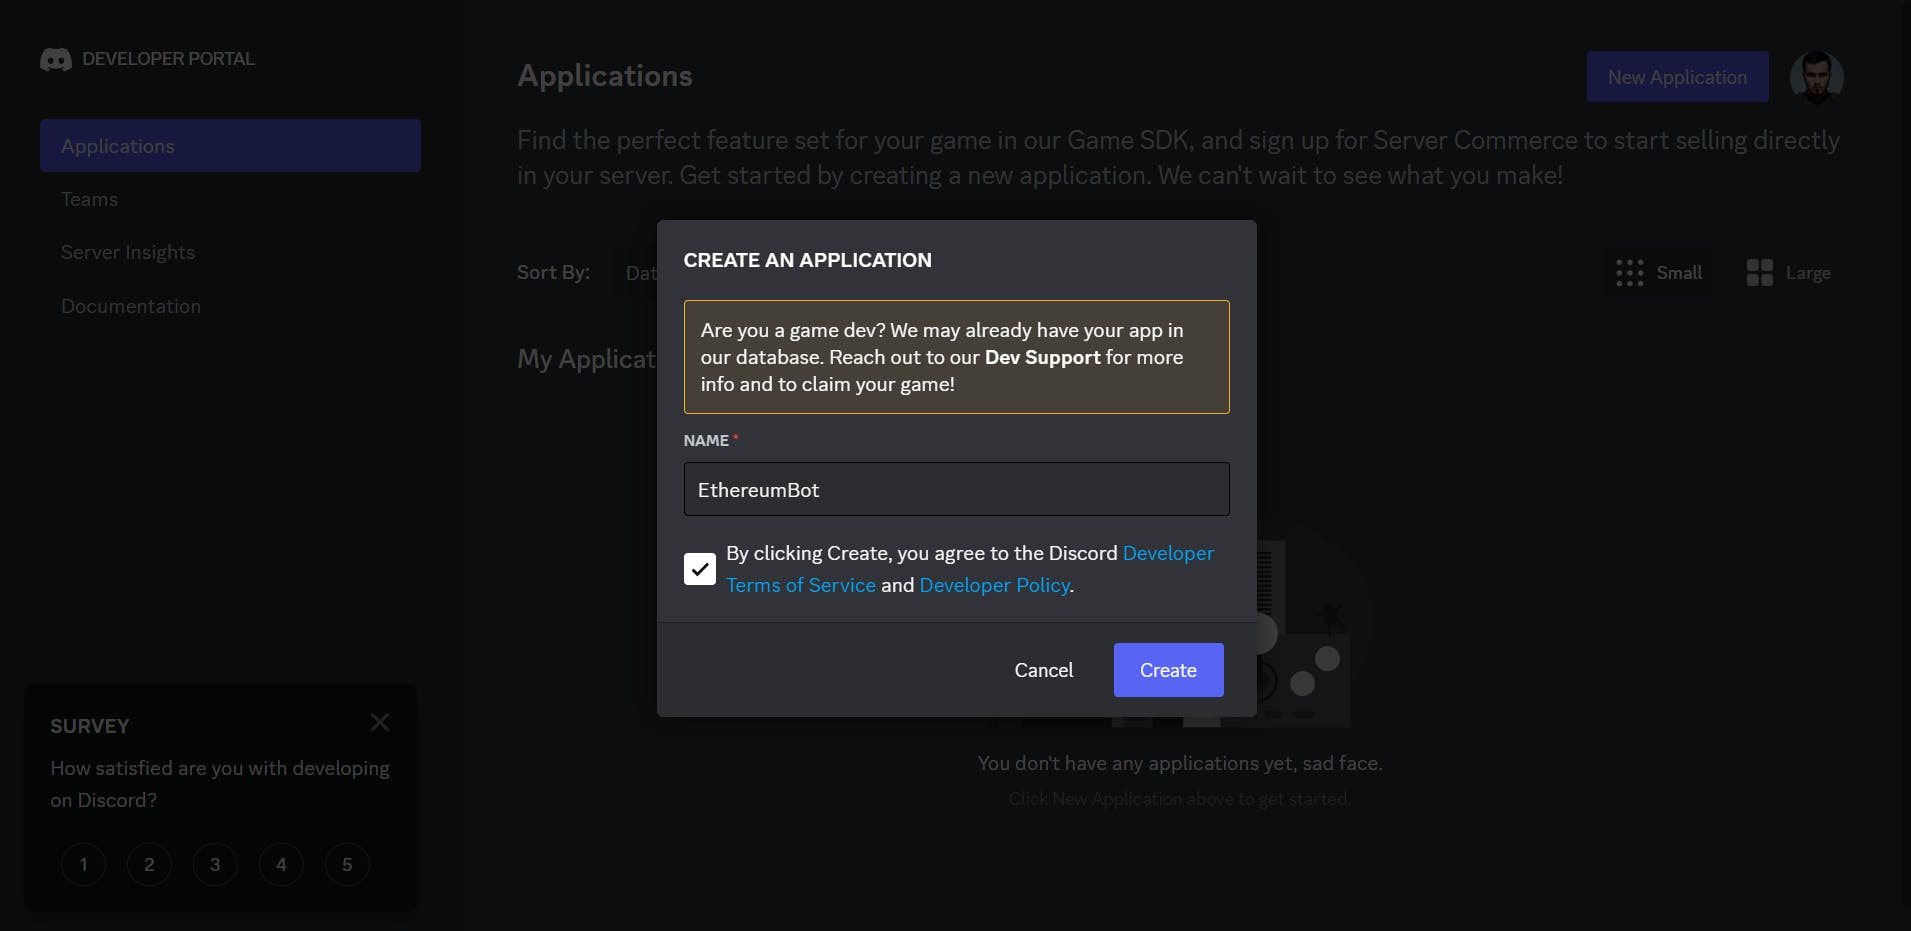
Go to the Discord Developer Portal website. You can access it by visiting discord.com/developers/applications and logging in with your Discord account.
Once you are logged in, click on the "New Application" button to create a new application for your bot. Give your application a name that represents your bot.
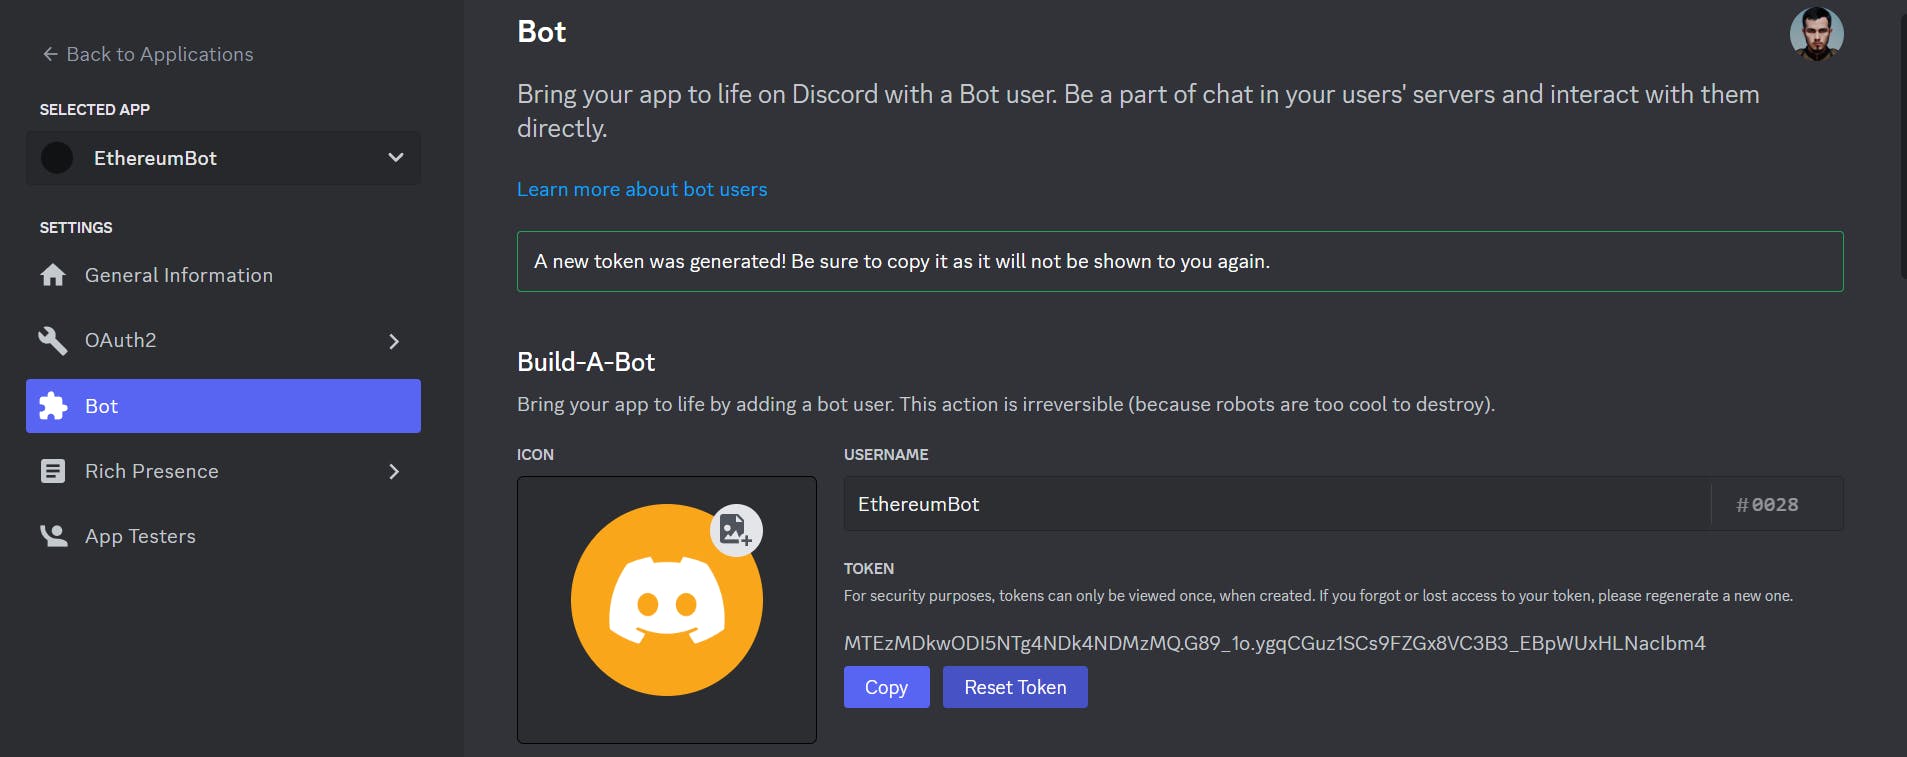
In the left sidebar, select "Bot" under the settings for your application.
Under the "Token" section, you will find your BOT_TOKEN.
Click on the "Reset Token" button.
This token acts as your bot's authentication to the Discord API. Keep this token secure and do not share it publicly.
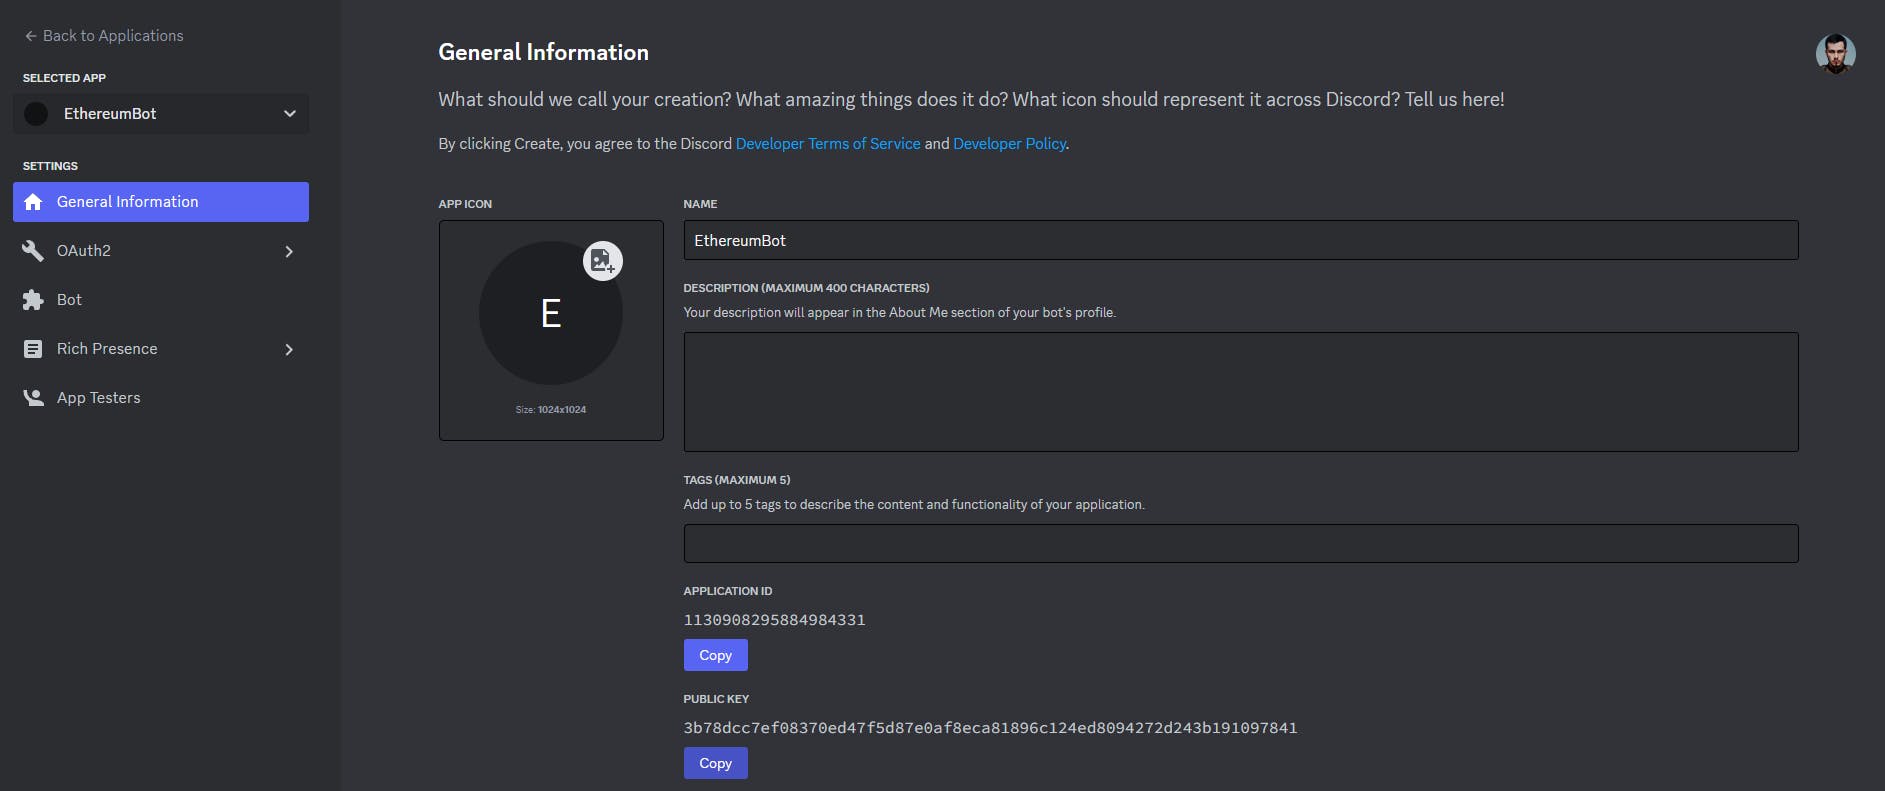
To obtain the CLIENT_PUBLIC_KEY, you need to go to the General Information setting. Search for "Public Key" and copy the value.
After that, you need to invite your bot to your discord, to get the invitation, go to the "OAuth2" section and search for the "URL Generator" sub-section.
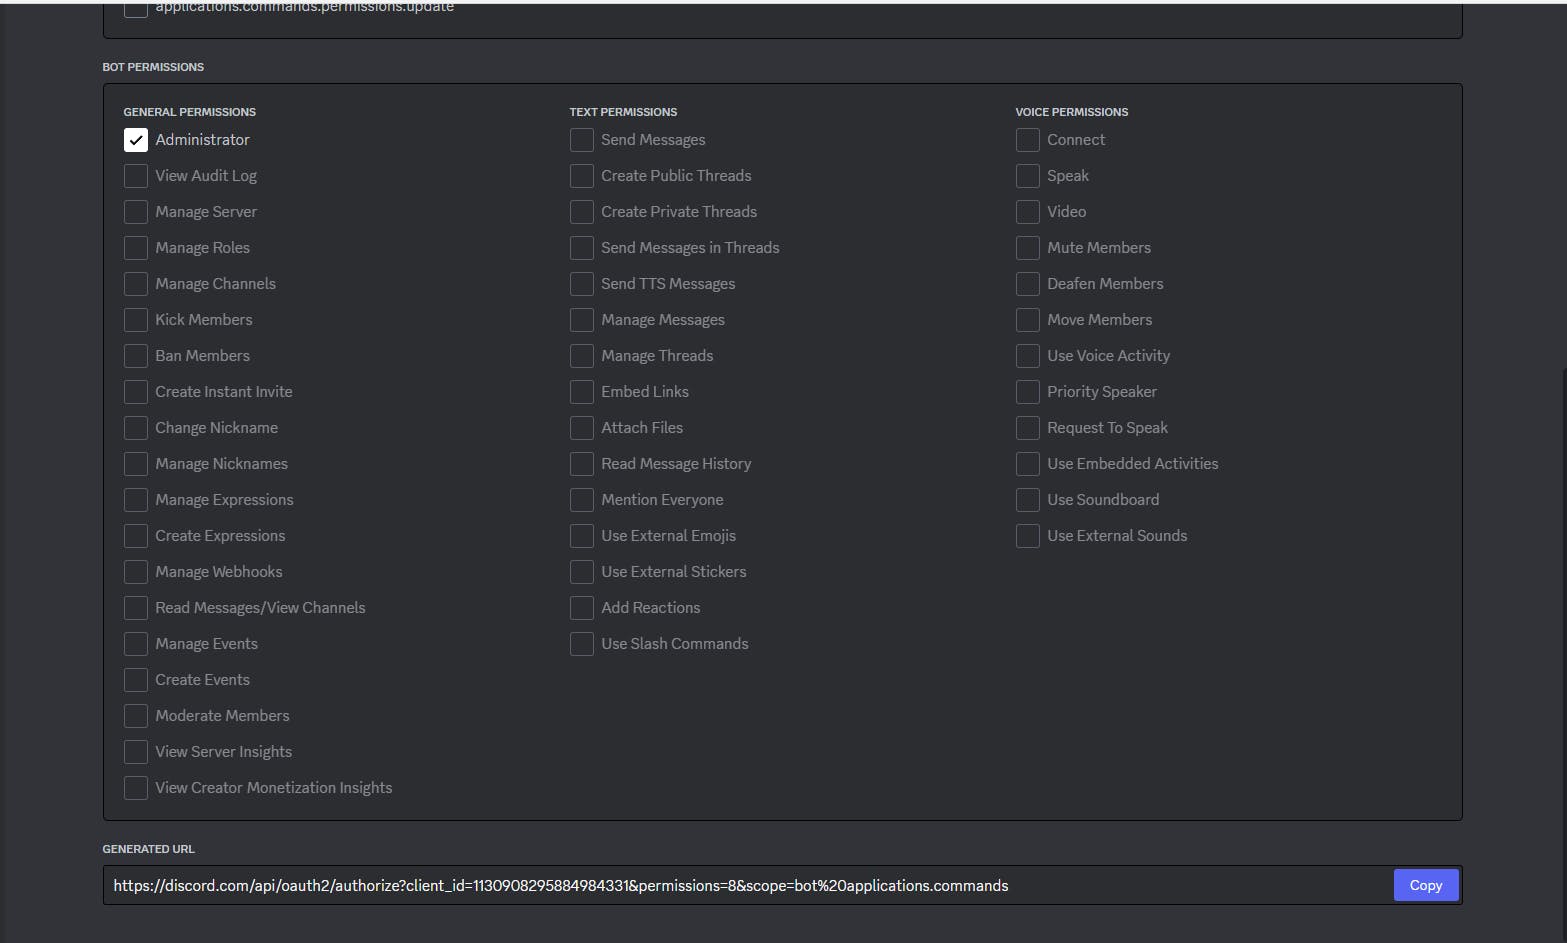
In this section, you need to check the "bot" and "applications.commands" options. After that, you can see the Bot Permissions, and check the "Administrator" option.
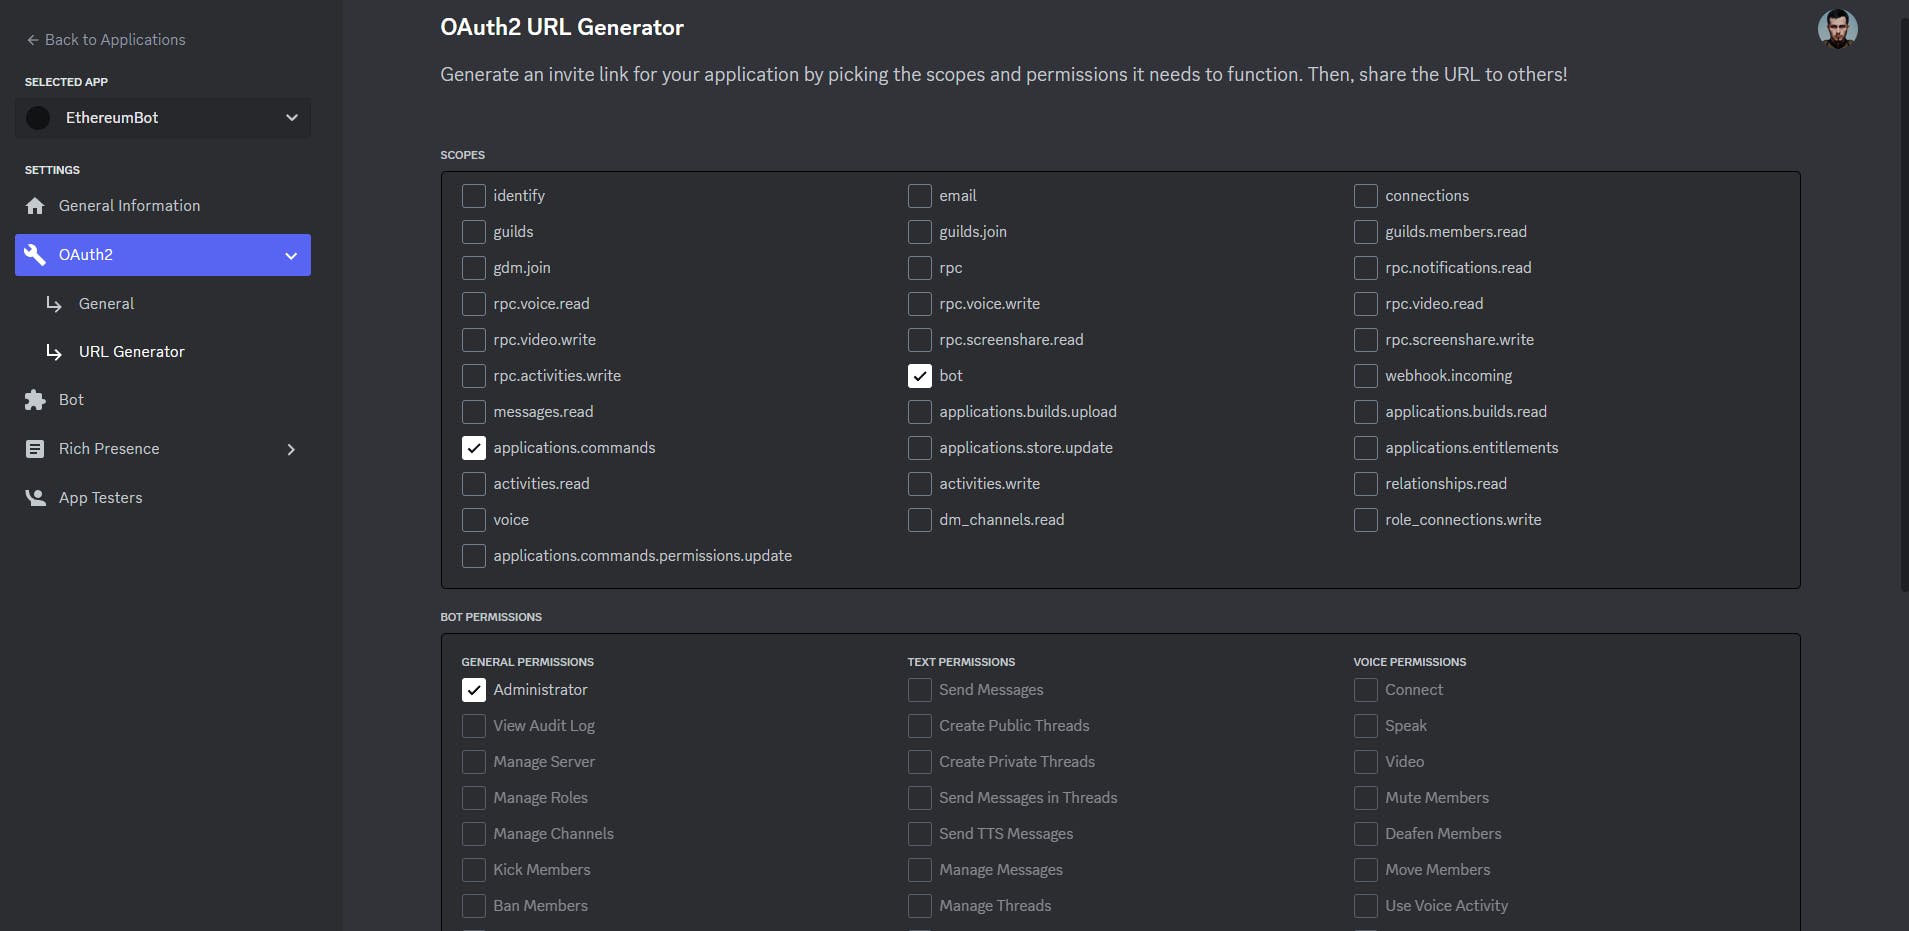
At the bottom, you need to copy this invitation URL.
In consequence, you need to copy the generated URL and paste it into your browser, and press enter:
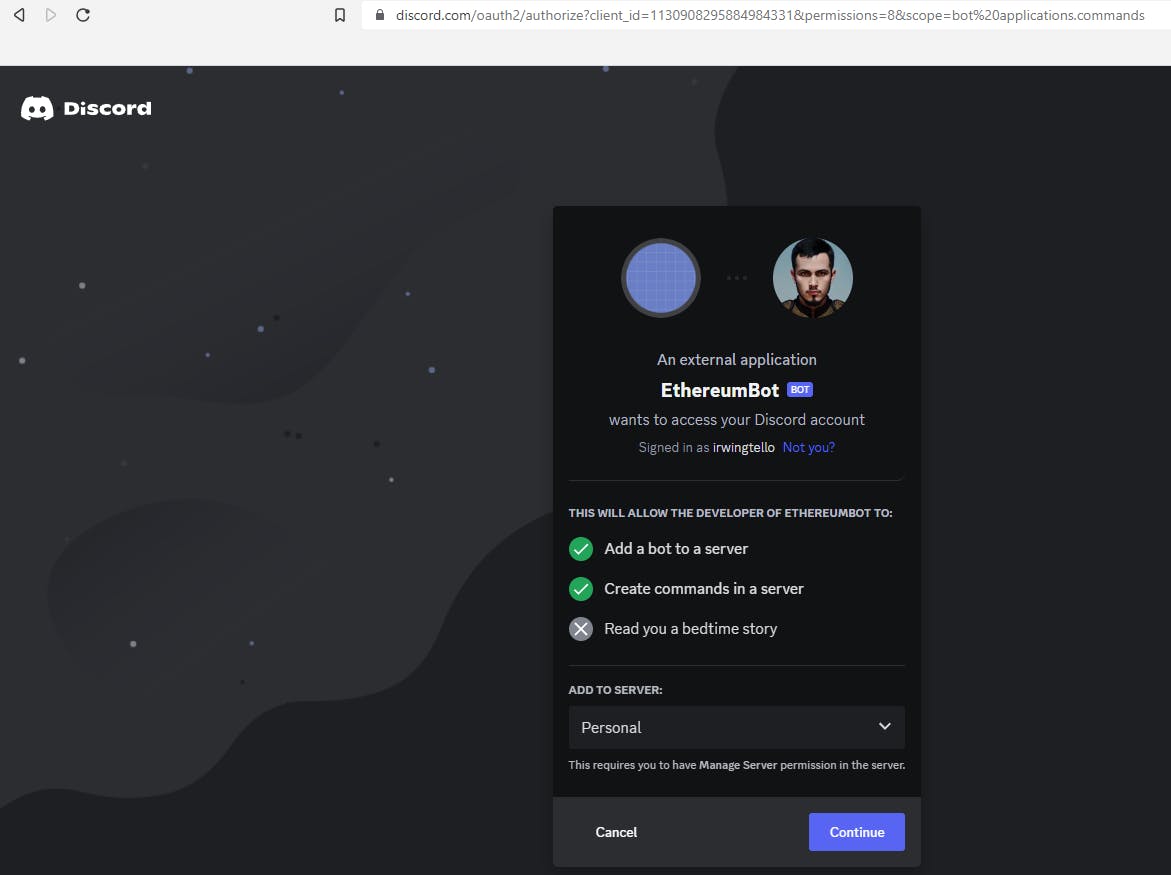
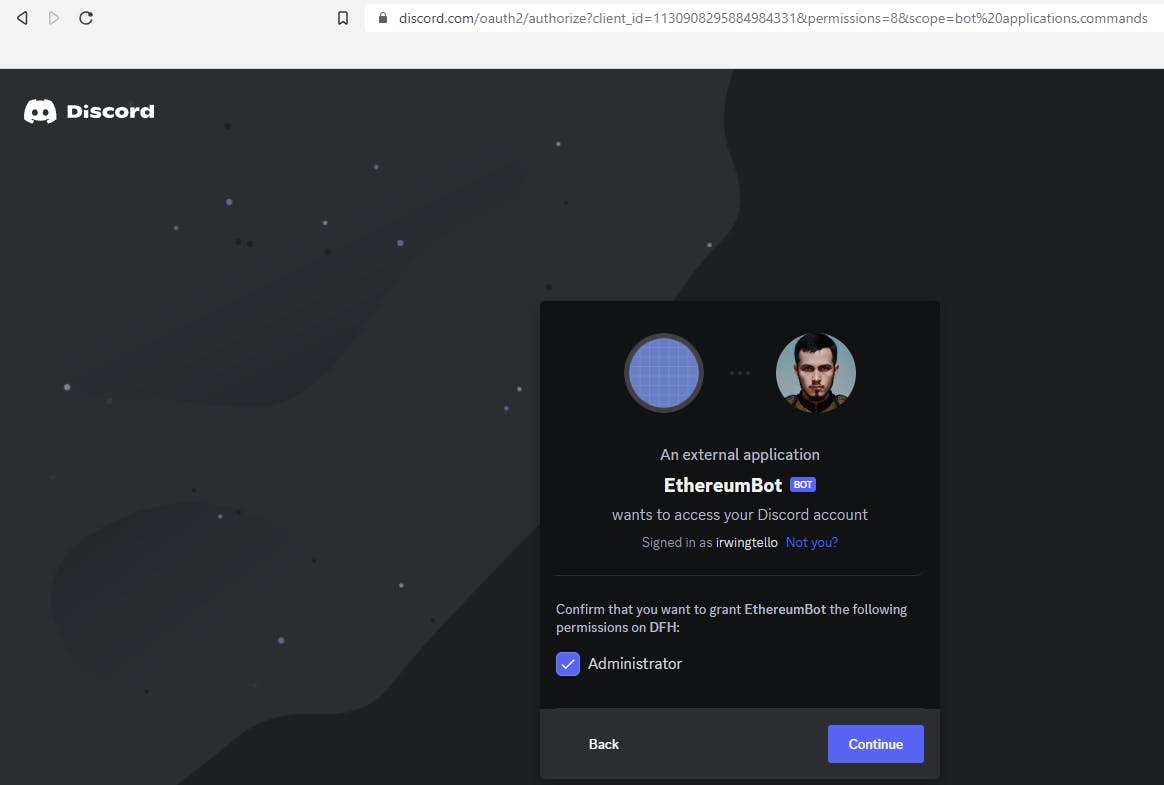
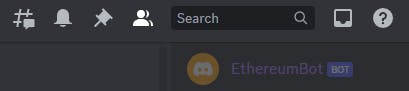
You will see a similar screen to the previous image and finally, you can see your bot on your community.
To retrieve the information from our discord bot, you need to create these two commands:
/info <address>
You can retrieve the information to retrieve the NFTs associated with your wallet.
/retrieve <address> <page>
You can retrieve the information from your nfts with the next parameters:
address: The address you would like to retrieve your nfts.
page: Each page has a limit to seeing 10 nfts, because discord has some limitations on returning messages.

To create the commands, you need to go to:
https://www.site24x7.com/tools/restapi-tester.htmlCreating the command "/info":
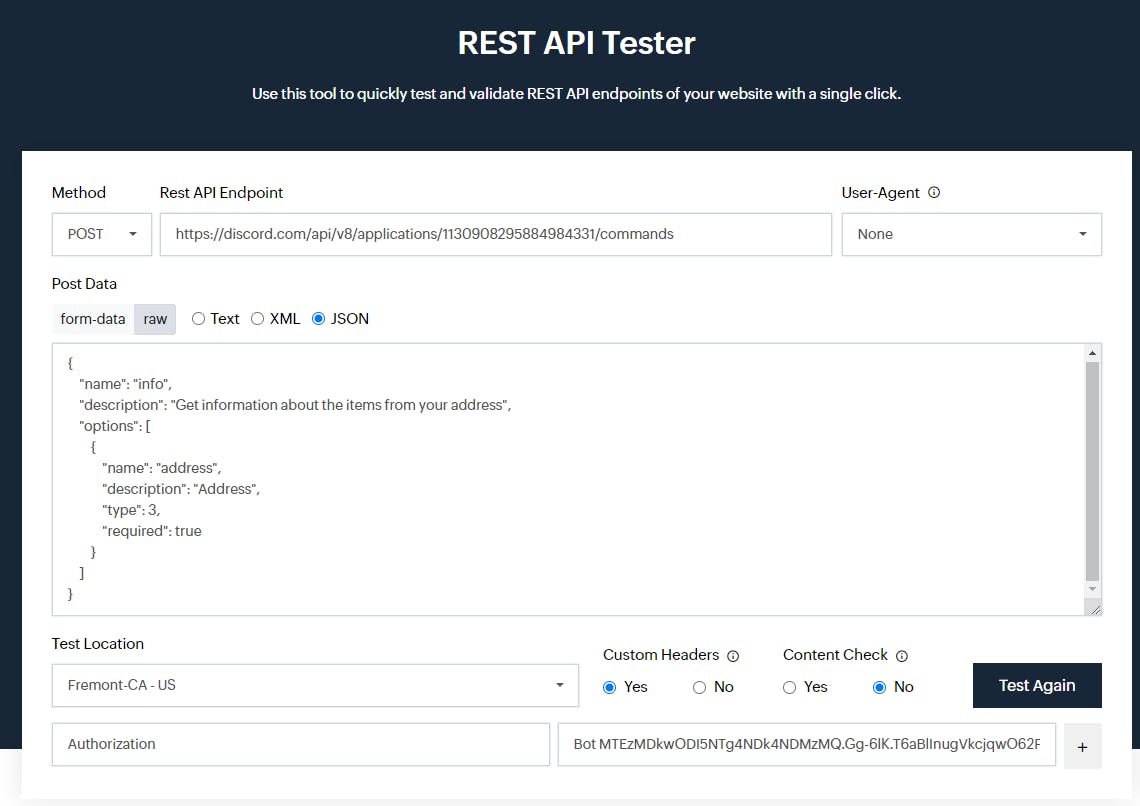
In "Method", you need to change the option to "POST"
In "Rest API Endpoint", you need to copy this URL and change the "Application ID" for the parameter returned in the following steps above:
- [discord.com/api/v8/applications/[APPLICATIO.. ID]/commands
In "Post Data" you need to check the "JSON" parameter.
Verify if the "raw" option is selected.
Copy this code and paste it as in the image above.
 {
     "name": "info",
     "description": "Get information about the items from your address",
     "options": [
         {
             "name": "address",
             "description": "Address",
             "type": 3,
             "required": true
         }
     ]
 }
In "Custom Headers" you need to check the "Yes" parameter.
You will see two fields "Name" and "Value".
In Name, write "Authorization".
In Value, Bot <Token>.
- You need to change it with the parameter returned in the steps mentioned above.
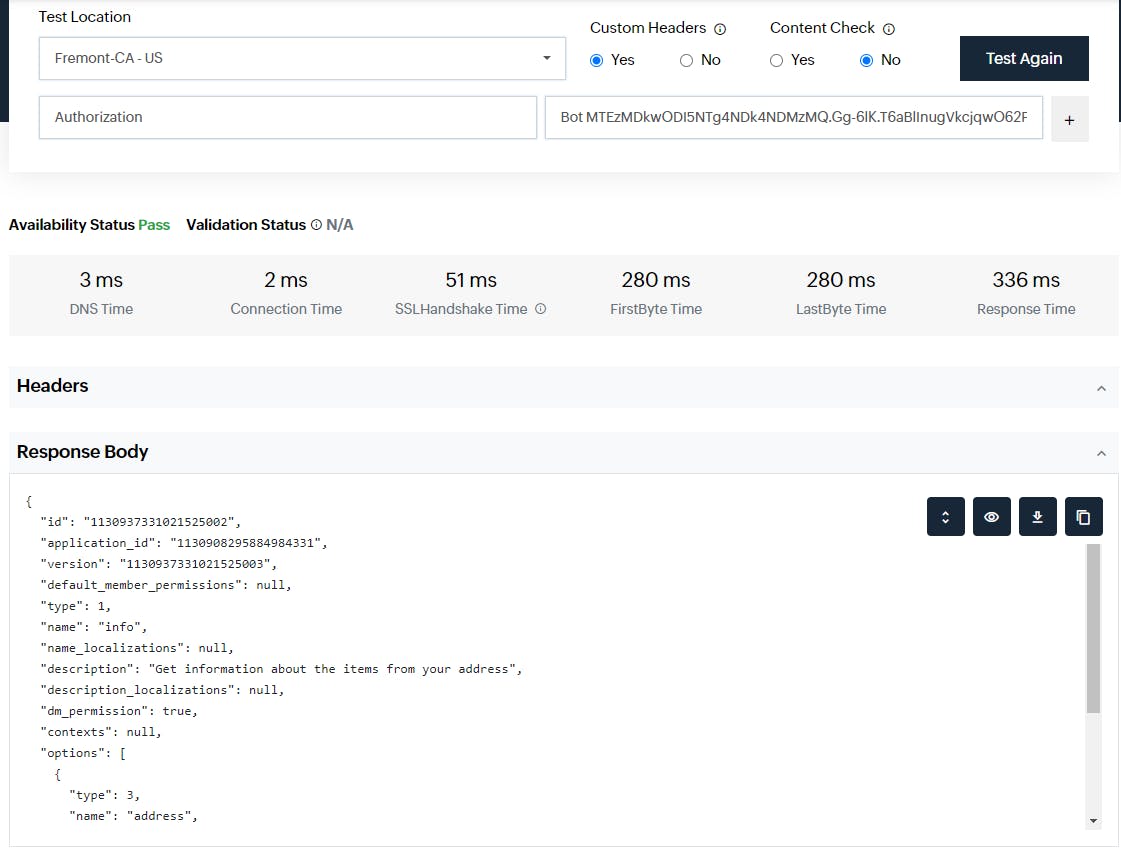
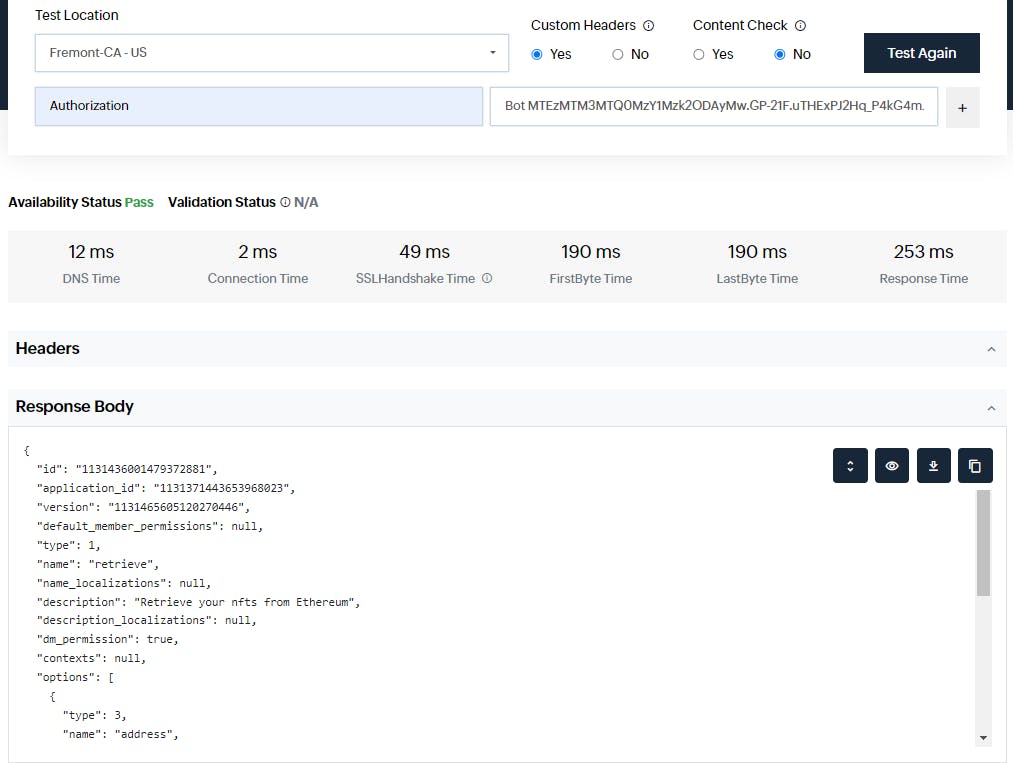
Click on the "Test again" button.
To view the response to this petition, you can scroll down.
Creating the command "/retrieve":

In "Method", you need to change the option to "POST"
In "Rest API Endpoint", you need to copy this URL and change the "Application ID" for the parameter returned in the following steps above:
- [discord.com/api/v8/applications/[APPLICATIO.. ID]/commands
In "Post Data" you need to check the "JSON" parameter.
Verify if the "raw" option is selected.
Copy this code and paste it as in the image above.
 {
     "name": "retrieve",
     "description": "Retrieve your nfts from Ethereum",
     "options": [
         {
             "name": "address",
             "description": "Address",
             "type": 3,
             "required": true
         },
                 {
             "name": "page",
             "description": "Set the number of page",
             "type": 3,
             "required": true
         }
     ]
 }
In "Custom Headers" you need to check the "Yes" parameter.
You will see two fields "Name" and "Value".
In Name, write "Authorization".
In Value, Bot <Token>.
- You need to change it with the parameter returned in the steps mentioned above.
Click on the "Test again" button.
To view the response to this petition, you can scroll down.
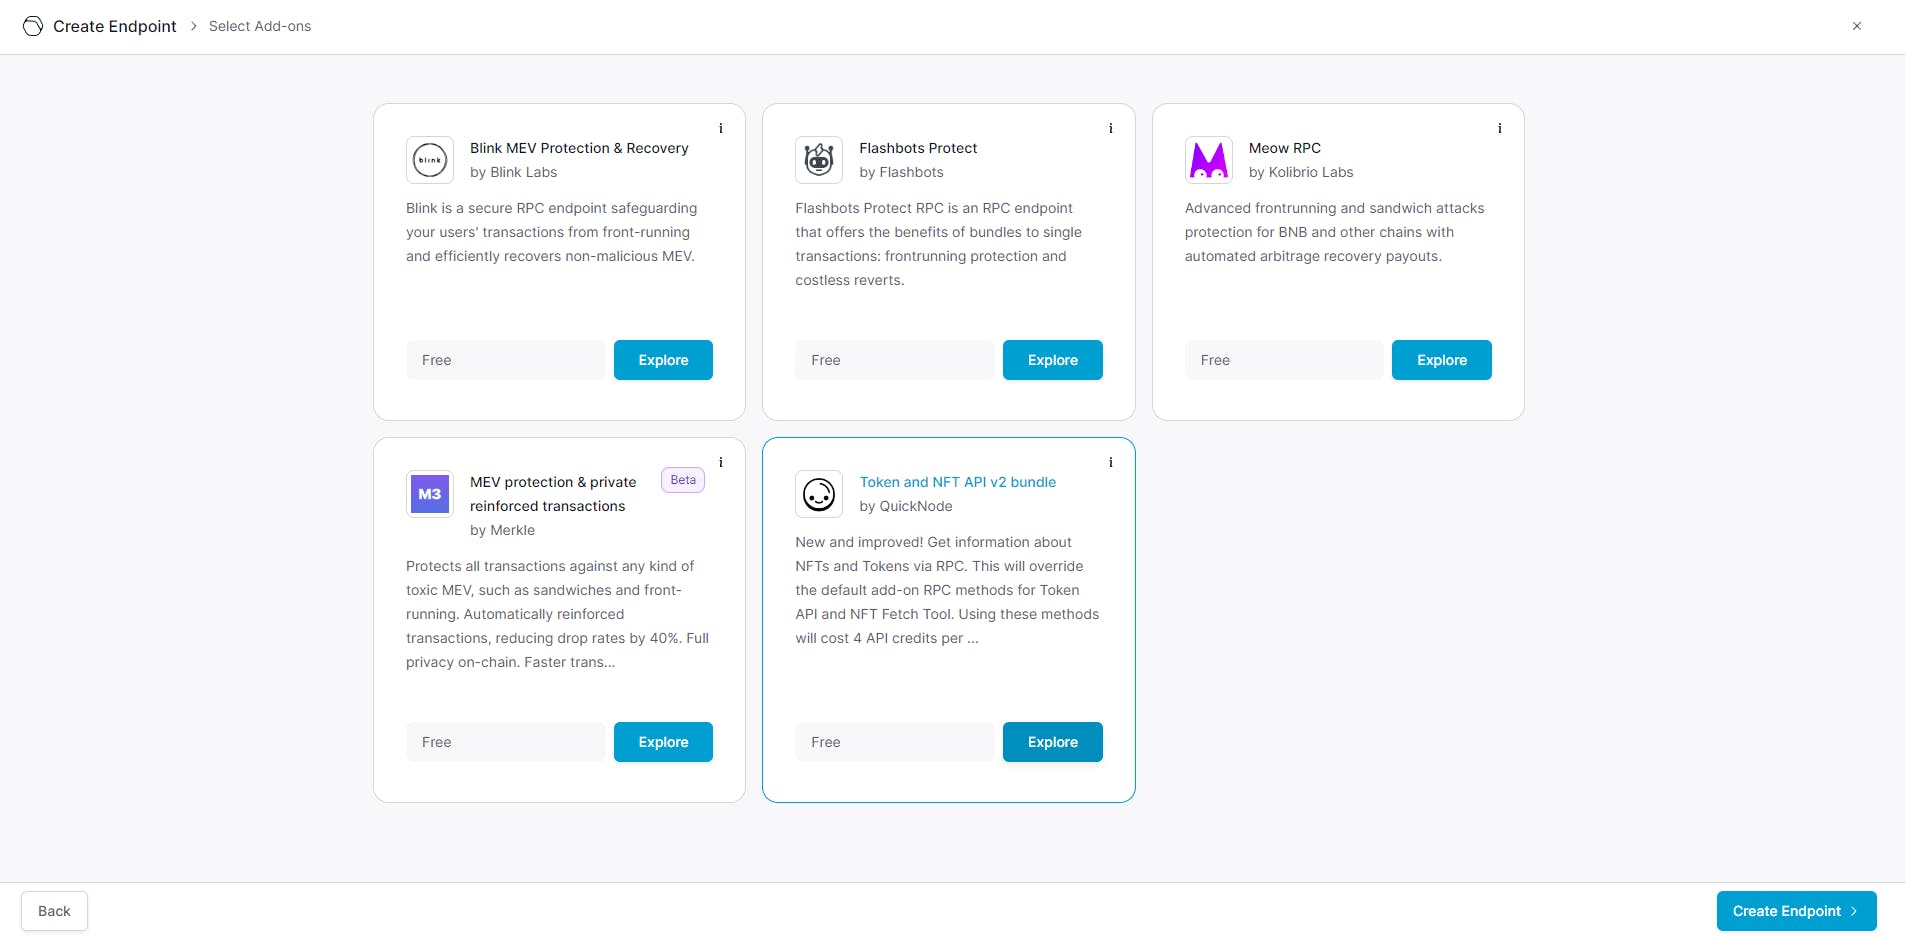
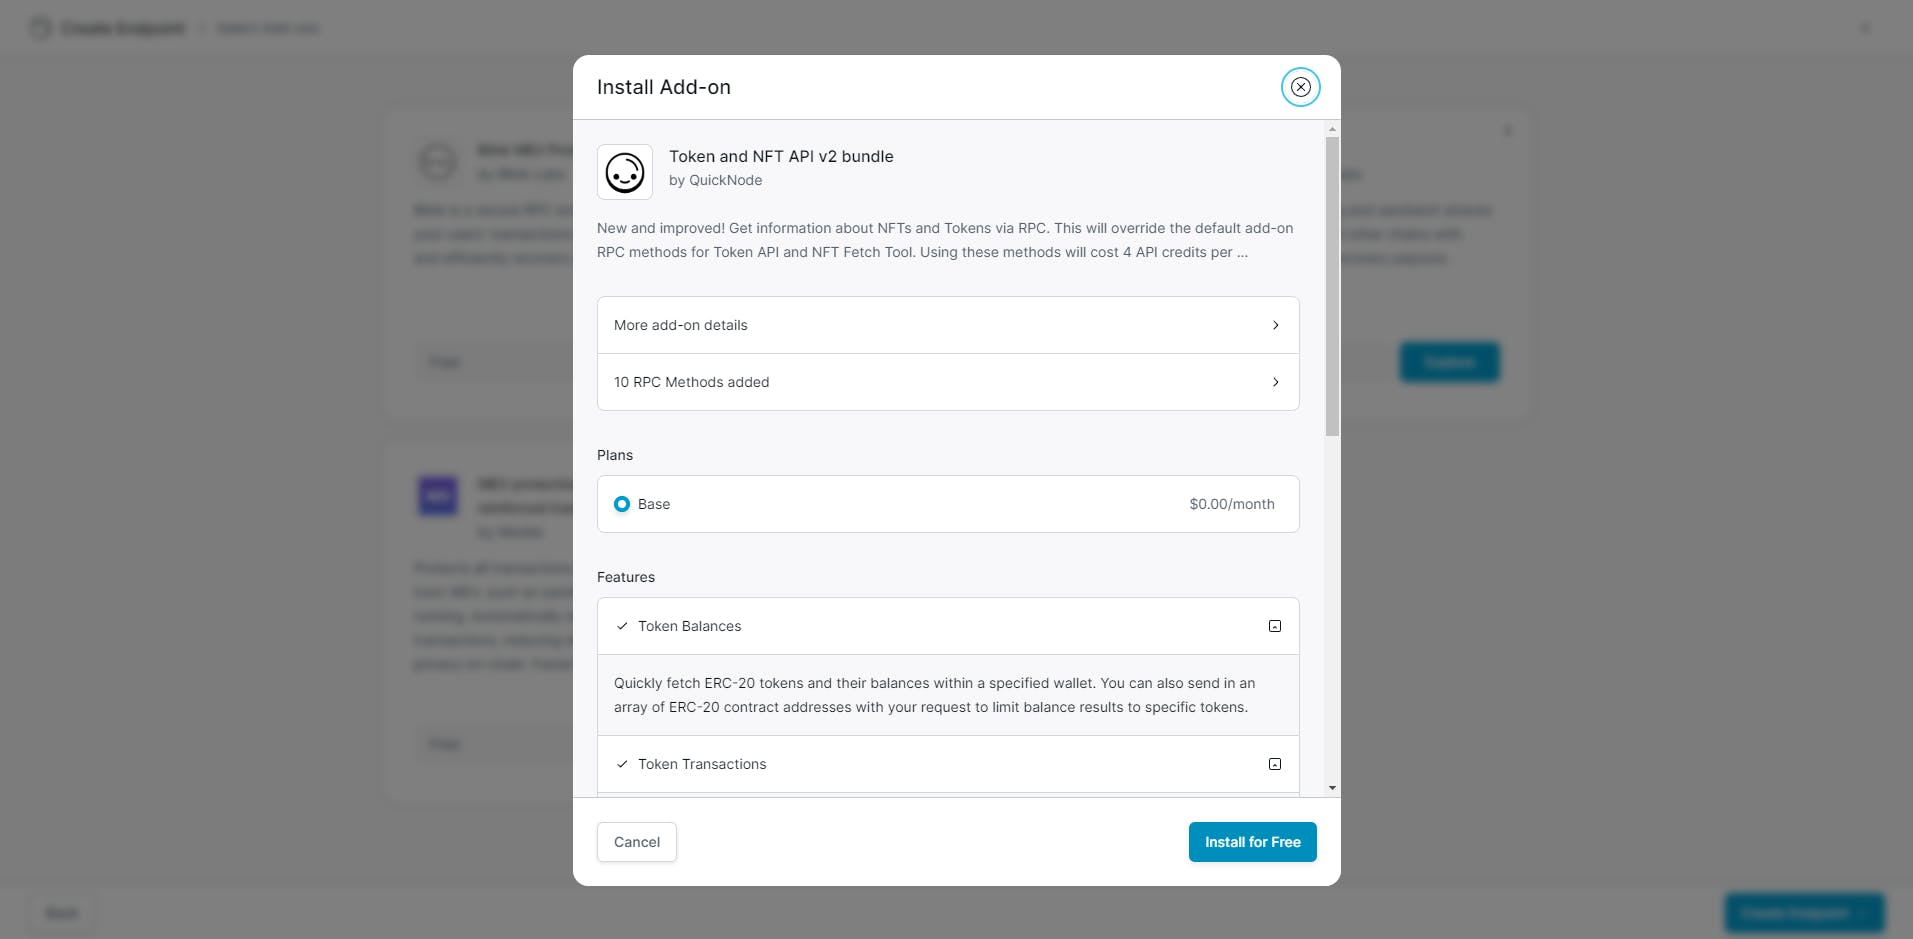
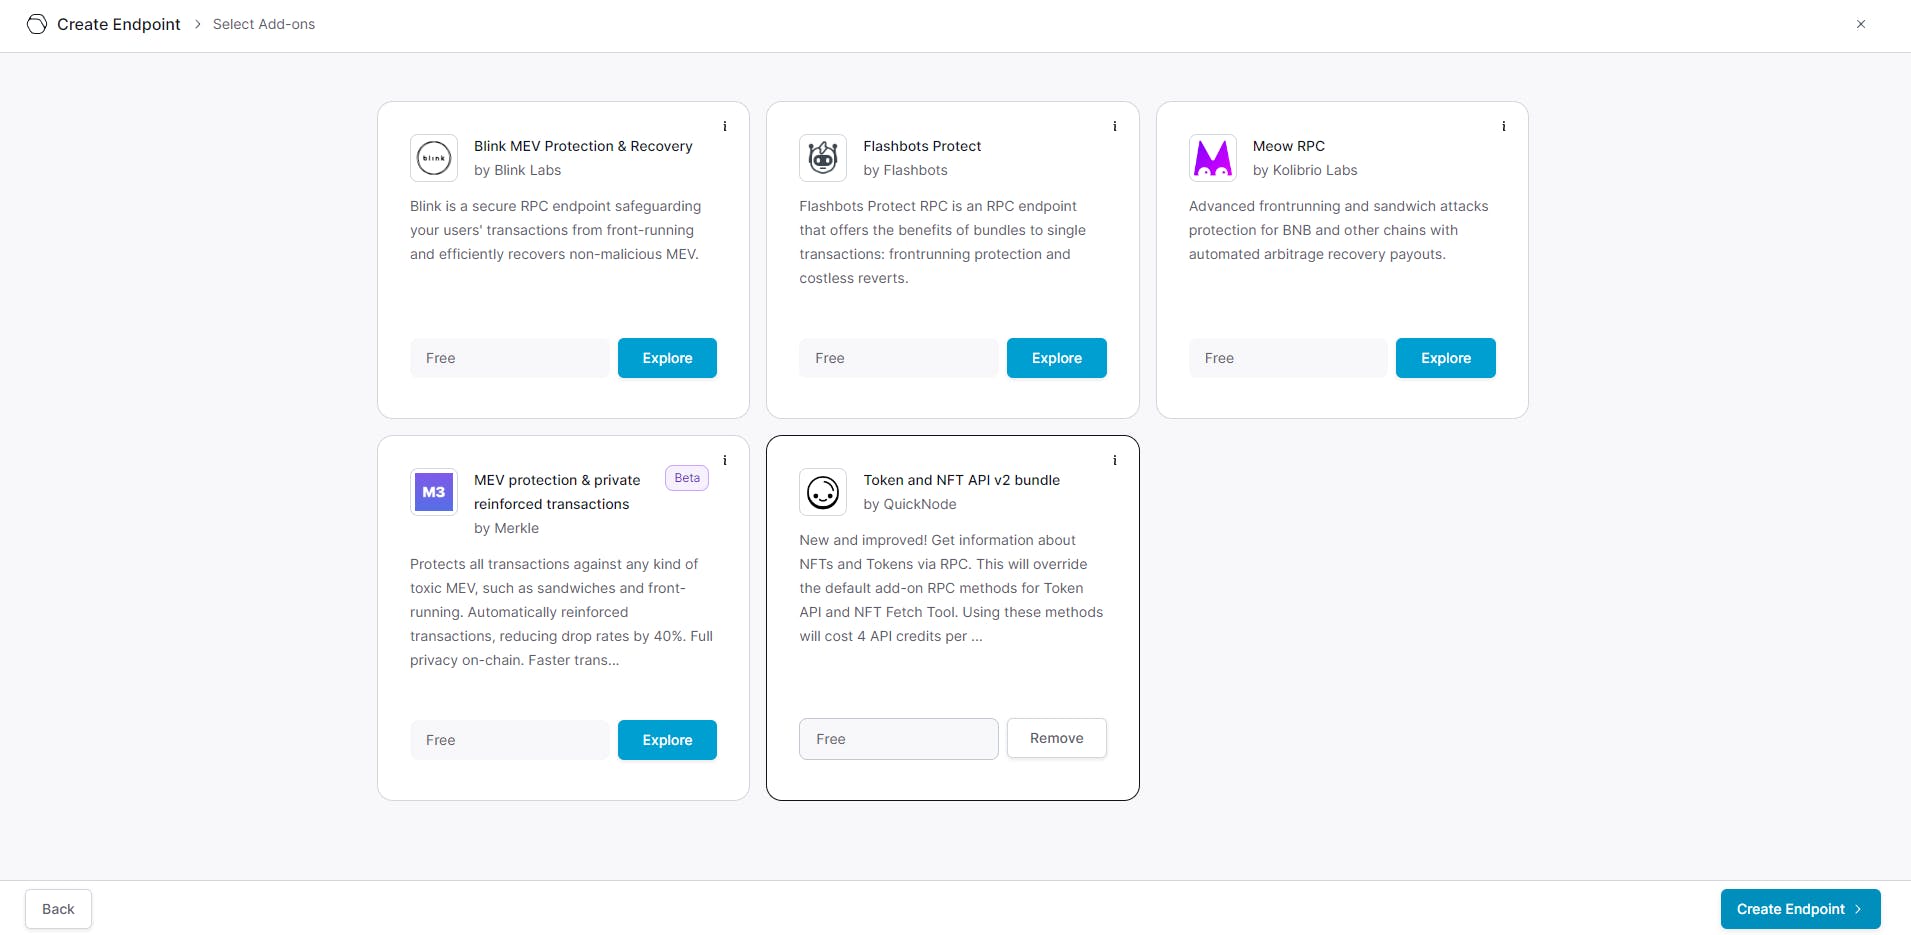
Obtaining information from QuickNode
Obtaining QUICKNODE_API_KEY value:
To detect if the user address contains an ENS domain, we need to copy the API KEY from the Graph API section.

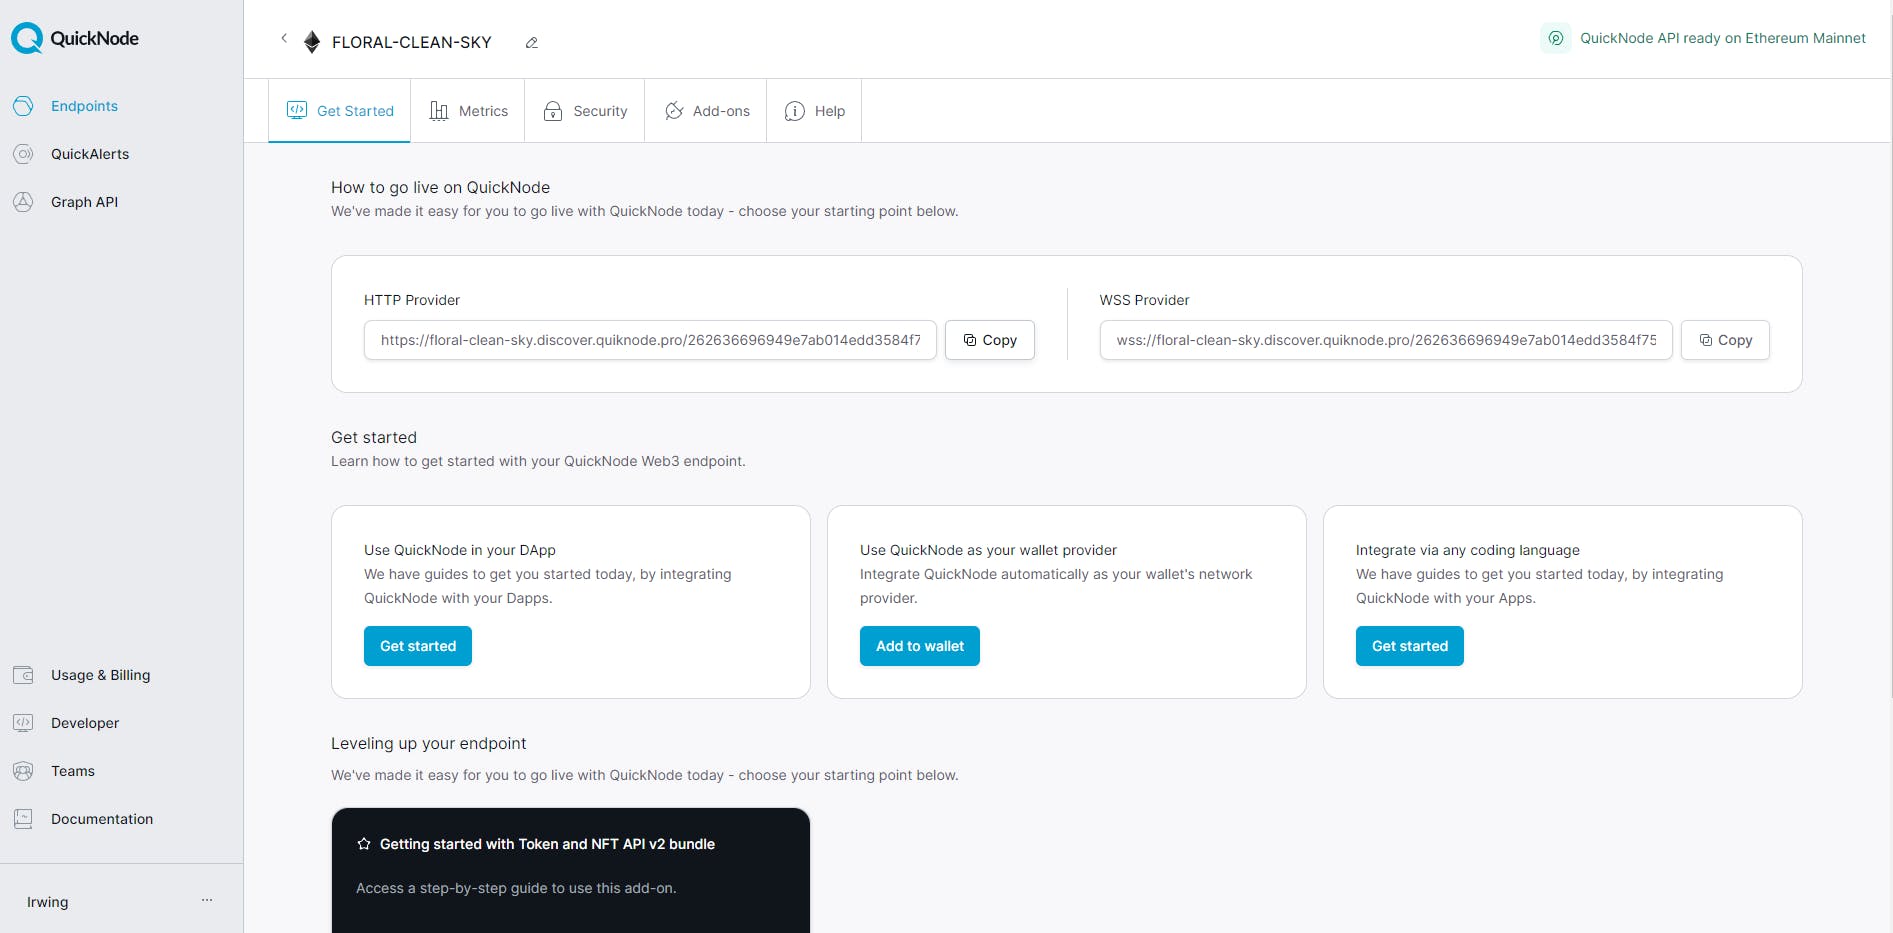
Obtaining QUICKNODE_RPC_URL value:
Creating a service to retrieve information for our Discord bot
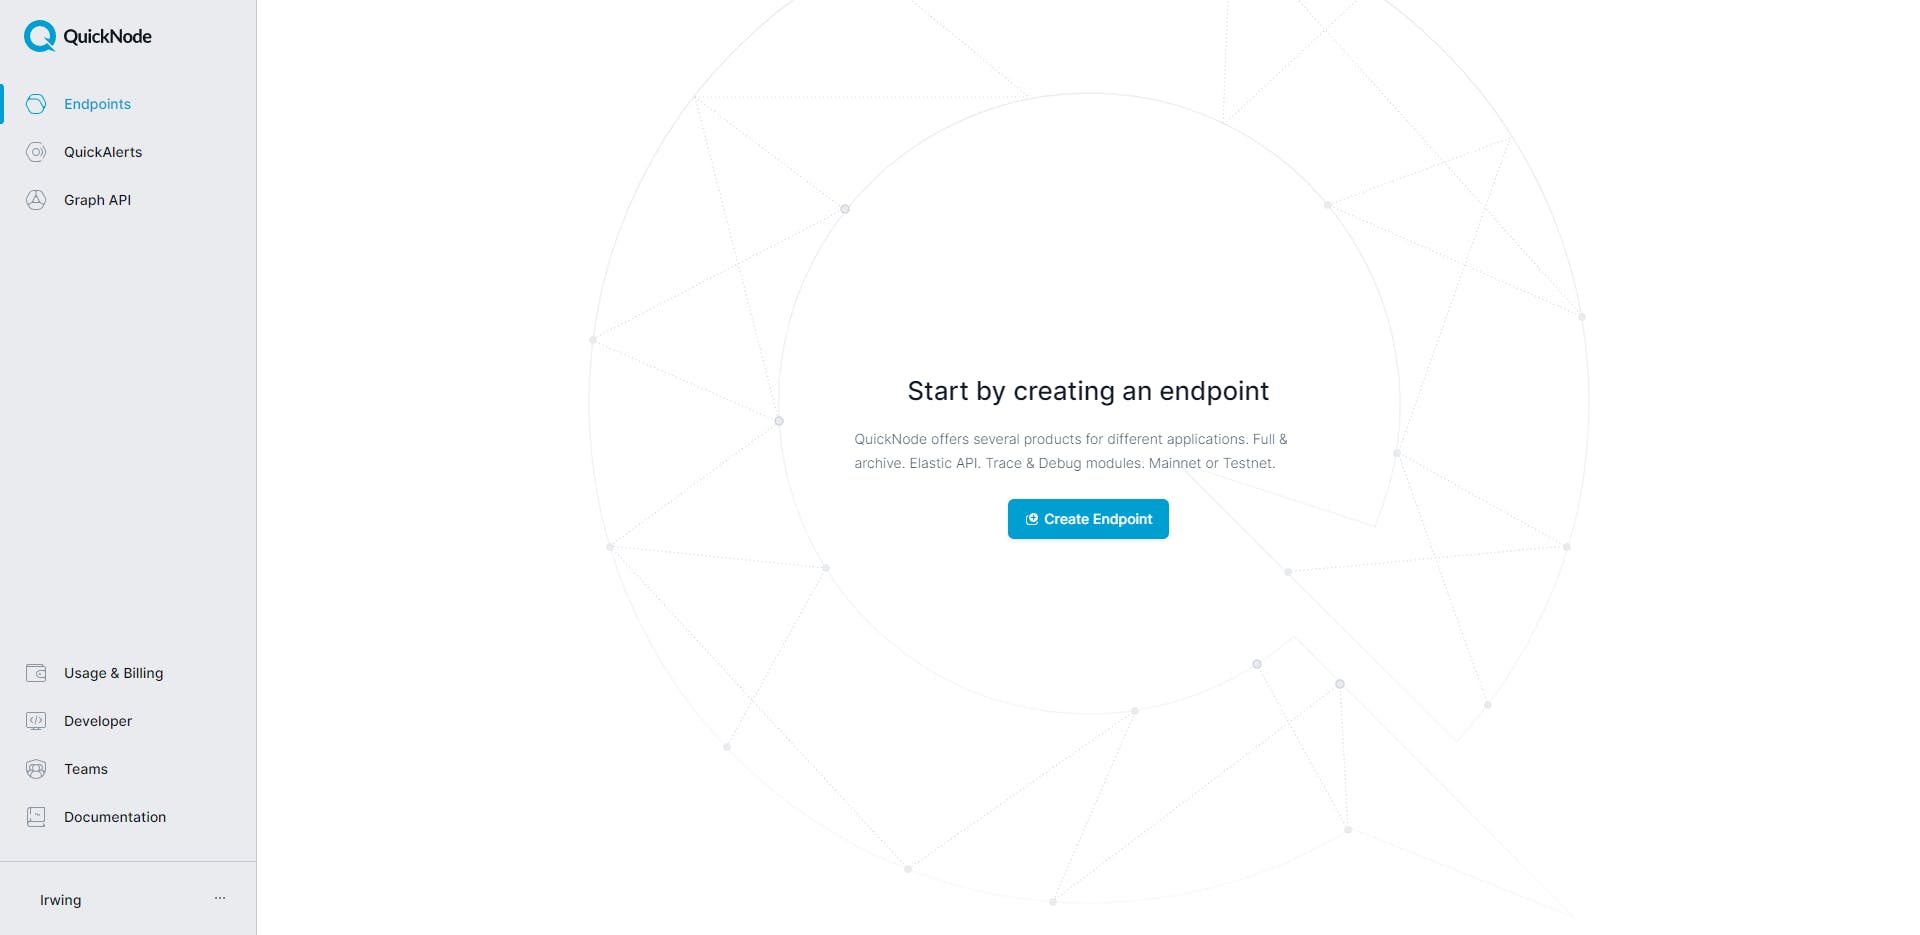
You need to go to Render:
Afterward, you need to click on "New". In the subsequent steps, you will need to click on the 'Web Service' option.
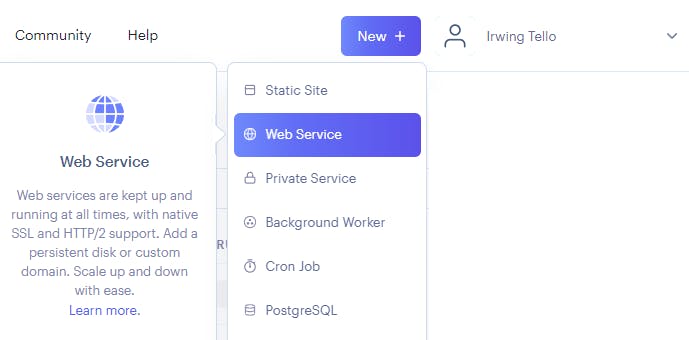
You will see this dashboard:
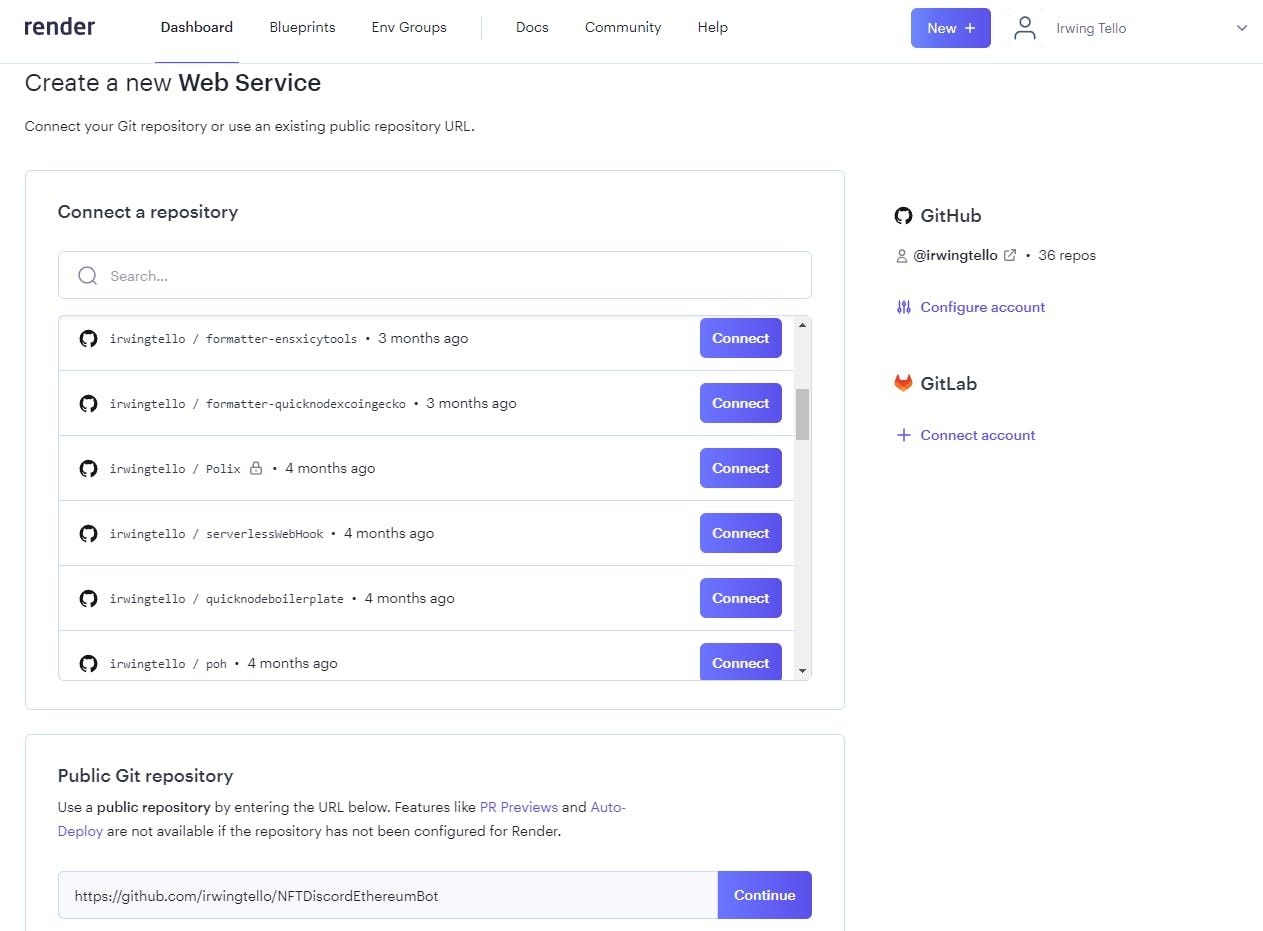
In the Public Git Repository section, you can find a white box where you need to paste this code and click on the "Continue" button:
https://github.com/irwingtello/NFTDiscordEthereumBot
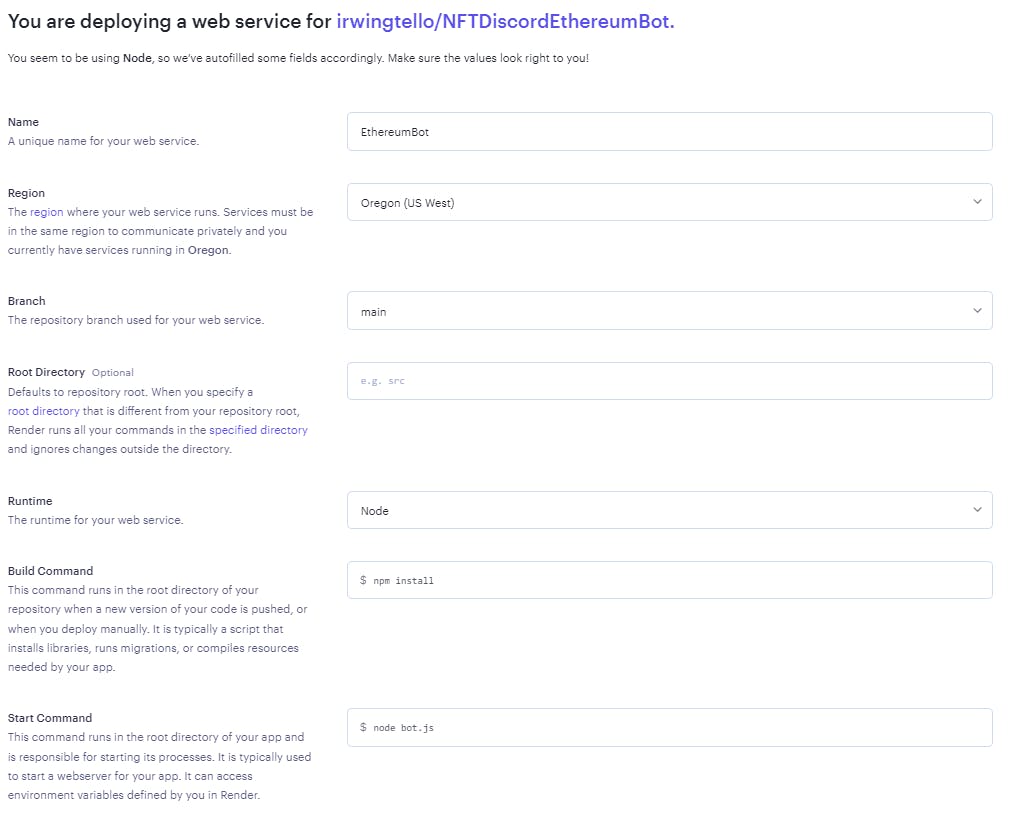
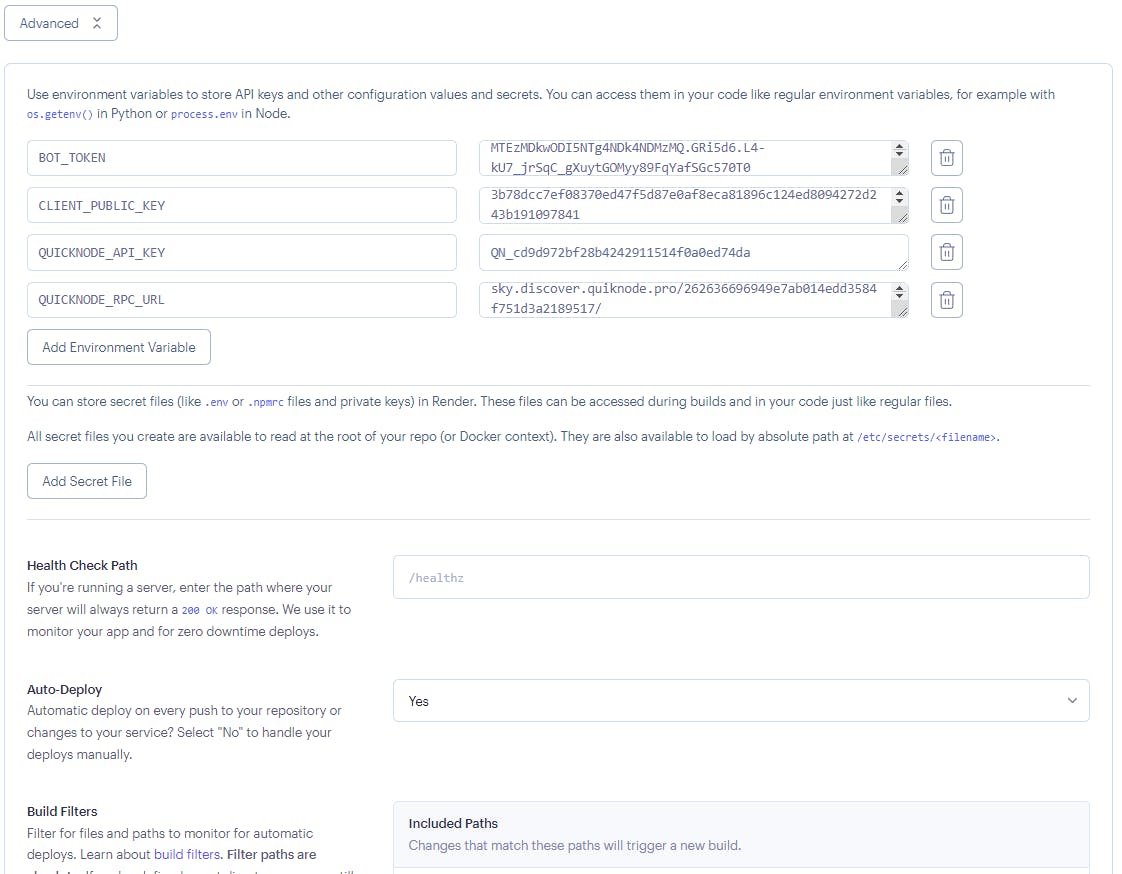
You need to change these values:
In Name, you need to write a name for the service.
In Build Command, you need to write the next command "npm install".
After defining the above values, we need to scroll down and click on the "Advanced" button.
You need to add the following environment variables:
QUICKNODE_API_KEY.
QUICKNODE_RPC_URL.
CLIENT_PUBLIC_KEY.
BOT_TOKEN.
Afterward, click on the "Create Web Service" button and you will see the next screen.
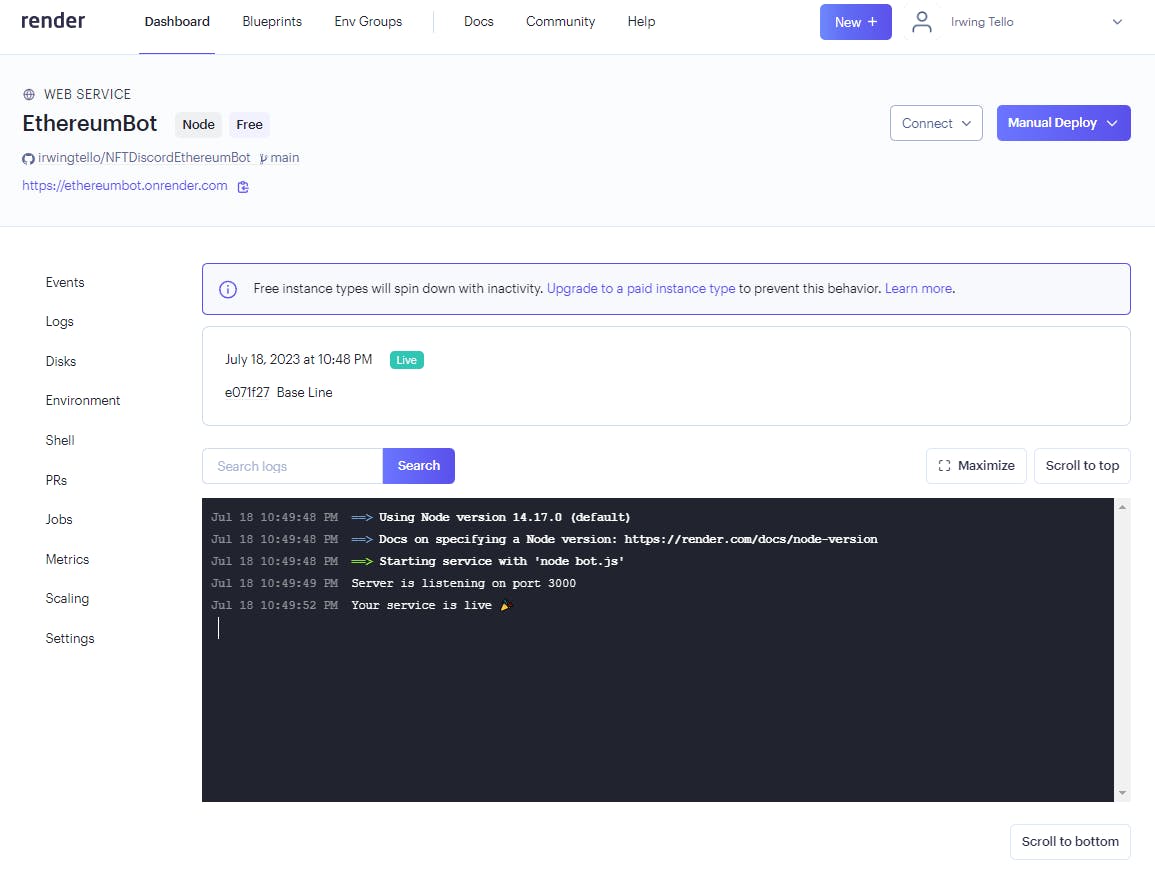
Congratulations!. You now have your first bot service online. We need to copy the URL for this bot and paste it into our bot configuration on Discord.
In my case, this is my URL:
https://ethereumbot.onrender.com
Setting up our service on Discord
I will save you time!, you need to go to the Discord Developer Portal:
https://discord.com/developers/applications/
Click on the name of your Bot.
After that, you need to go to the "General Information" section and change the "Interactions Endpoint URL".
You need to paste the URL generated by render.com and add the path "/interactions"
Example:
https://ethereumbot.onrender.com/interactions
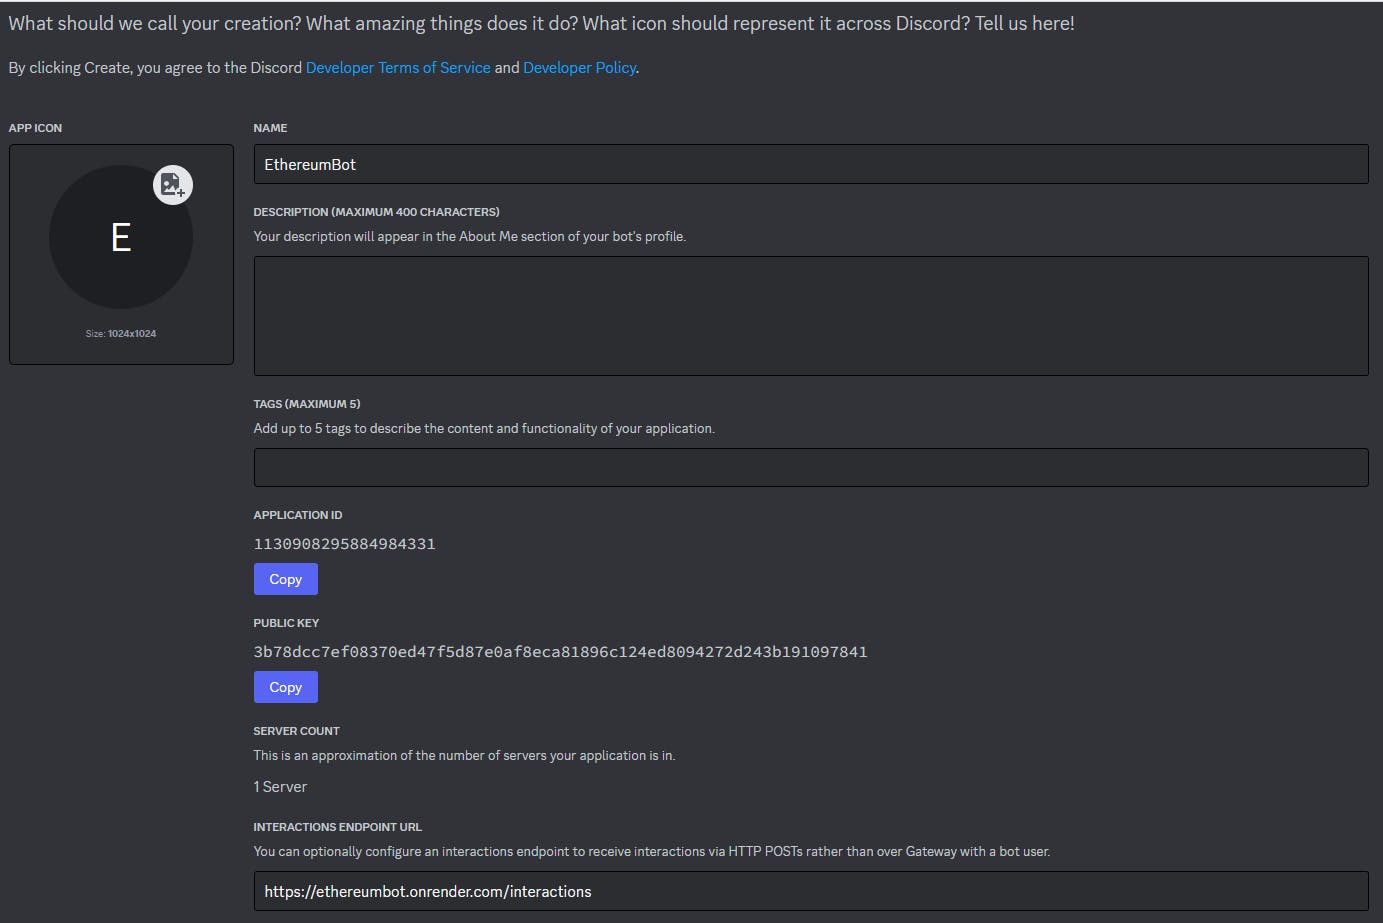
In the consequent step, you need to click the button "Save changes".
After that, you can use your bot in your community!
Exploring your first NFT Discord Bot on your community
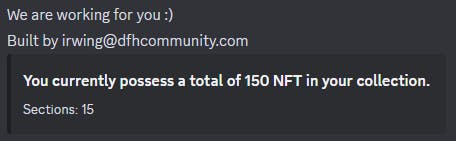
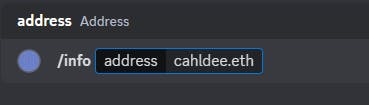
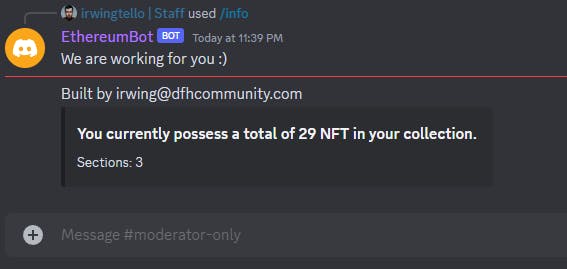
Go to any channel on your discord and write this first command: /info, to know how many nfts you have.
After that, you will see this result:
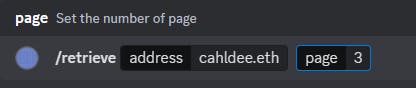
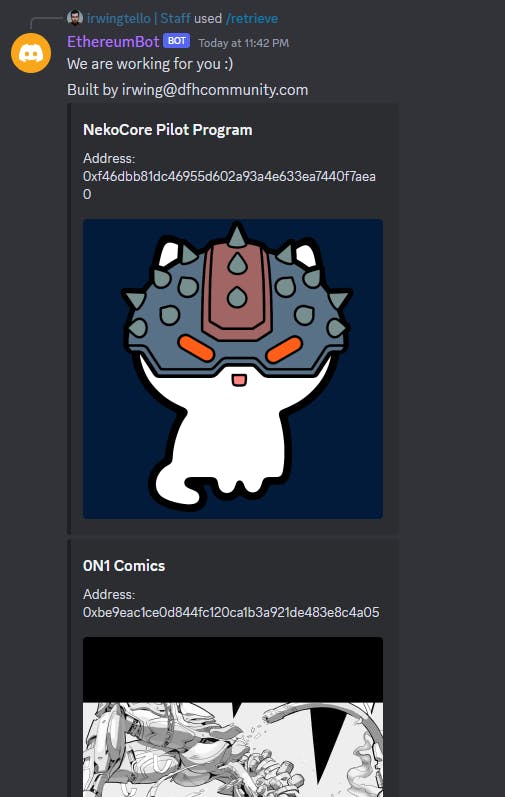
Now you have the total pages where you can find your nft data, then you can use this command /retrieve:
As a result, you will be able to see your NFTs:
Conclusion
Congratulations on making it to the end of this tutorial! .
You have now learned how to integrate your ENS and Ethereum addresses with Discord to showcase your NFTs.
I hope you found this tutorial informative and easy to follow.
We ❤️ Feedback!
If you have any feedback or questions on this guide, let us know. Or, feel free to reach out to us via Twitter or our Discord community server.
We’d love to hear from you!
Author: Irwing Tello
Discord: discord.com/invite/ADjtsHVreT
Twitter: twitter.com/irwingtello
LinkedIn: linkedin.com/in/irwingtello
Email: irwing@dfhcommunity.com
Website: dfhcommunity.com
Youtube: youtube.com/@irwingtellomx
You can support my work here:
buymeacoffee.com/irwingtello
BTC: 34kXK9CpTJP1PyHKw2kUD2bt6rtGcG5CHY
EVM Address: 0x8B98F8Ff69d2A720120eD6C71A9Bc5072b8Eb46D
Solana: Ey9oVFHW79giacRZaKxigYjeihMsY7ox8jxc7Hp1sJmS