

Overview
This technical document explains how to view your NFTs without having to write any single line of code.
To begin, you need to sign up for a Bubble.io account. While there are other codeless platforms available, we recommend Bubble.io because we have tested this platform for this tutorial.
What We Will Do
- Set up an Ethereum, Solana Node with QuickNode
What You Will Need
- Create a bubble.io account (https://bubble.io/)
What is Bubble.io?
Bubble.io is a web development platform that allows individuals and businesses to build and launch web applications without writing code. Bubble.io uses a visual drag-and-drop editor to help users create complex web applications with ease.
With Bubble.io, users can create a wide variety of web applications, including social networks, marketplaces, e-commerce platforms, and more. The platform allows for the customization of designs, integrations with external APIs and services, and automated workflows.
Creation of our app in Bubble.io
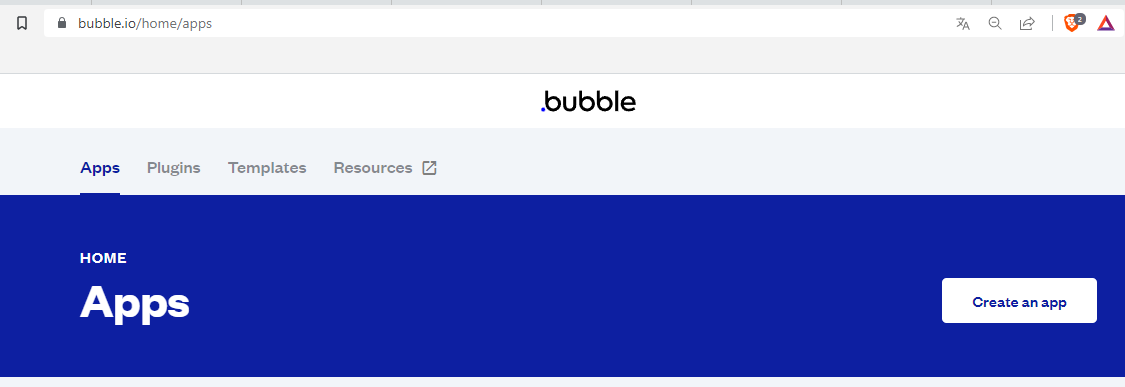
First, we need to click the "Create an app" button to start :)
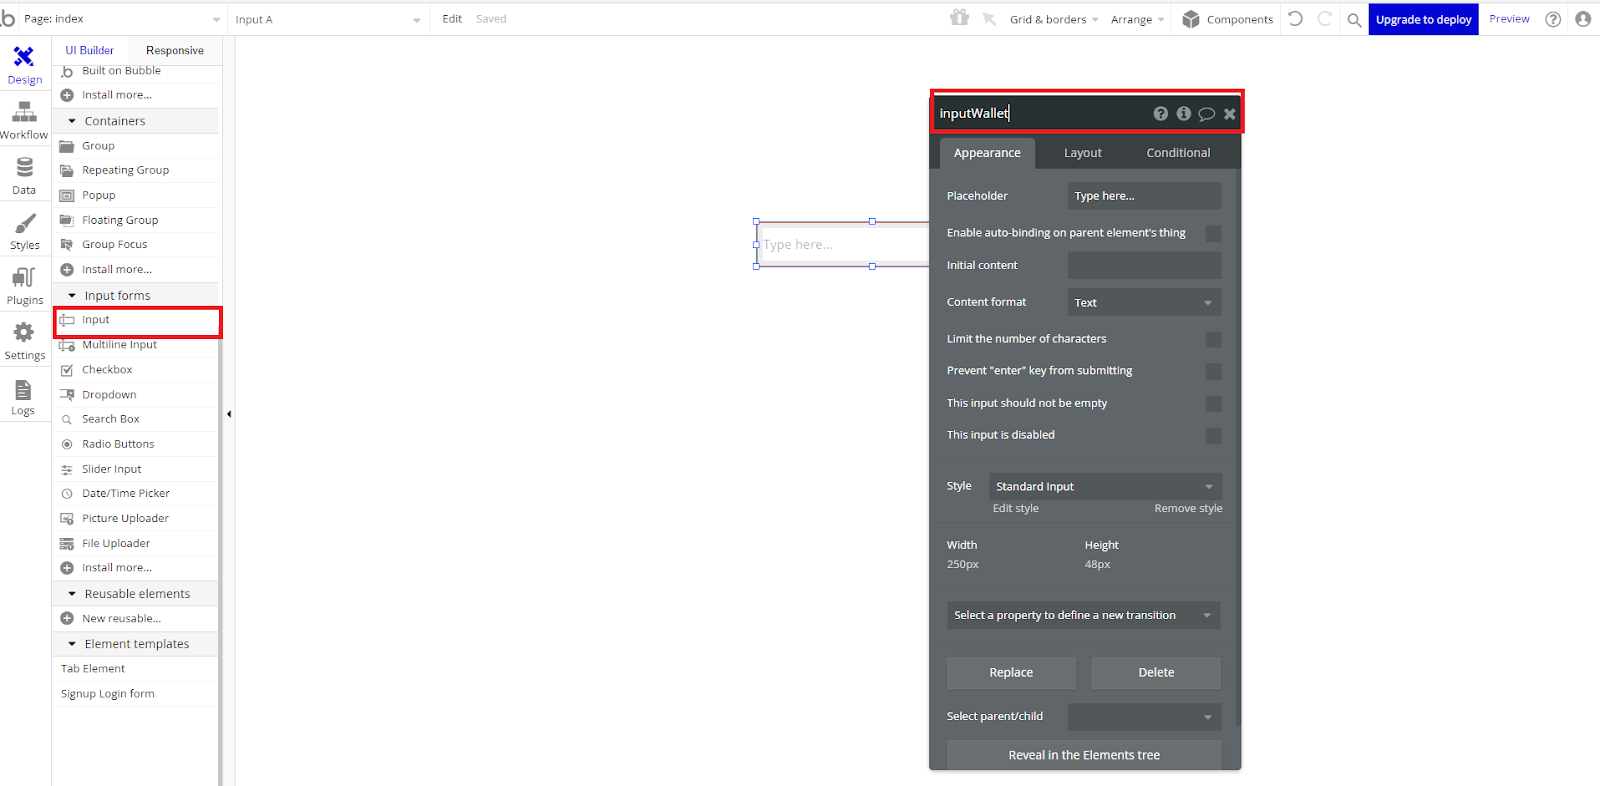
After that, you can see this interface, and you need to create these elements:
1.- Input - inputWallet
2.- Input - inputPage
3.- Repeating group
4.- Labels:
Total Pages
Total Items
Page Number
You can change the information easily by clicking on the top of the element to change the name.
It is important to set a name for the elements to have a good understanding of the workflow.

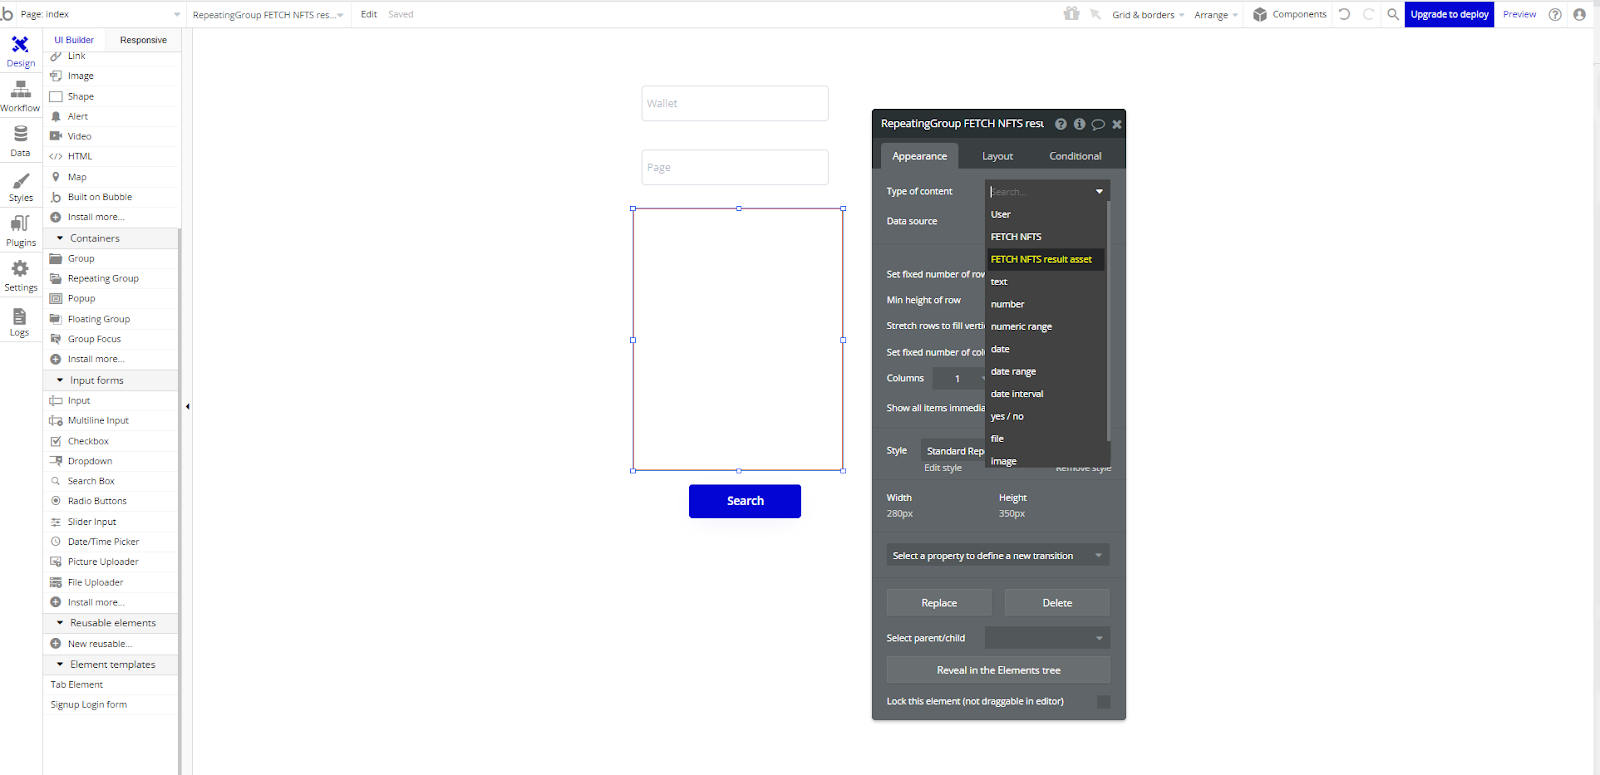
In the repeating group element, you need to uncheck the field “Set fixed number of rows”

After that we need to uncheck the field “Stretch rows to fill vertical space” and in the Layout tab, we need to change to the “Column” option
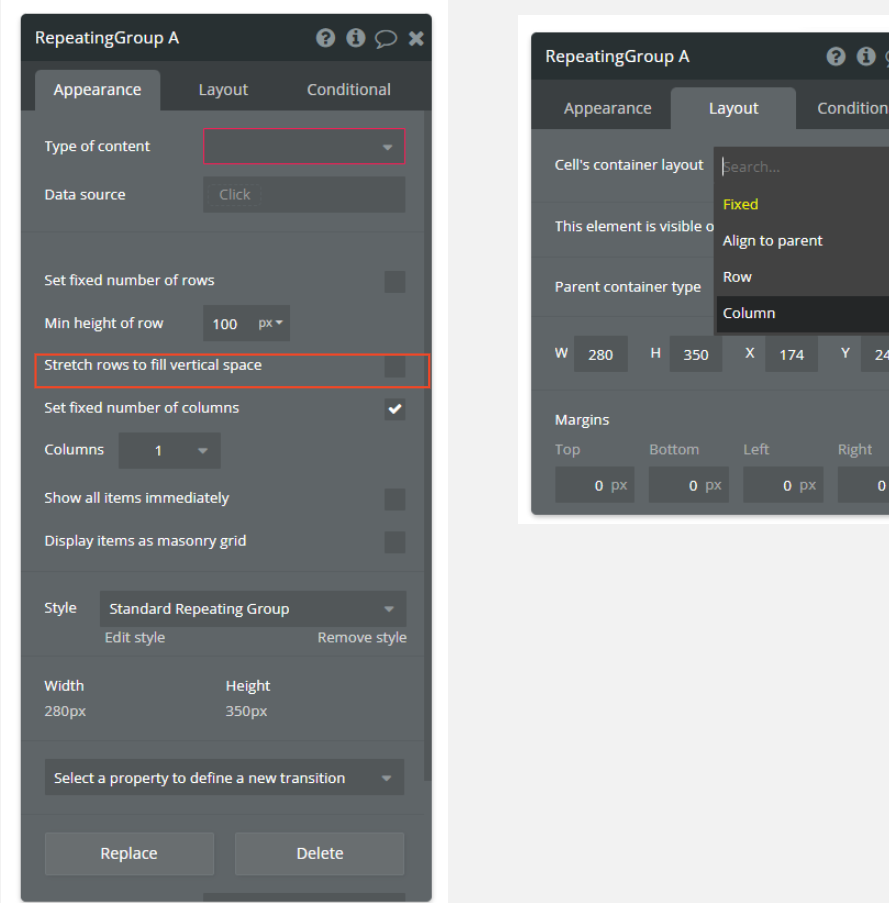
And you noticed the type of content it’s marked in red, that's because we need to retrieve the data from our NFTs. But don’t worry in the next steps we will retrieve the data 🙂.
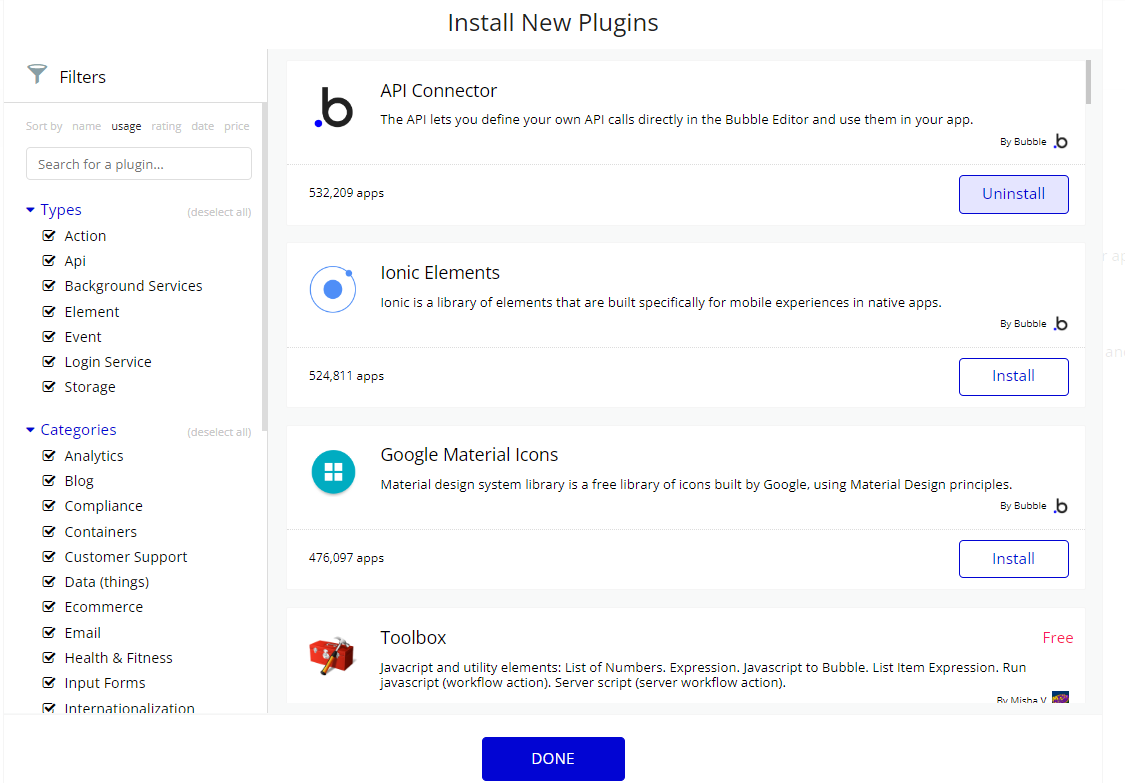
We need to go to this section “Plugins” after that we need to click the button “Add Plugins” , and you need to search for the API Connector plugin.

Once you have found the API Connector plugin, proceed by clicking on the "Install" button.
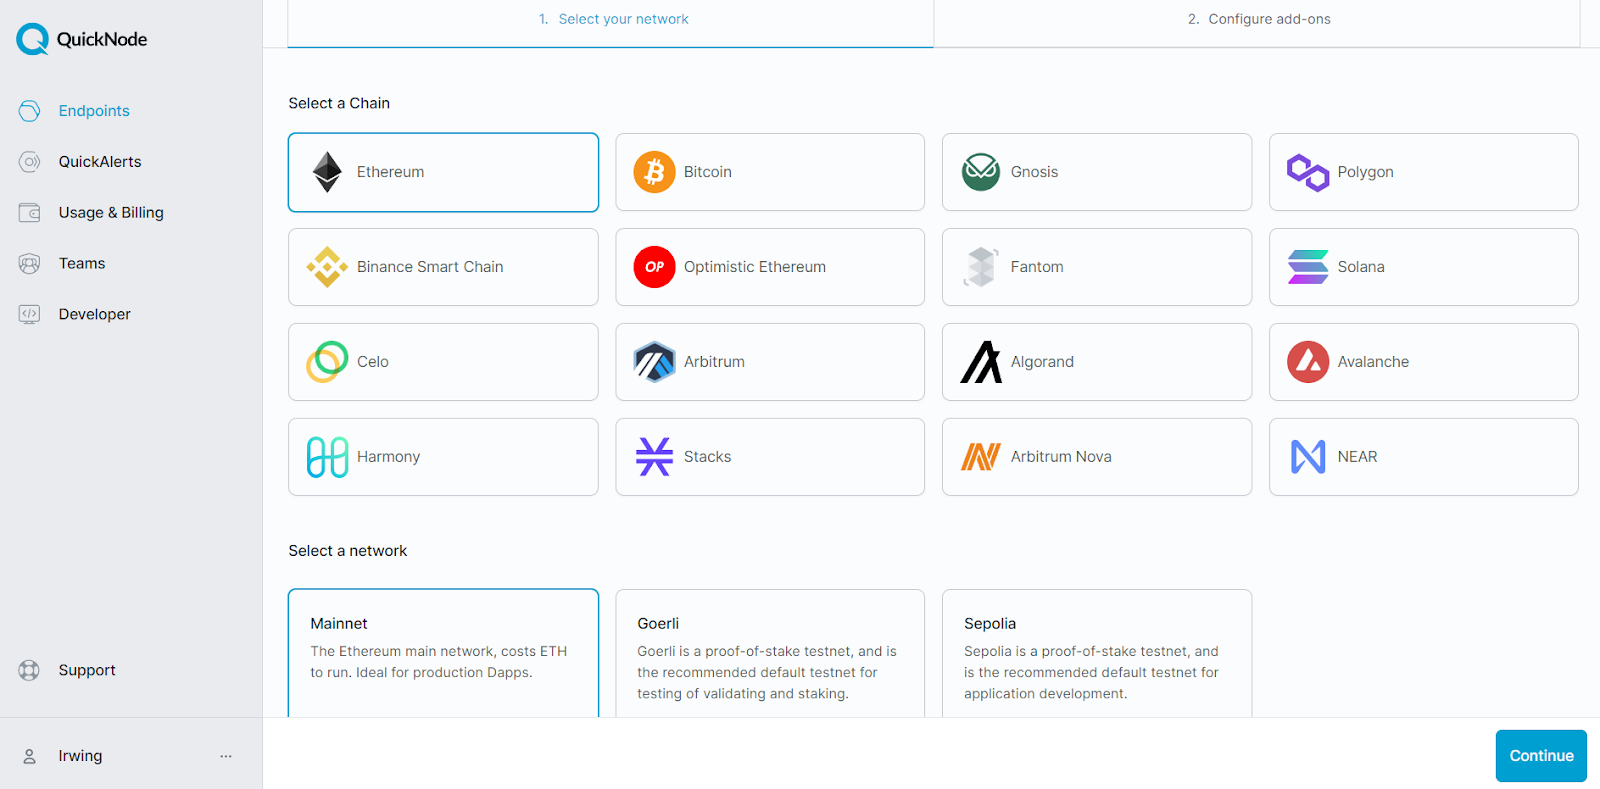
To configure our API connector, we must first obtain our desired blockchain's QuickNode RPC.

After obtaining our RPC, we need to set up our API in the API Connector plugin.

Next, you will need to construct the request to retrieve our NFTs, based on the blockchain you desire to use.
For Ethereum, please refer to this link:
https://www.quicknode.com/docs/ethereum/qn_fetchNFTs
For Solana, please refer to this link:
https://www.quicknode.com/docs/solana/qn_fetchNFTs
It should be noted that in this article, we are utilizing the Ethereum blockchain. However, it is possible to use Solana instead.
To save your time, i will provide you the code 🙂
{

    "id":67,

    "jsonrpc":"2.0",

    "method":"qn_fetchNFTs",

    "params":{

      "wallet": "<inputWallet>",

      "omitFields": [

        "provenance",

        "traits"

      ],

      "page": <inputPage>,

      "perPage": 10

    }

  }
You notice you saw the inputPage and inputWallet variables between the angle brackets ,and that's because we retrieve the data from the input from the UI.
To complete the task, first deselect the private field. Next, input the API name as "NFT API" and the name of the request as "FETCH NFTS". Note that this is a "POST" request.
Once the values for the "inputPage" and "inputWallet" keys have been entered, click on the "Initialize call" button to proceed.

In the following steps, a screen displaying the retrieved value for "qn_fetchNFTs" will be presented,after that you need to click the “Save” button.

Once the asset object has been obtained, navigate to the "Design" section. Then, modify the content type in the repeating group to retrieve the name of the request. The resulting display should resemble the following:
We determine the type of content by executing the command "Current cells [REQUEST NAME] assets [attribute]". This will allow us to retrieve the desired attribute.
In the next example we are adding an image inside the repeating group.
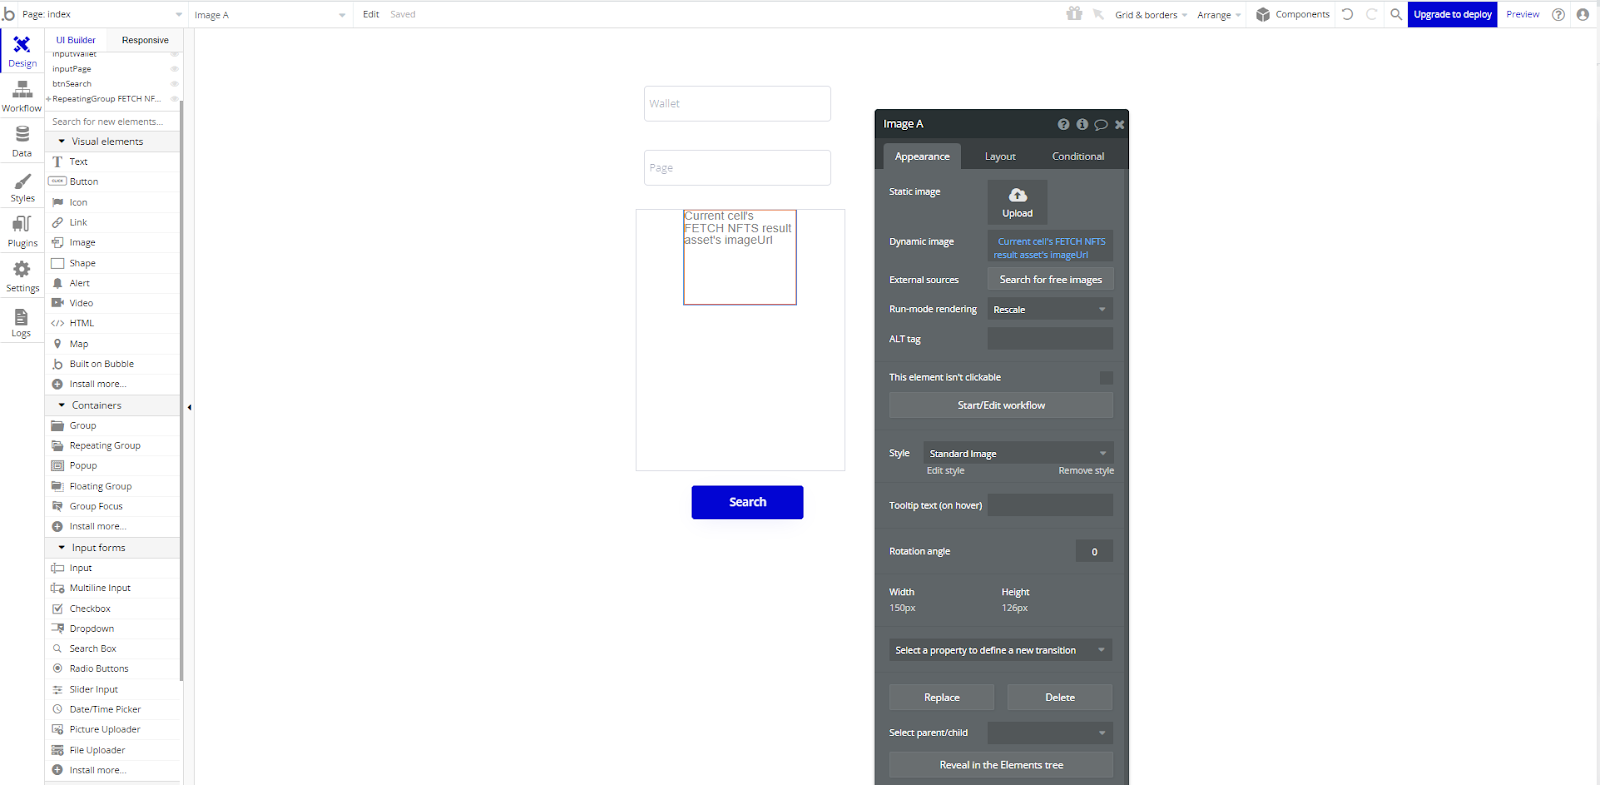
To add a text attribute, you need to drop a text element inside the repeating group like the image element.

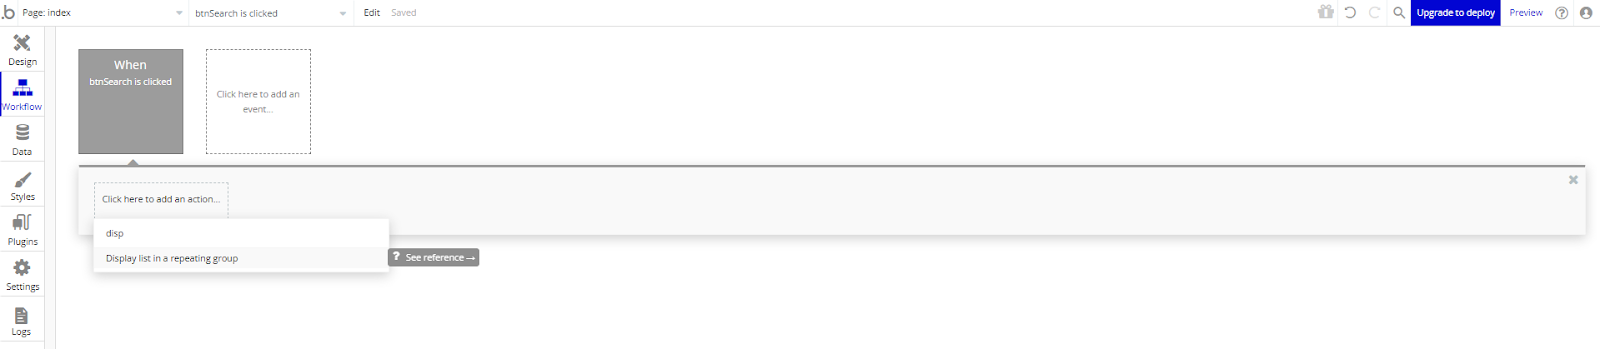
In order to display our data, we must initiate a workflow.

Furthermore we need to search for the “Display list in a repeating group”
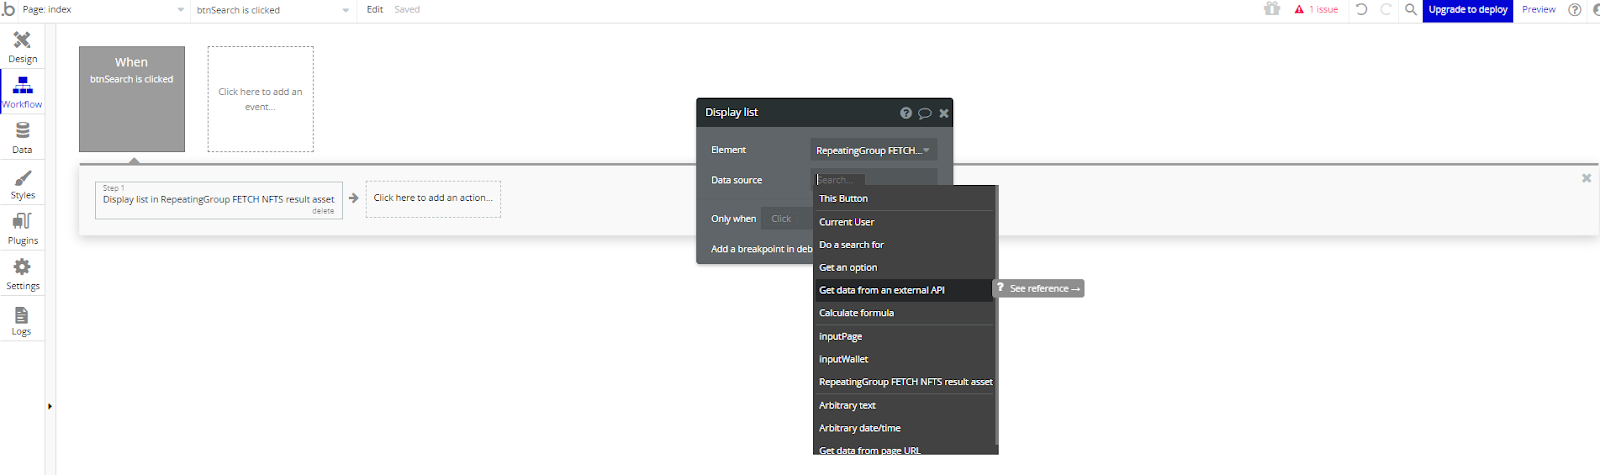
You can observe the "Display List" window, and you must search for the option "Get data from an external API".
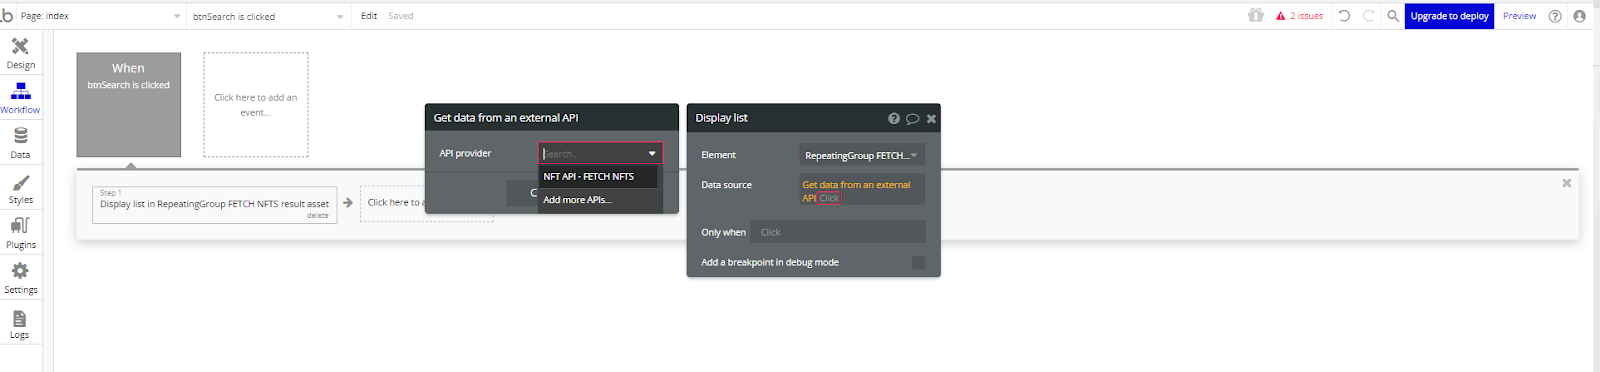
In consequent steps, you need to select your API and your petition.
After that , you may observe the required params about our API.
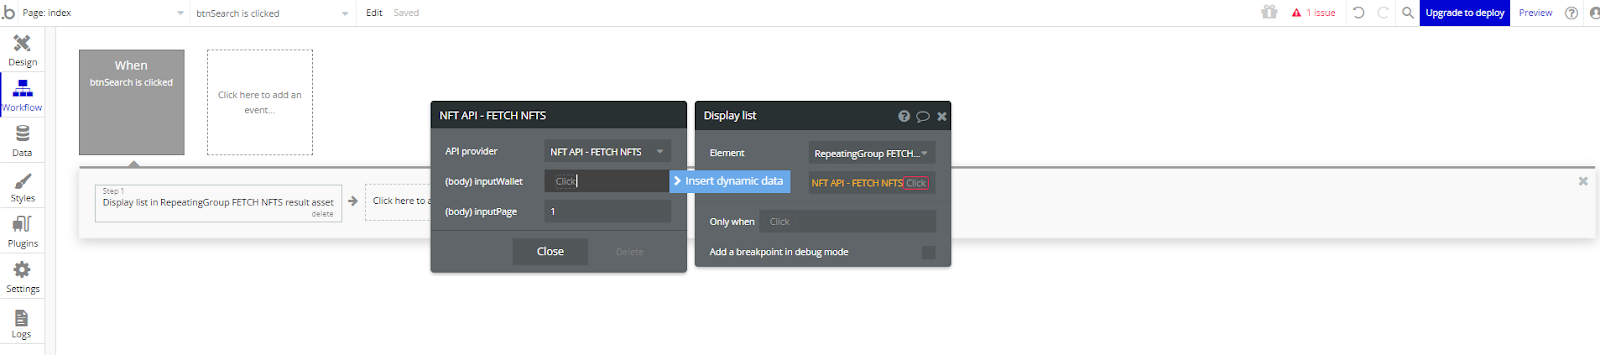
Afterwards we need to put the values from the elements:

Finally we need to retrieve the assets attribute from our petition.

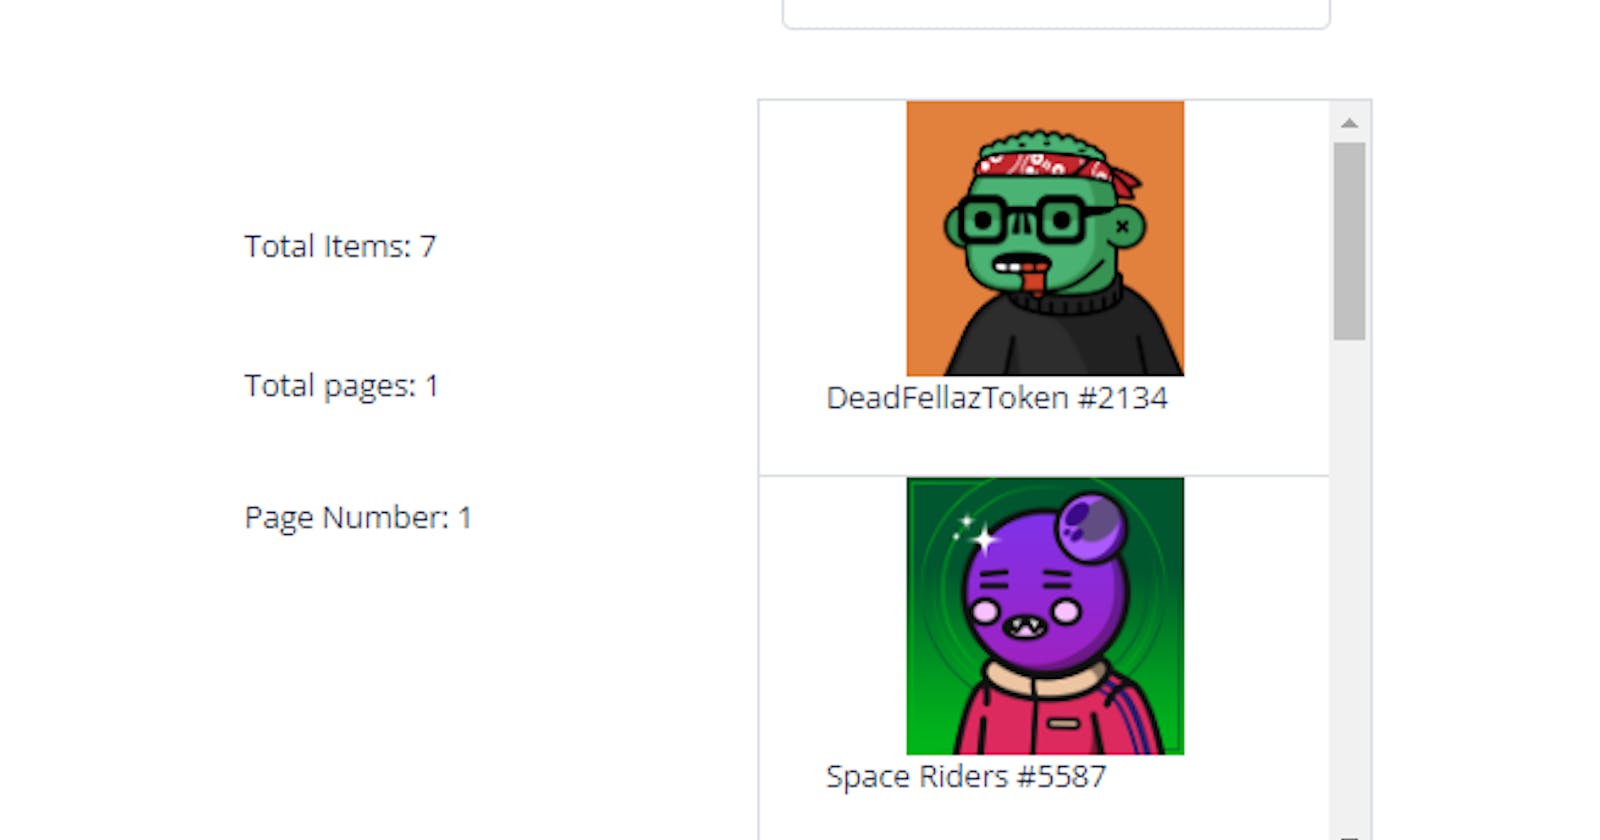
Once the assets of our petition have been defined, you can view how the site appears by clicking the "Preview" tab.

But we need to add some magic touches!
Let add these attributes:
1.- totalItems
2.- totalPages
3.- pageNumber
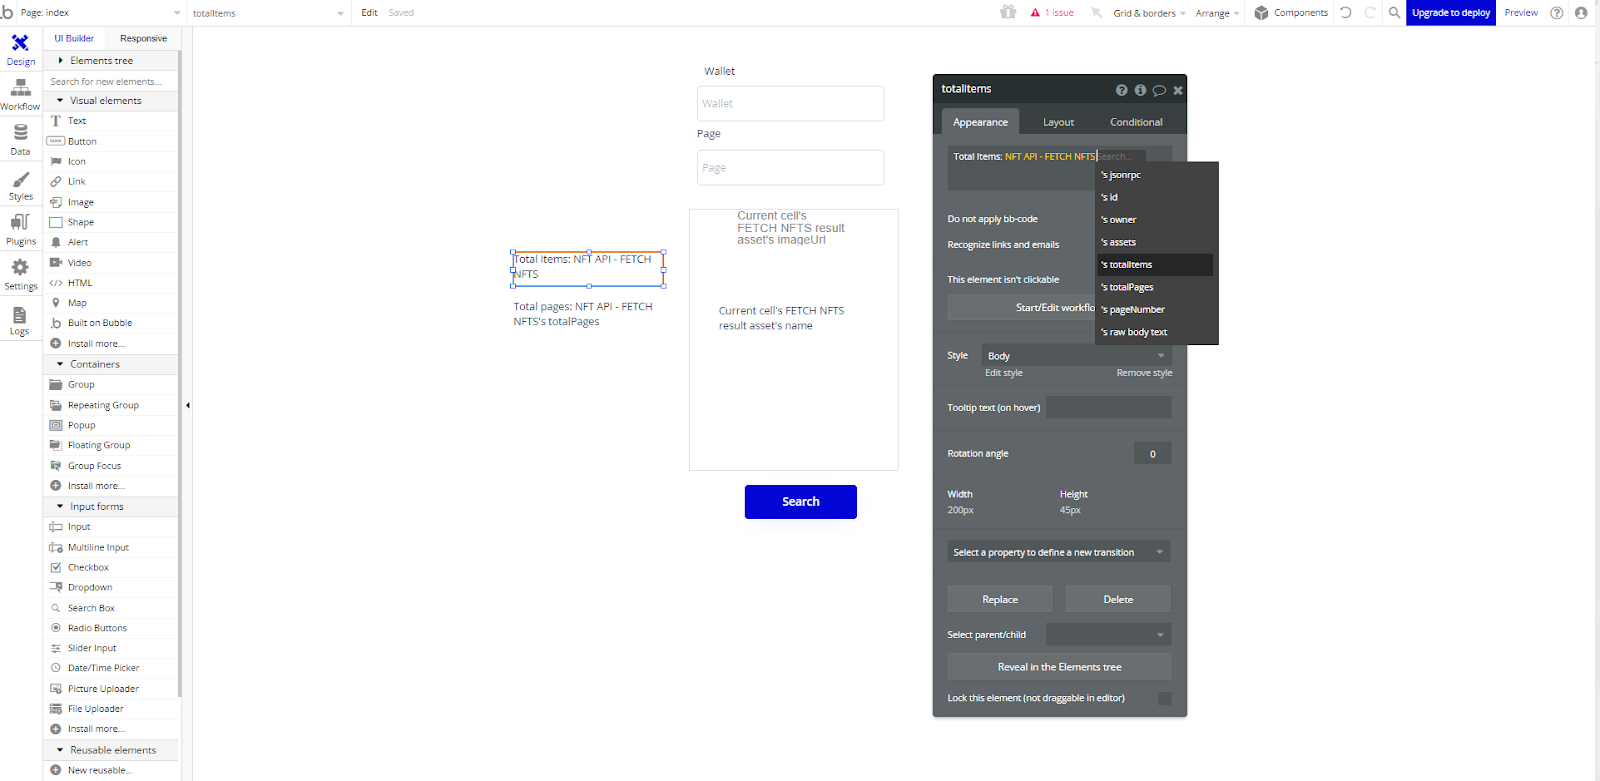
We must search for the option "Get data from an external API" and select it in order to add the value from the totalItems from our API. Subsequently, we must specify the API Provider and the values required.

Finally we need to retrieve the attribute desired, in this case, total items 🙂
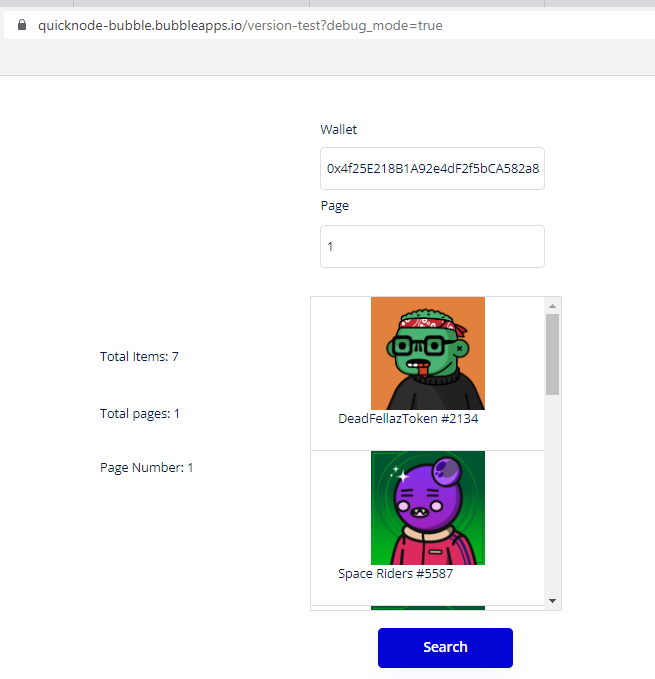
After adding the magic touches , your site will look like this!
Conclusion
Congratulations! You have successfully built your no-code nft visor. It is our belief that this was a beneficial learning experience and that you will keep on honing your capabilities in the intriguing domain of blockchain technology.
We ❤️ Feedback!
If you have any feedback or questions on this guide, let us know. Or, feel free to reach out to us via Twitter or our Discord community server.
We’d love to hear from you!
Author: Irwing Tello
Discord: discord.com/invite/ADjtsHVreT
Twitter: twitter.com/irwingtello
LinkedIn: linkedin.com/in/irwingtello
Email: irwing@dfhcommunity.com
Website: dfhcommunity.com
Youtube: youtube.com/@irwingtellomx
You can support my work here:
buymeacoffee.com/irwingtello
BTC: 34kXK9CpTJP1PyHKw2kUD2bt6rtGcG5CHY
EVM Address: 0x8B98F8Ff69d2A720120eD6C71A9Bc5072b8Eb46D
Solana: Ey9oVFHW79giacRZaKxigYjeihMsY7ox8jxc7Hp1sJmS