

Overview
This tutorial explains how to view the NFTs associated with your ENS address and your Ethereum Address (without having to write any single line of code.
What We Will Do
- Deploying custom formatter service to retrieve data to Bubble.io.
What You Will Need
Create a bubble.io account (https://bubble.io/).
Vercel Account.
Create an account on QuickNode.
What is Bubble.io?
Bubble.io is a web development platform that allows individuals and businesses to build and launch web applications without writing code. Bubble.io uses a visual drag-and-drop editor to help users create complex web applications with ease.
With Bubble.io, users can create a wide variety of web applications, including social networks, marketplaces, e-commerce platforms, and more. The platform allows for the customization of designs, integrations with external APIs and services, and automated workflows.
What is QuickNode?
QuickNode offers access to nodes for various blockchain networks such as Ethereum, Bitcoin, Binance Smart Chain, Polygon, and more. Developers and businesses can easily set up and manage their blockchain nodes without having to worry about the complexity of maintaining the infrastructure. QuickNode provides reliable and high-performance nodes that are always up-to-date with the latest software versions.
In addition to running blockchain nodes, QuickNode also provides tools for monitoring and managing your infrastructure, as well as APIs for building and deploying decentralized applications. With QuickNode, developers can focus on building their applications and not worry about the underlying infrastructure.
Creation of our app in Bubble.io
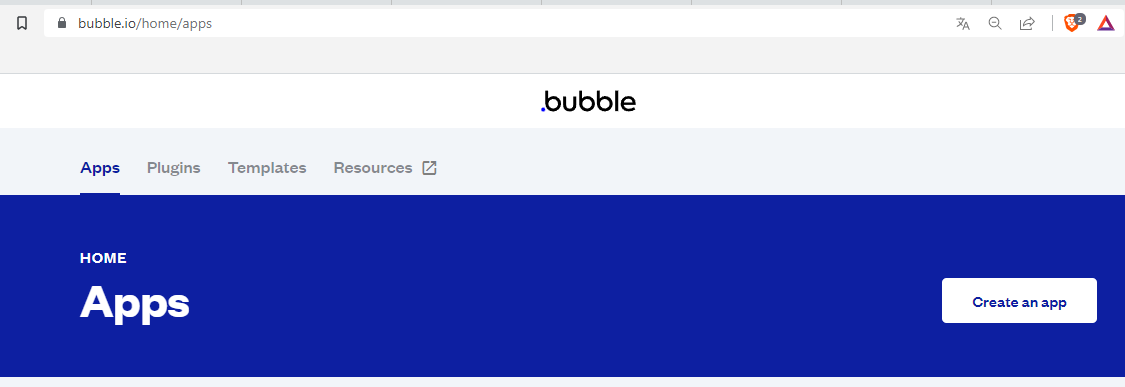
First, we need to click the "Create an app" button to start :)
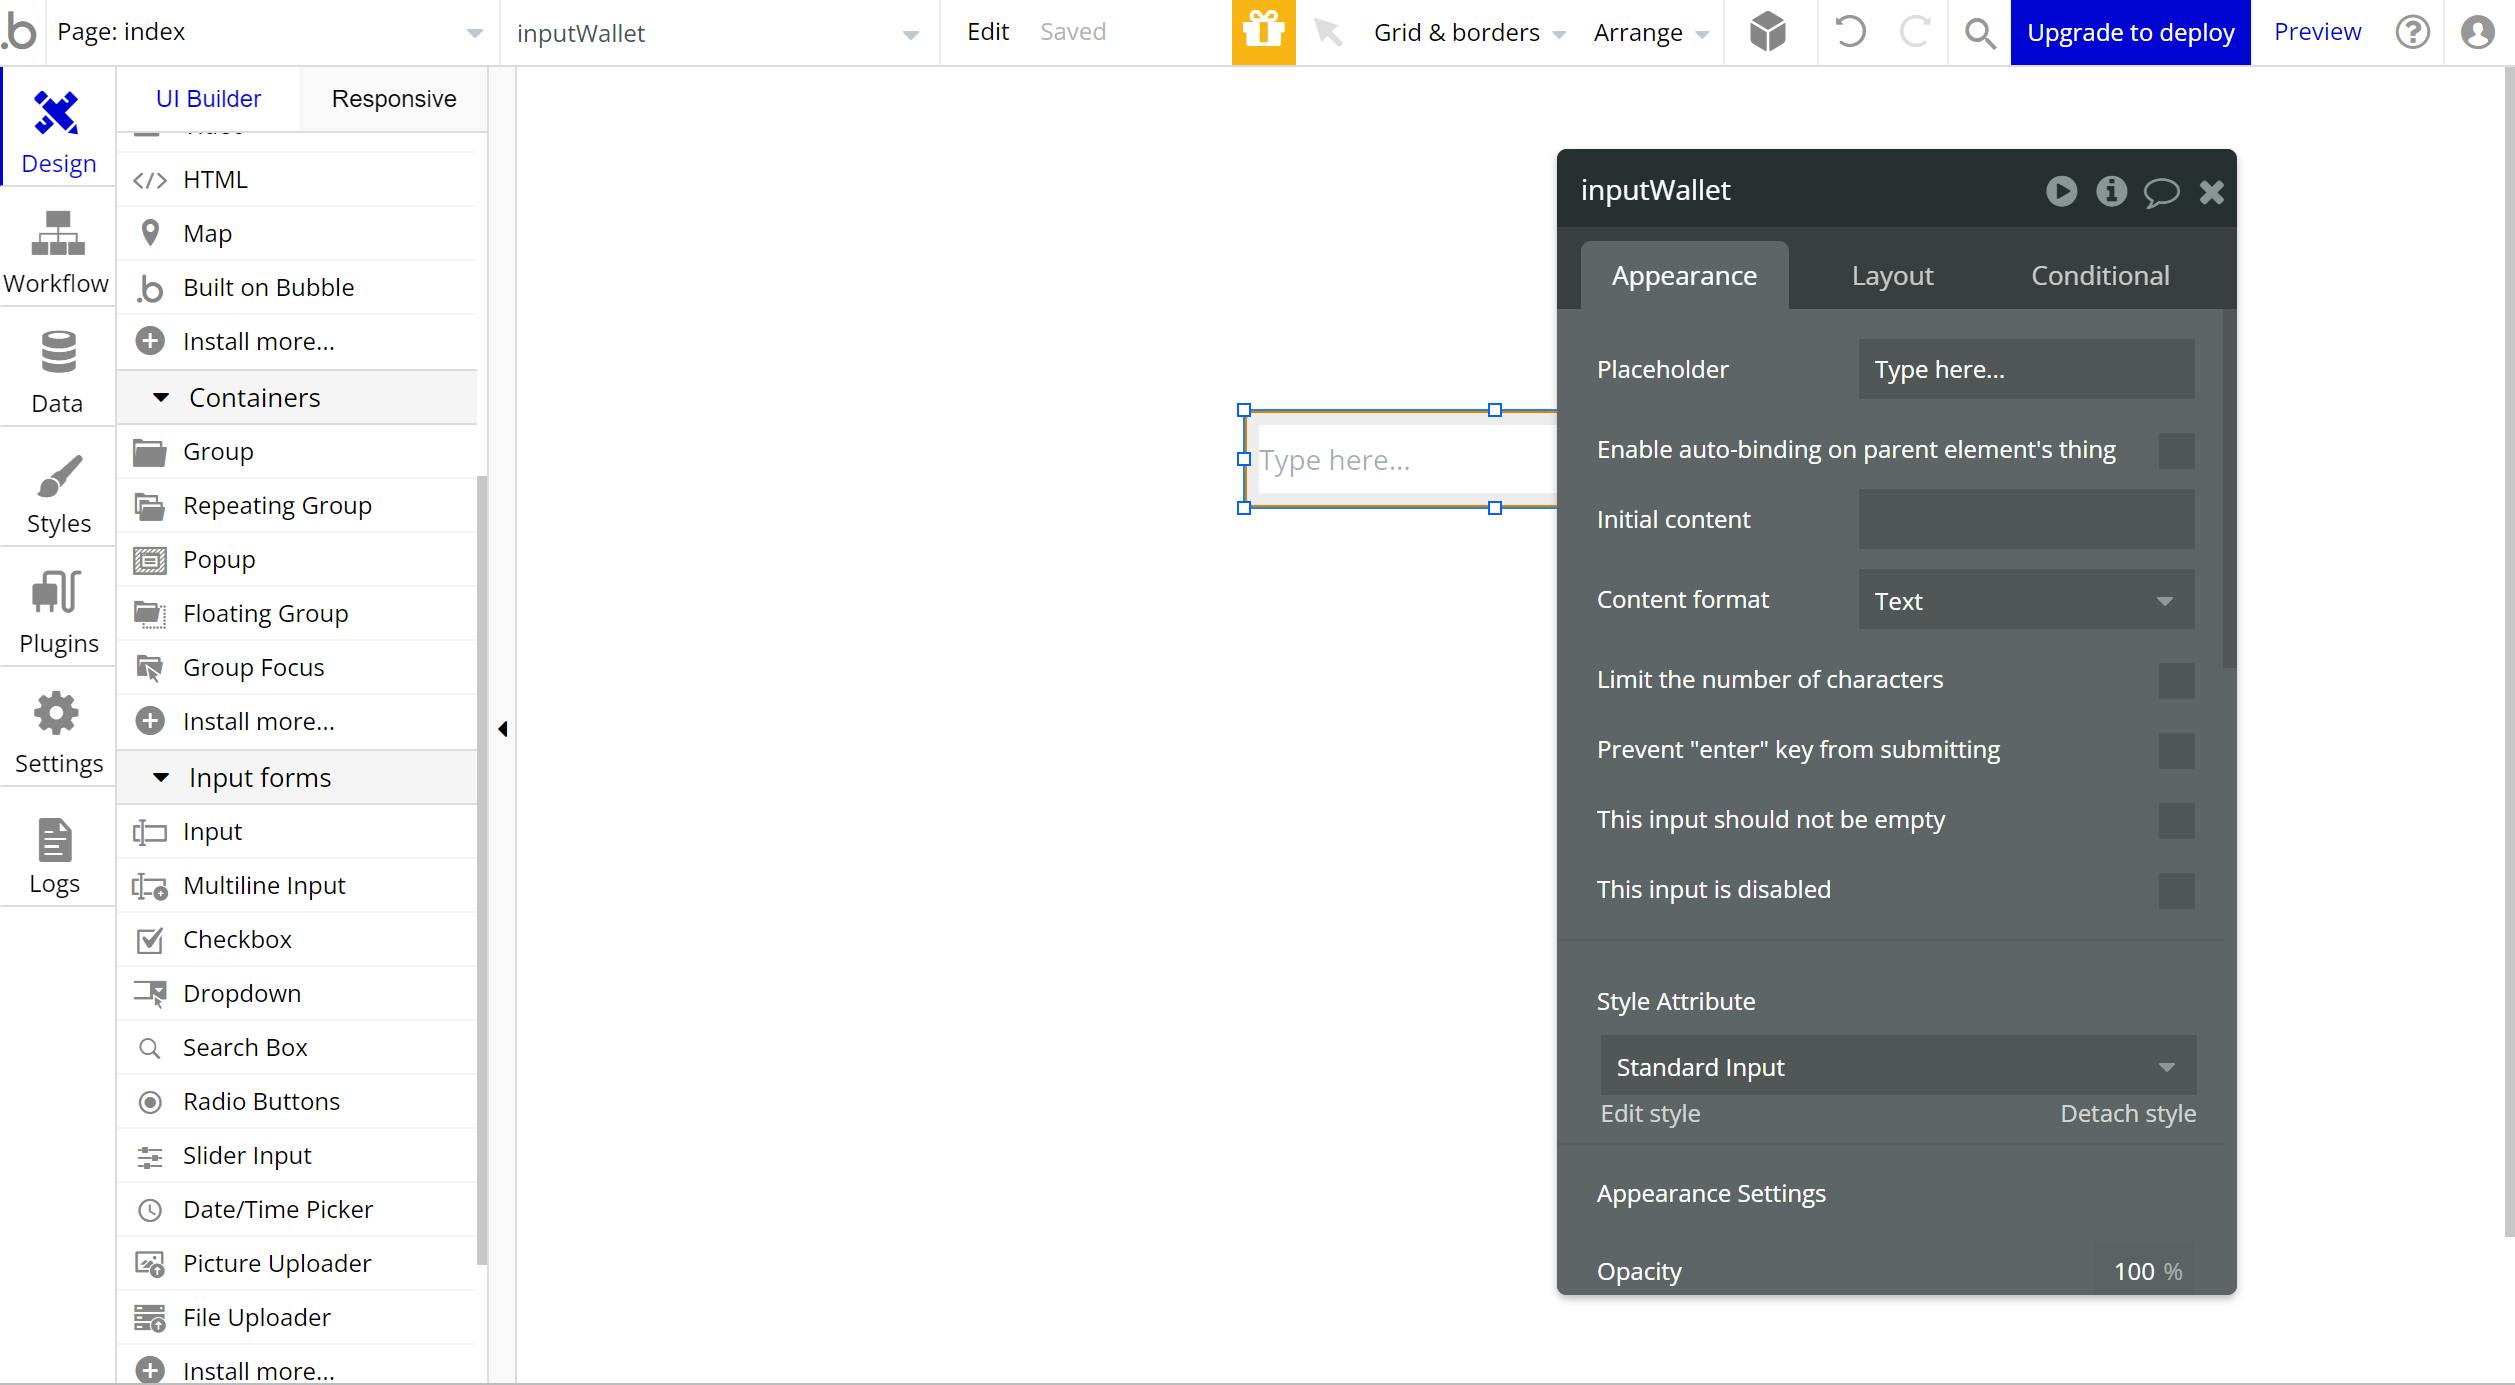
After that, you can see this interface, and you need to create these elements:
1.- Input - inputWallet
2.- Repeating group
3.- Button - btnSearch
You can change the information easily by clicking on the top of the element to change the name.
It is important to set a name for the elements to have a good understanding of the workflow.
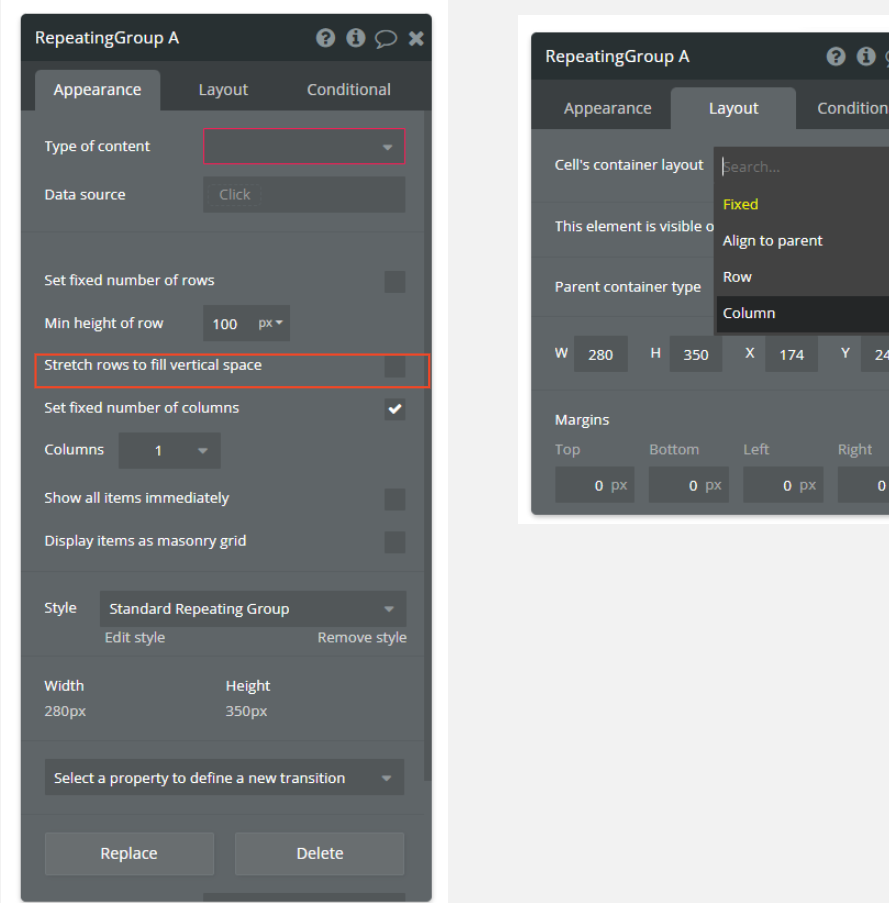
In the repeating group element, you need to uncheck the field “Set fixed number of rows”
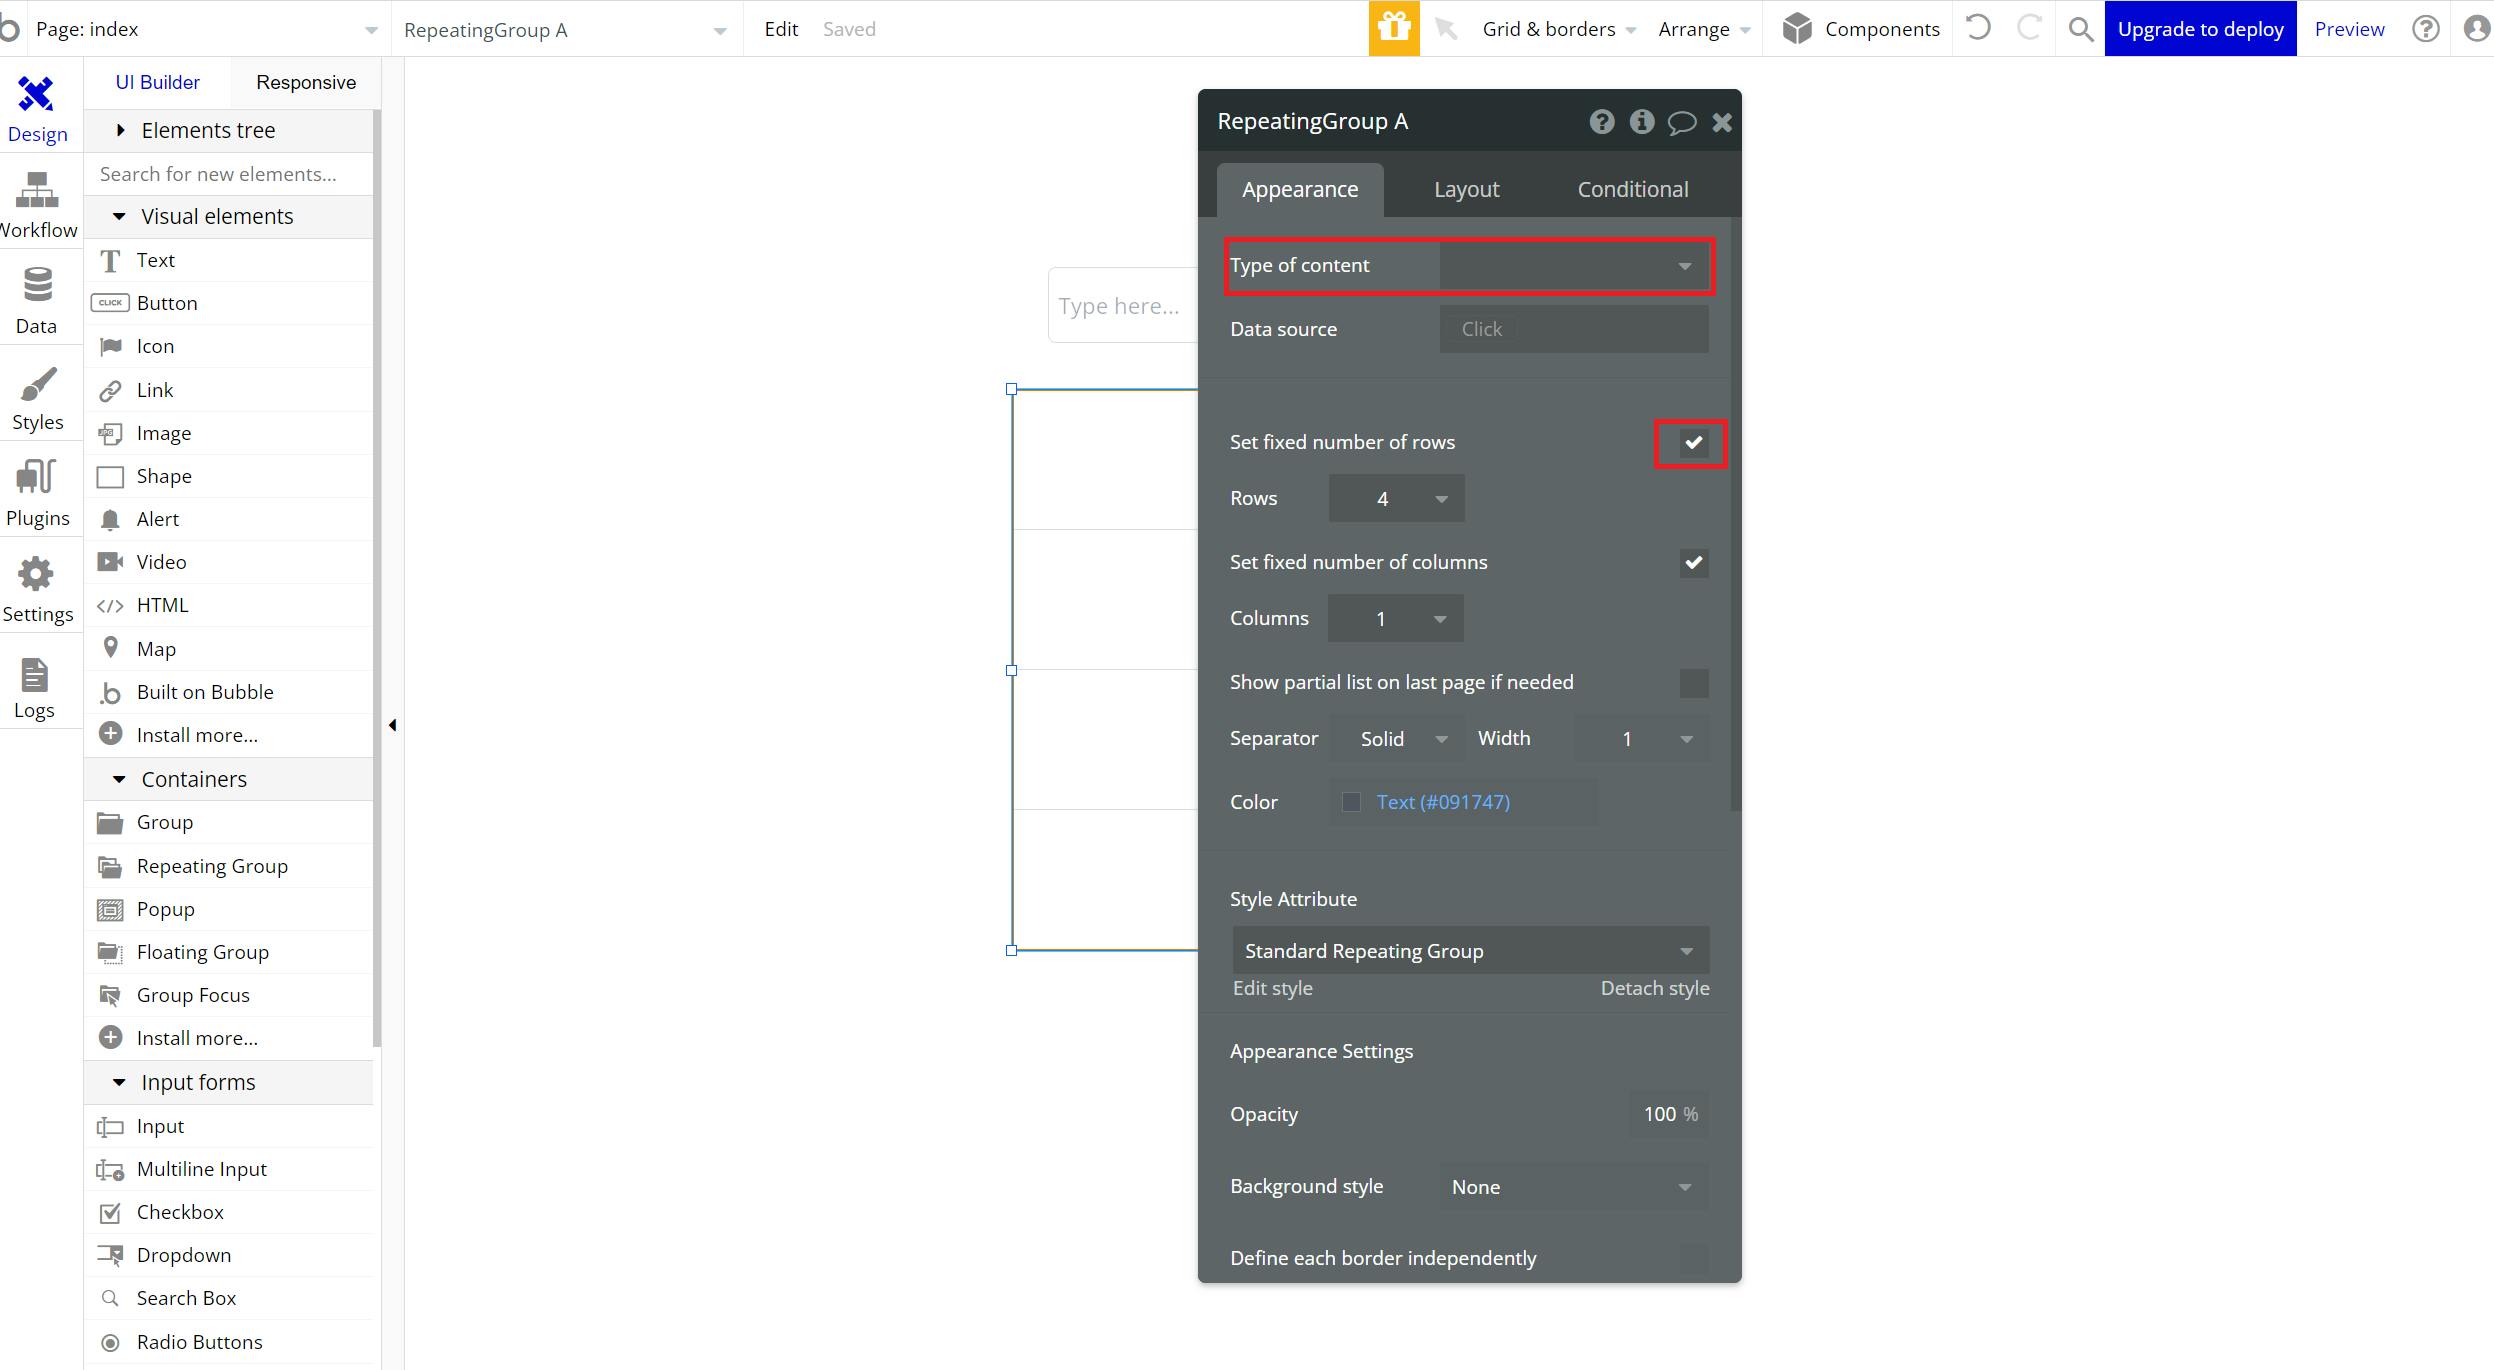
After that we need to uncheck the field “Stretch rows to fill vertical space” and in the Layout tab, we need to change to the “Column” option
In the repeating group element, you need to uncheck the field “Set fixed number of rows”
After that we need to uncheck the field “Stretch rows to fill vertical space” and in the Layout tab, we need to change to the “Column” option
And you noticed the type of content it’s marked in red, that's because we need to retrieve the data from our API. But don’t worry in the next steps we will retrieve the data 🙂.
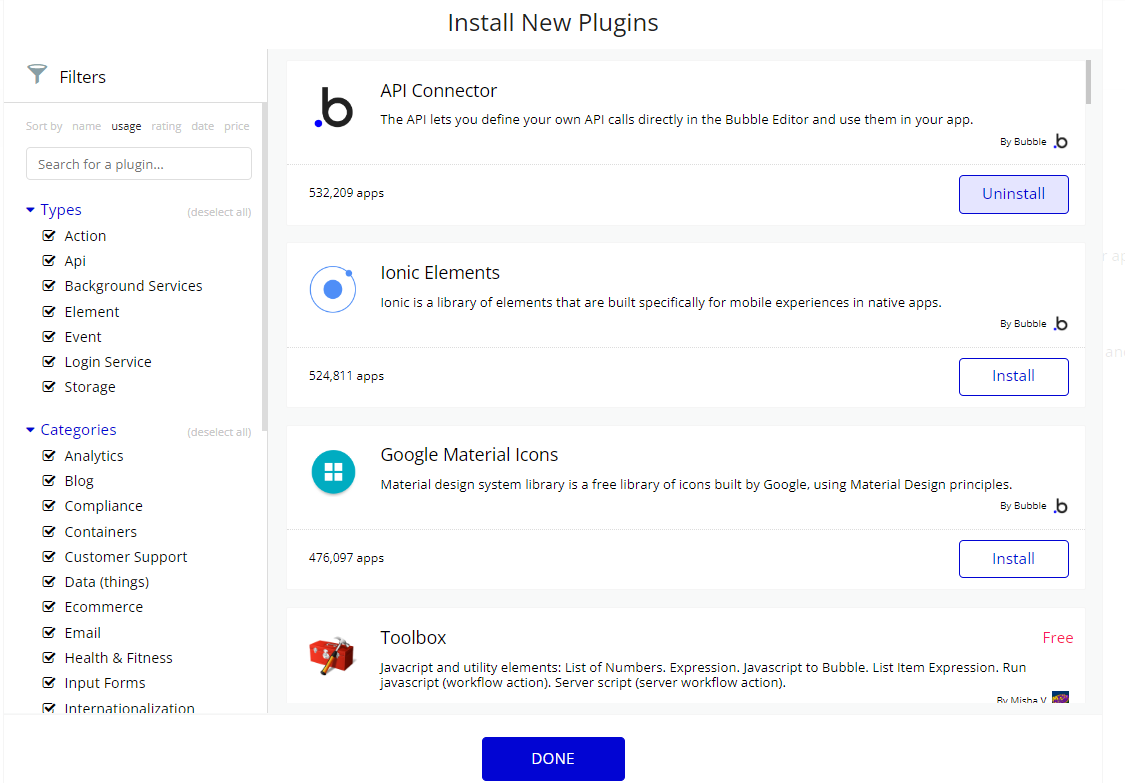
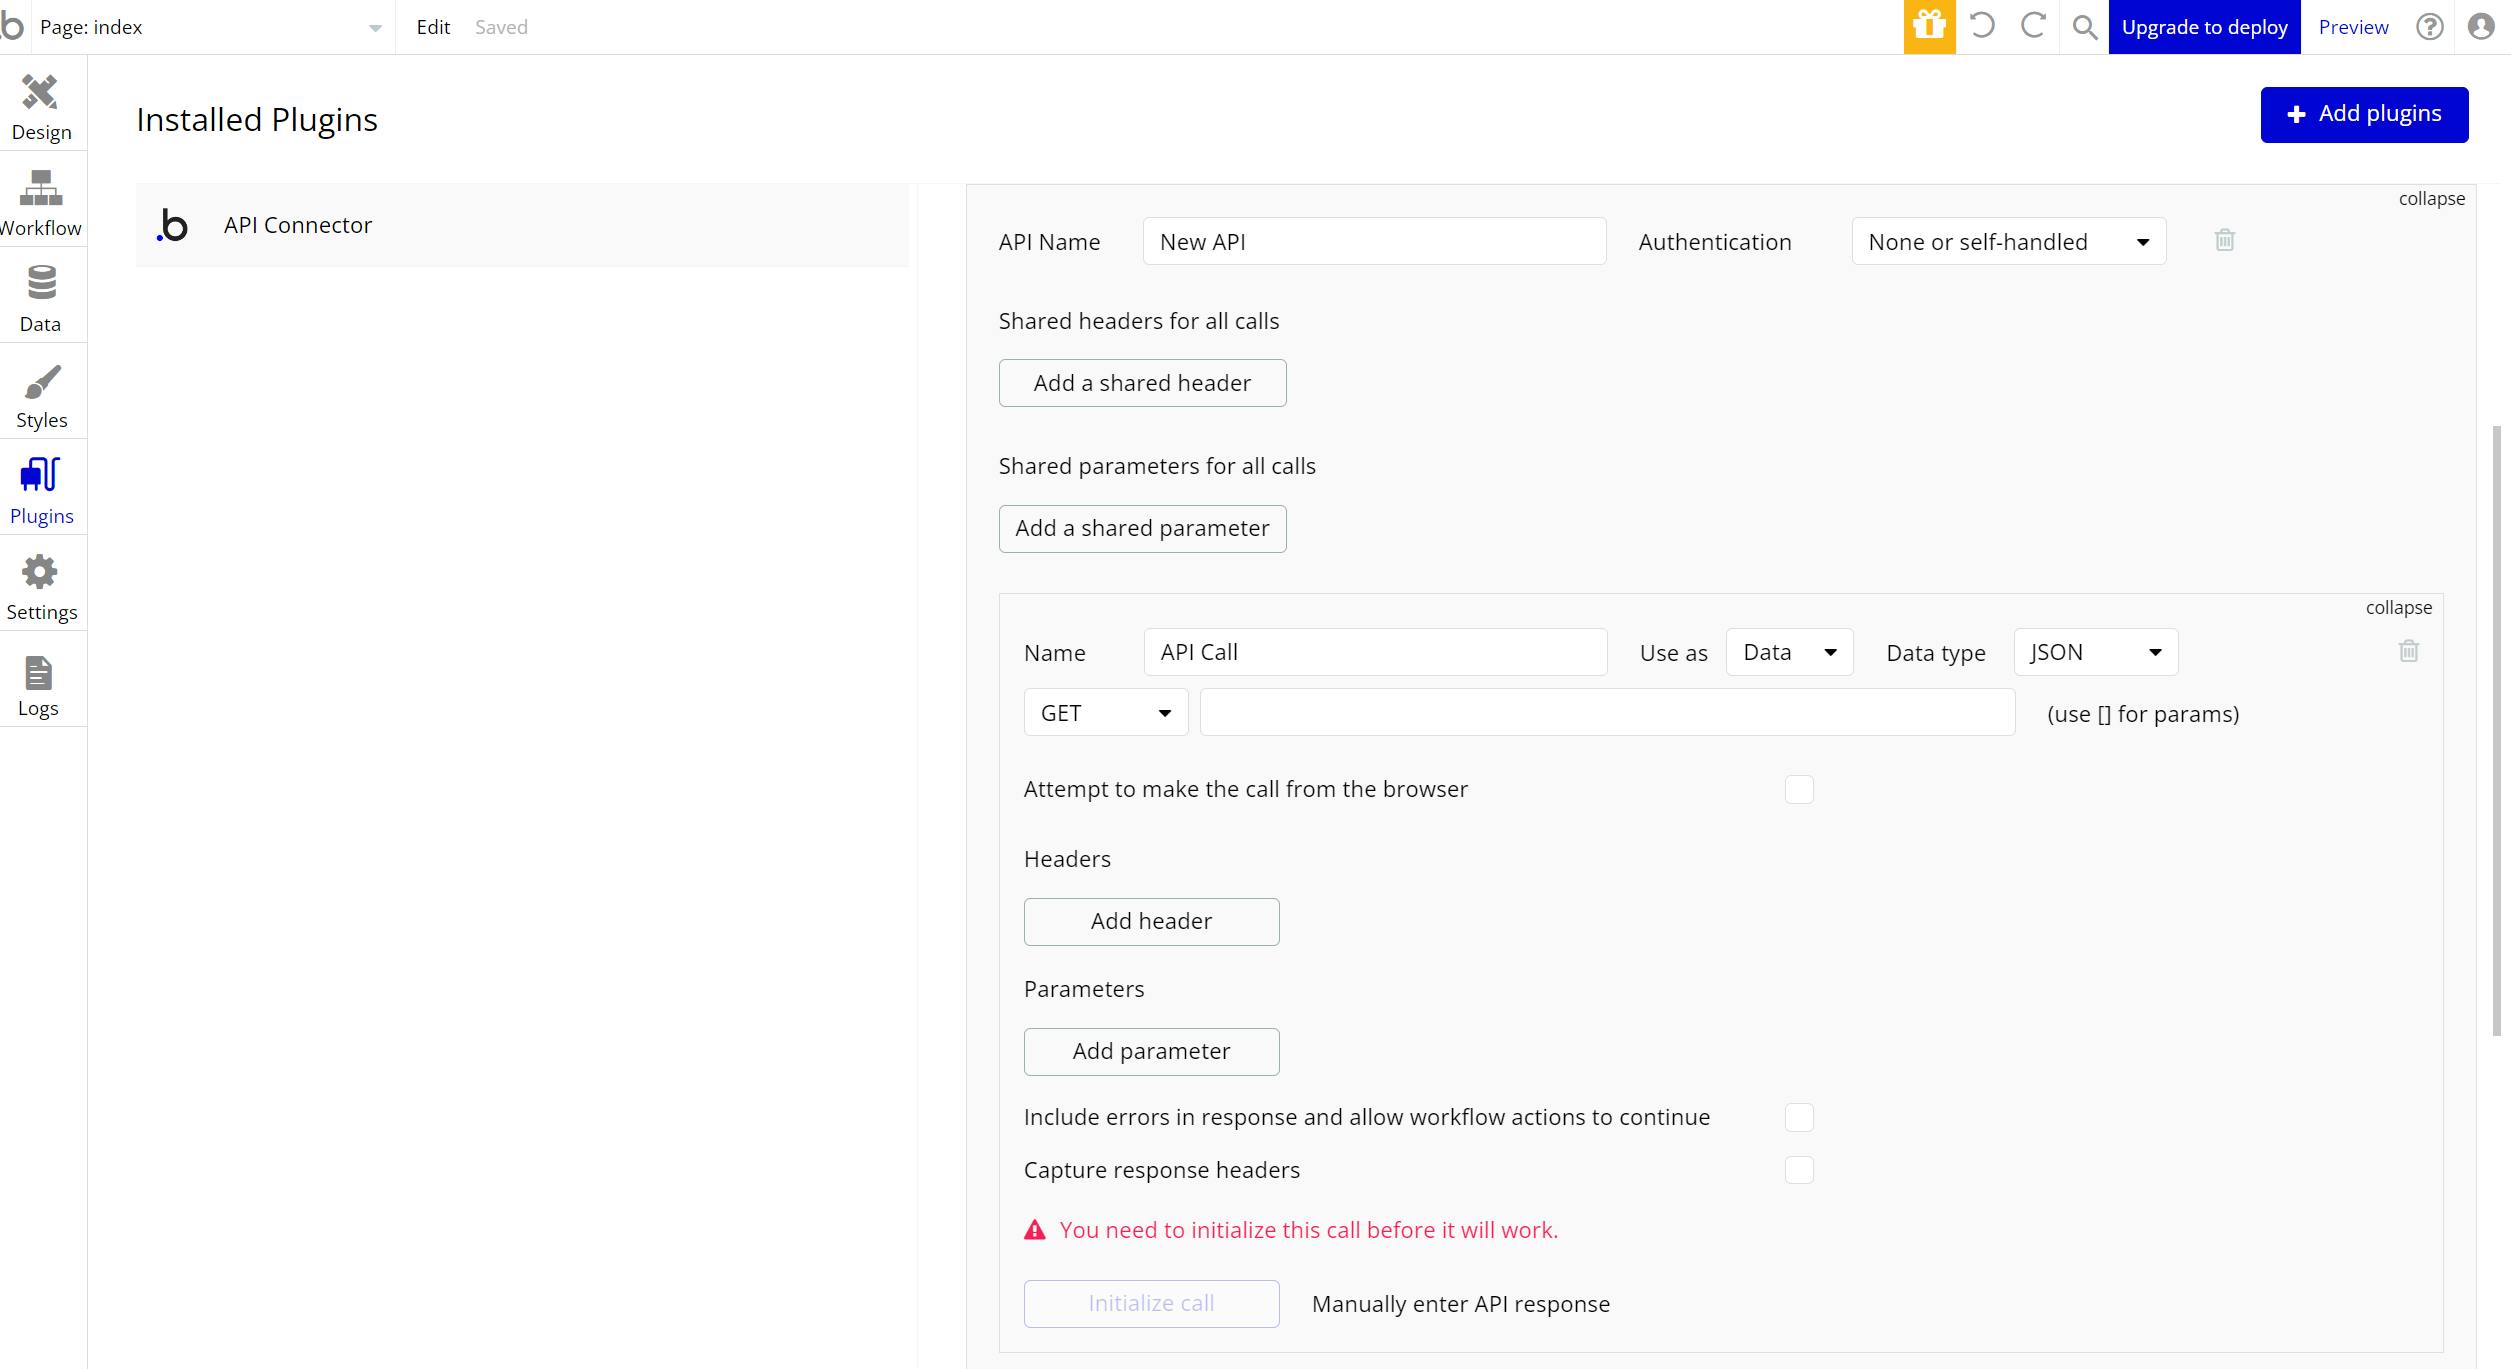
We need to go to this section “Plugins” , after that we need to click the button “Add Plugins”, and you need to search for the API Connector plugin.

Once you have found the API Connector plugin, proceed by clicking on the "Install" button.
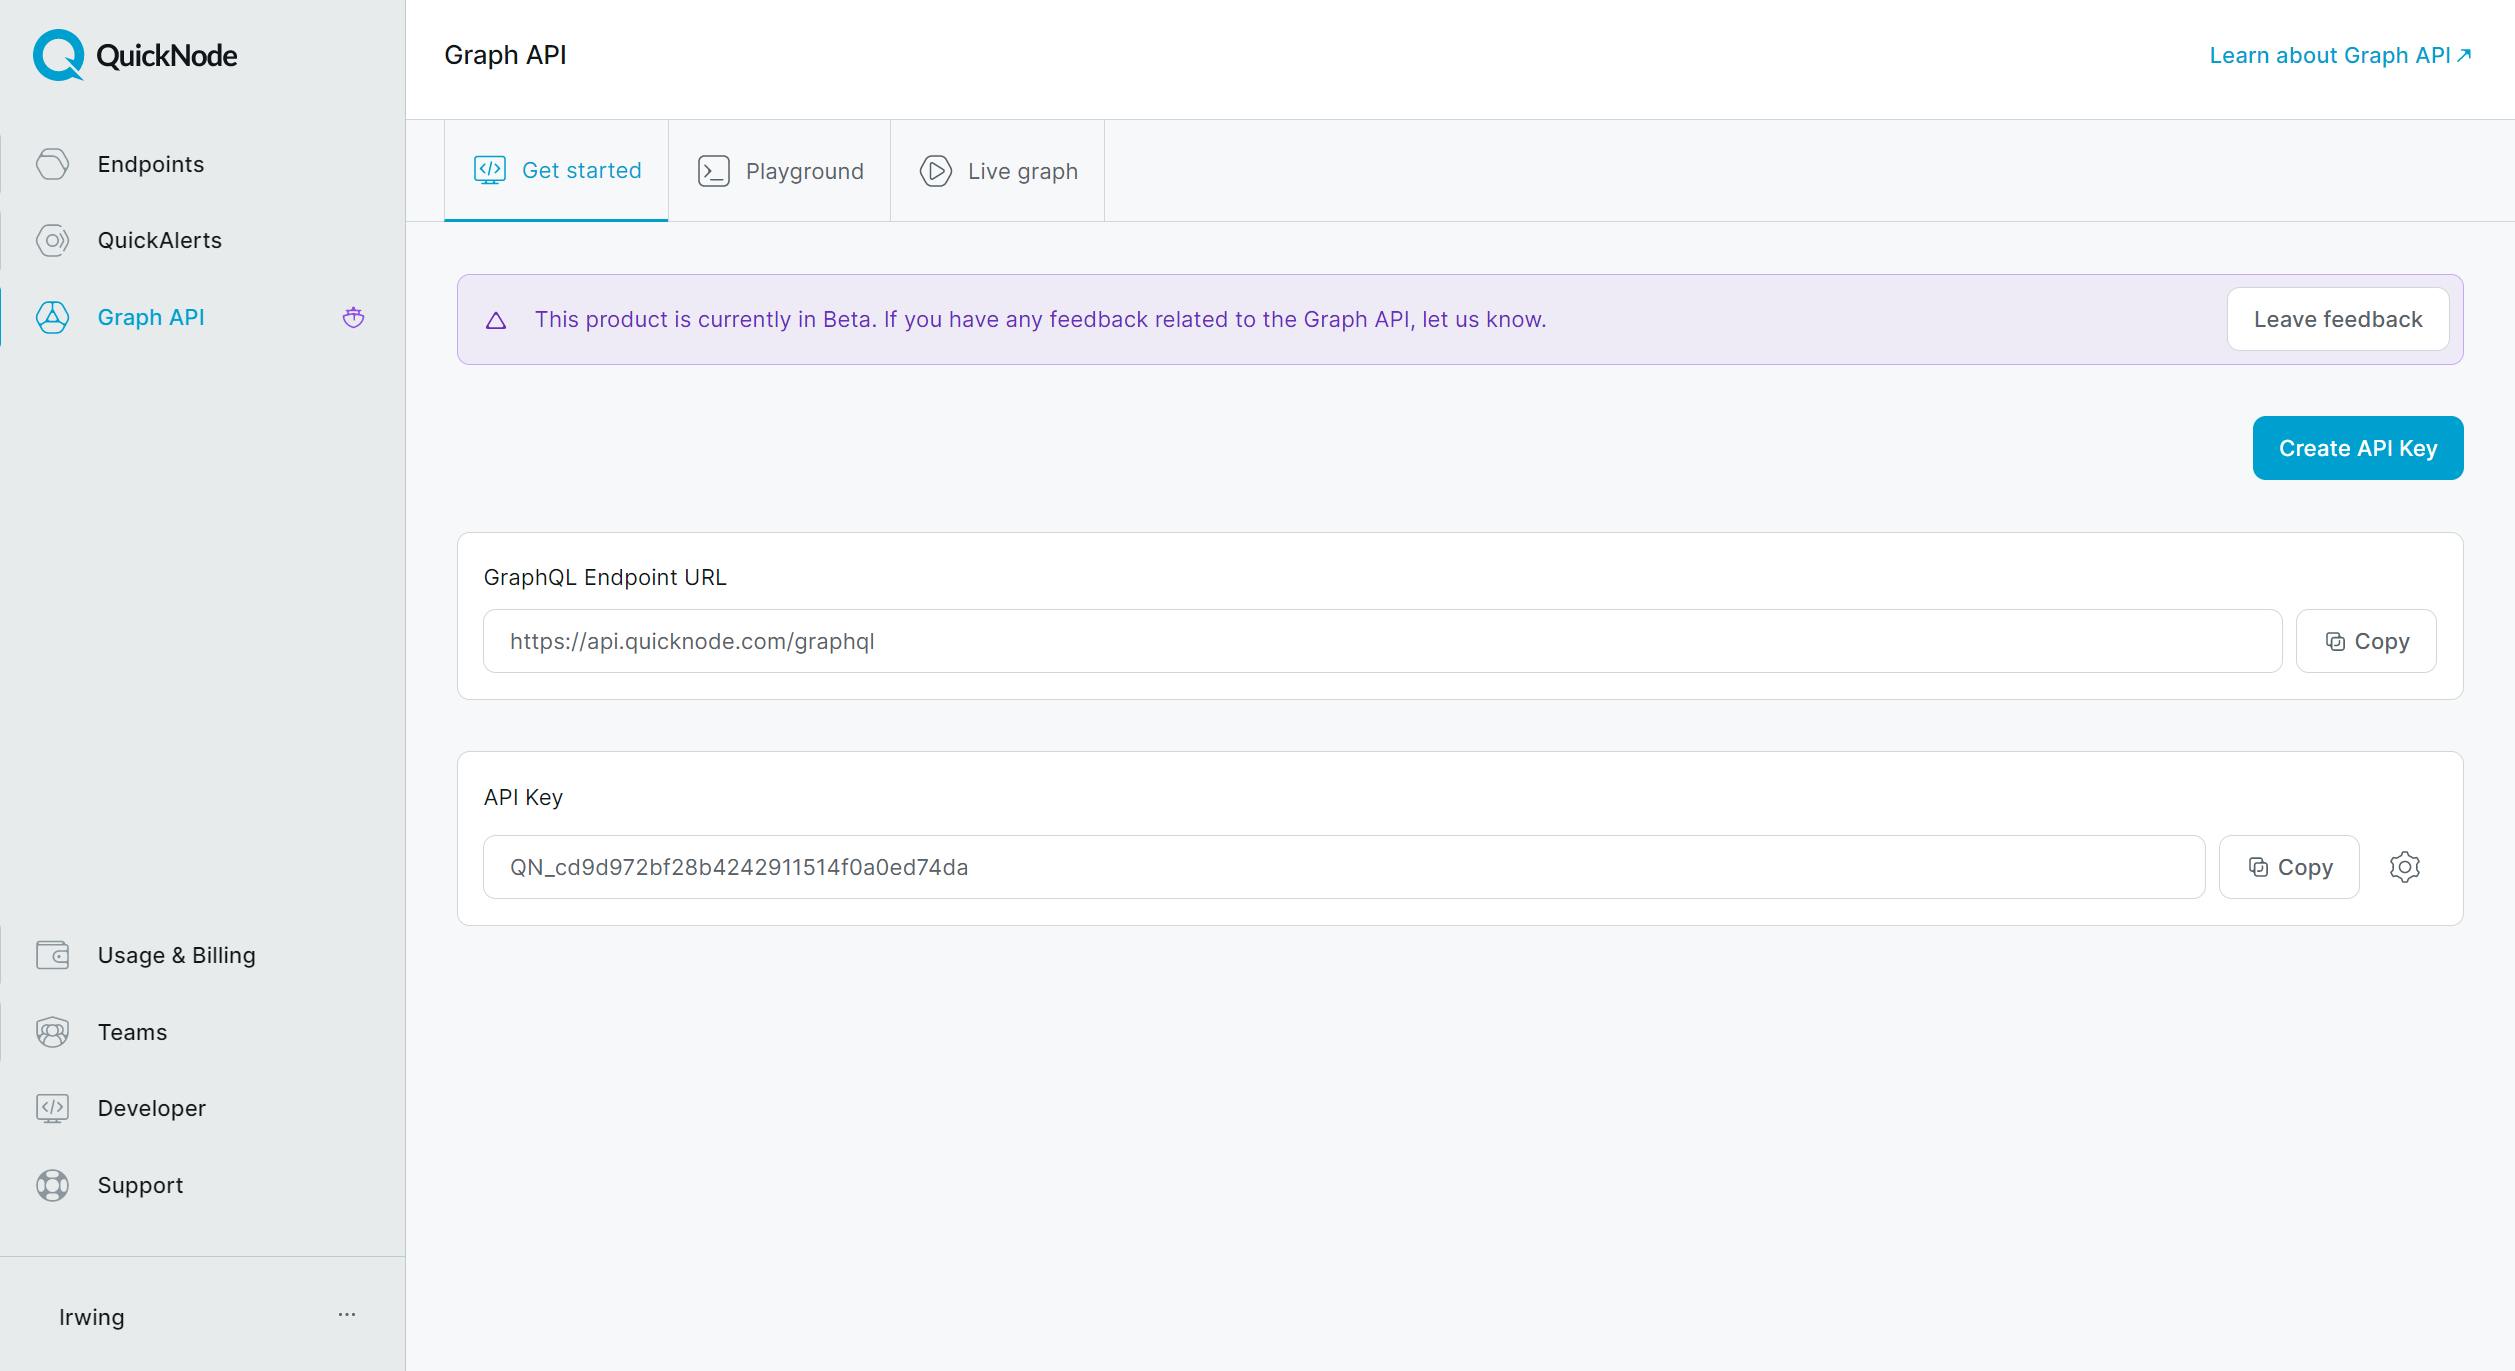
To configure our API, we must first obtain our API key. To obtain this data, we need to go to QuickNode. After creating our account, we need to copy our API key from the Graph API section.
To retrieve the data from QuickNode in a custom format we need a formatter, because Bubble.io doesn't have this feature, but don't worry i prepared this code for you!, you don't need how to code.
Deploying our custom formatter to retrieve data to Bubble.io
To do this, we will need to download this code.
Open your git terminal and copy the following command
git clone https://github.com/irwingtello/formatter-quicknode-ens-graphql
After downloading the repository, we need to install the following dependencies:
npm install -g vercel
After installing the dependency to run our project on vercel, we must navigate to our project and follow these commands:
npm install
Then enter this command:
vercel --prod
Upon entering the command, you will be asked for a series of confirmations:
You will receive an email and a confirmation that you will accept.
It will ask us if we want to launch our webhook and we write "y".
It will ask if we want to link to an existing project and we say no "n".
It will ask for the name of our project.
The path where our project is stored, we hit enter.
And we don't modify the default modifications.
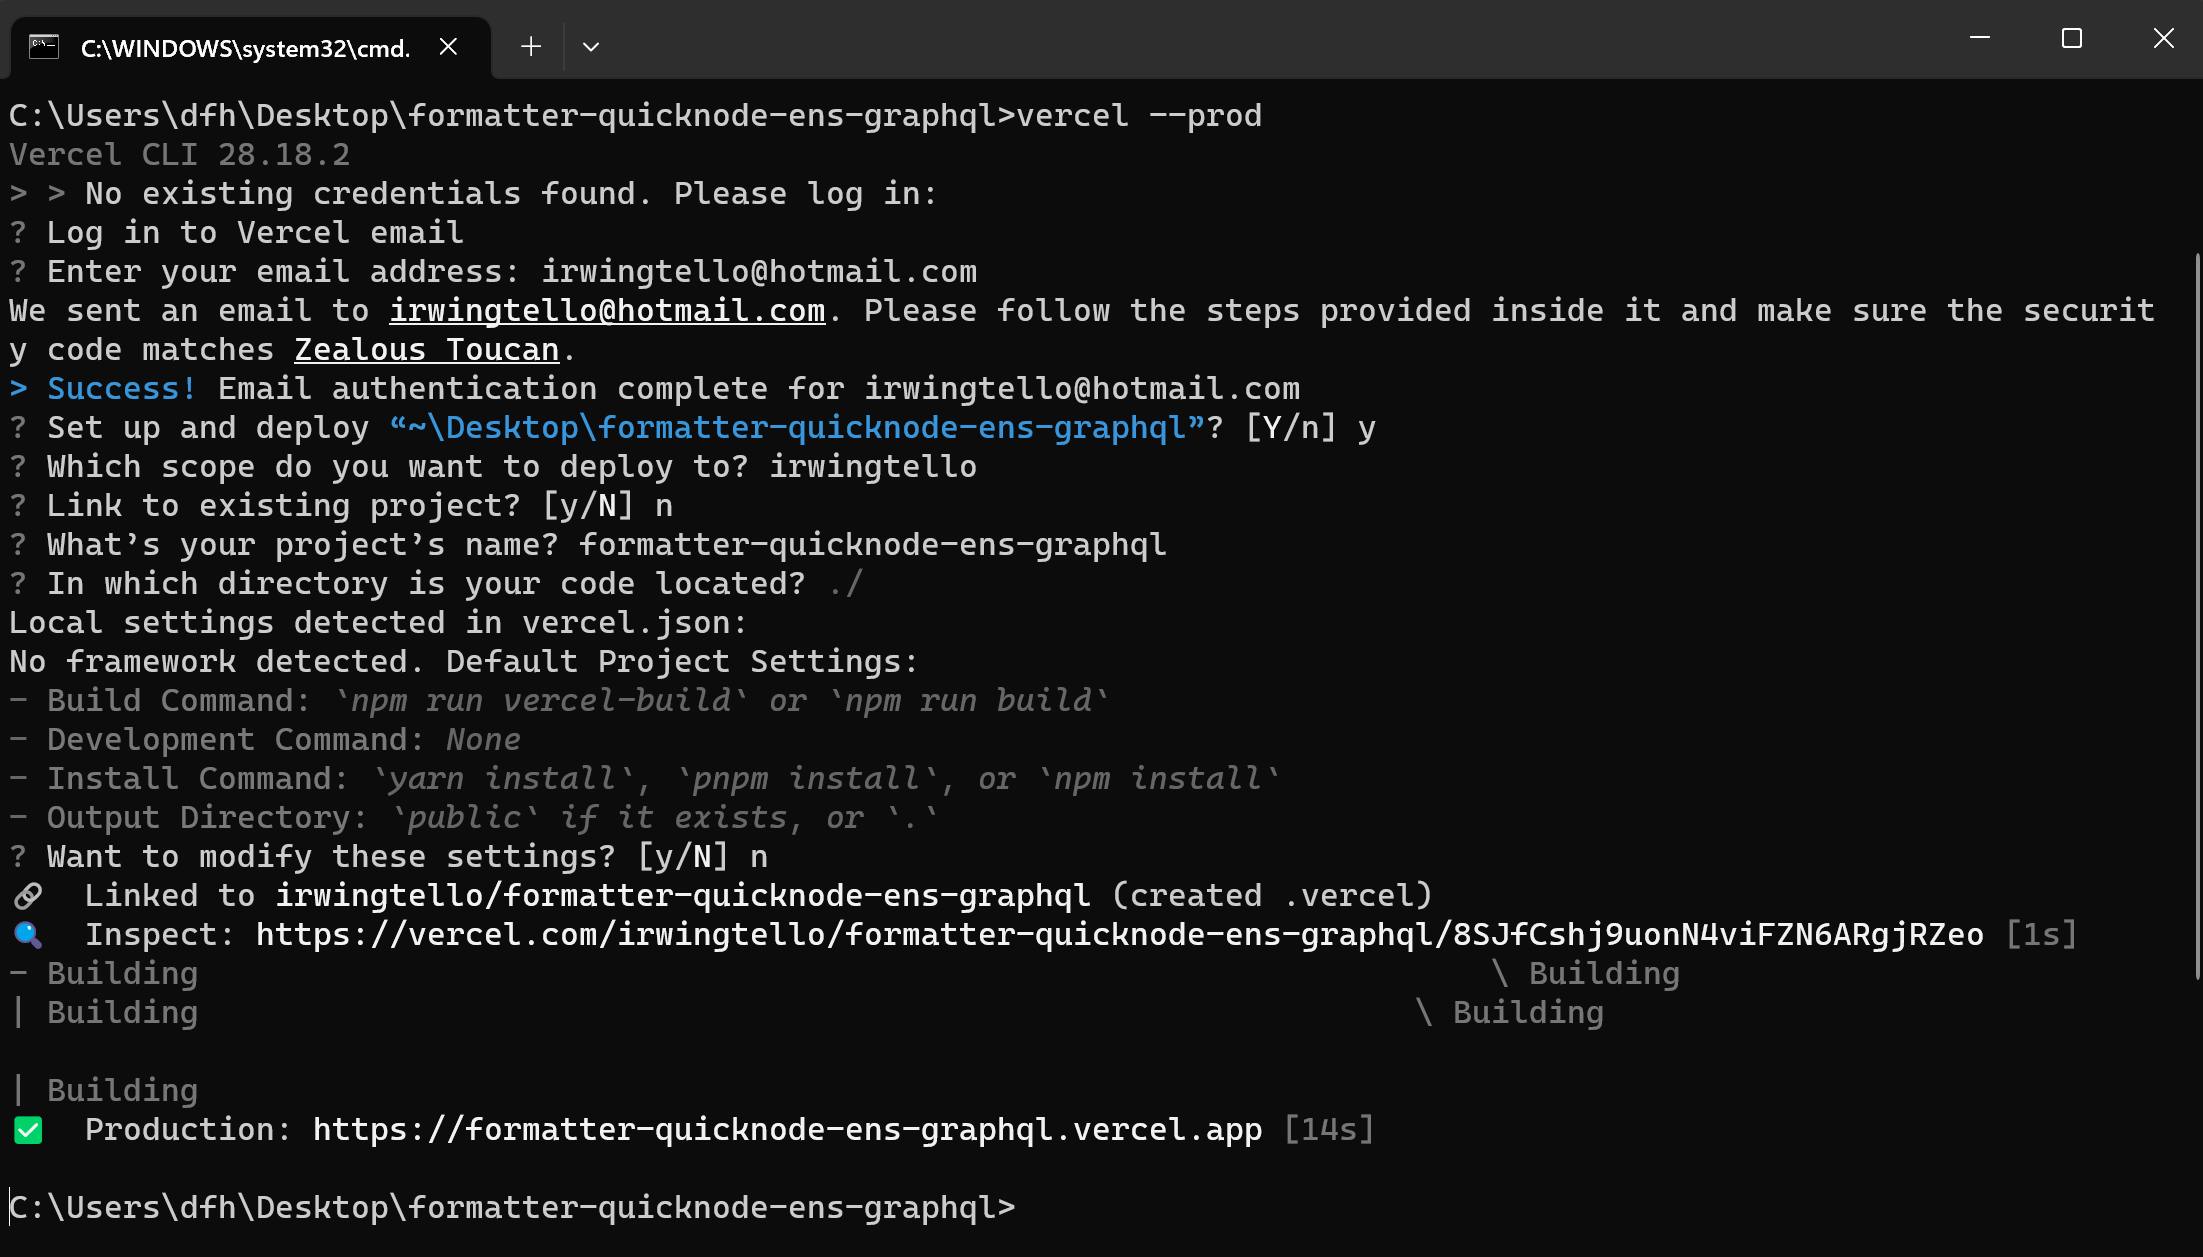
And that's it! . We will have our service formatter.
We must copy our url that says production, then we add the path that will receive our data /api/formatter:
https://formatter-quicknode-ens-graphql.vercel.app/api/formatter
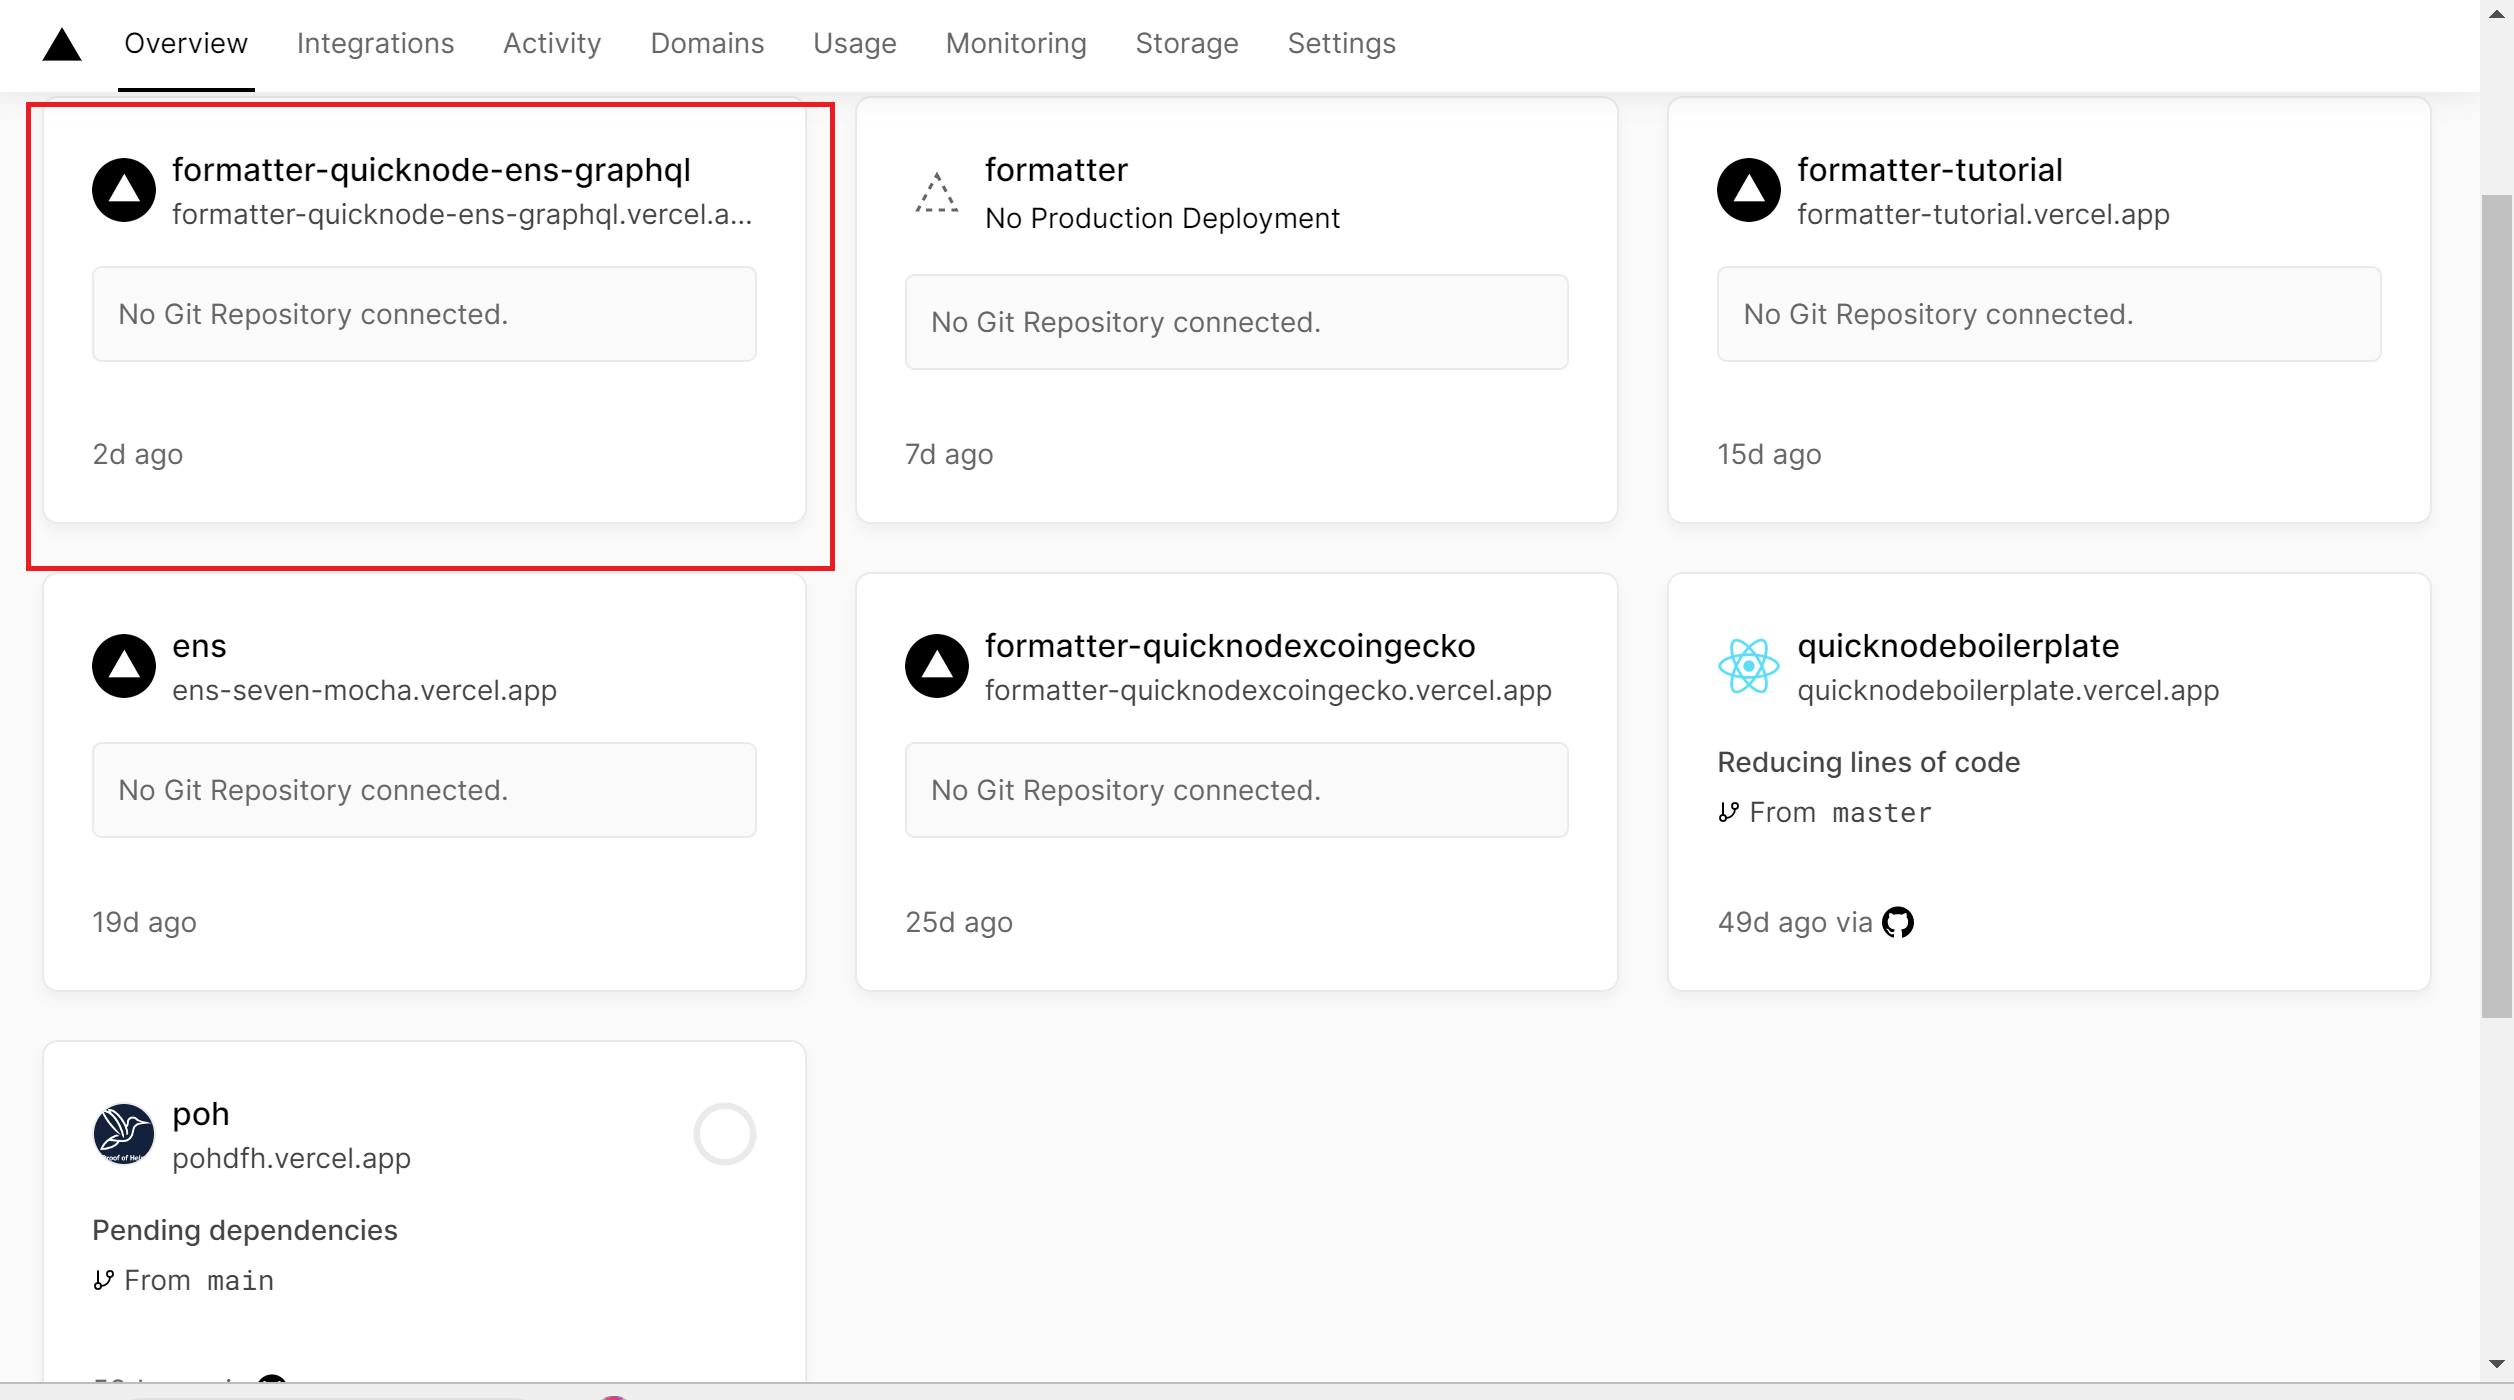
In our vercel account, we will see our service:
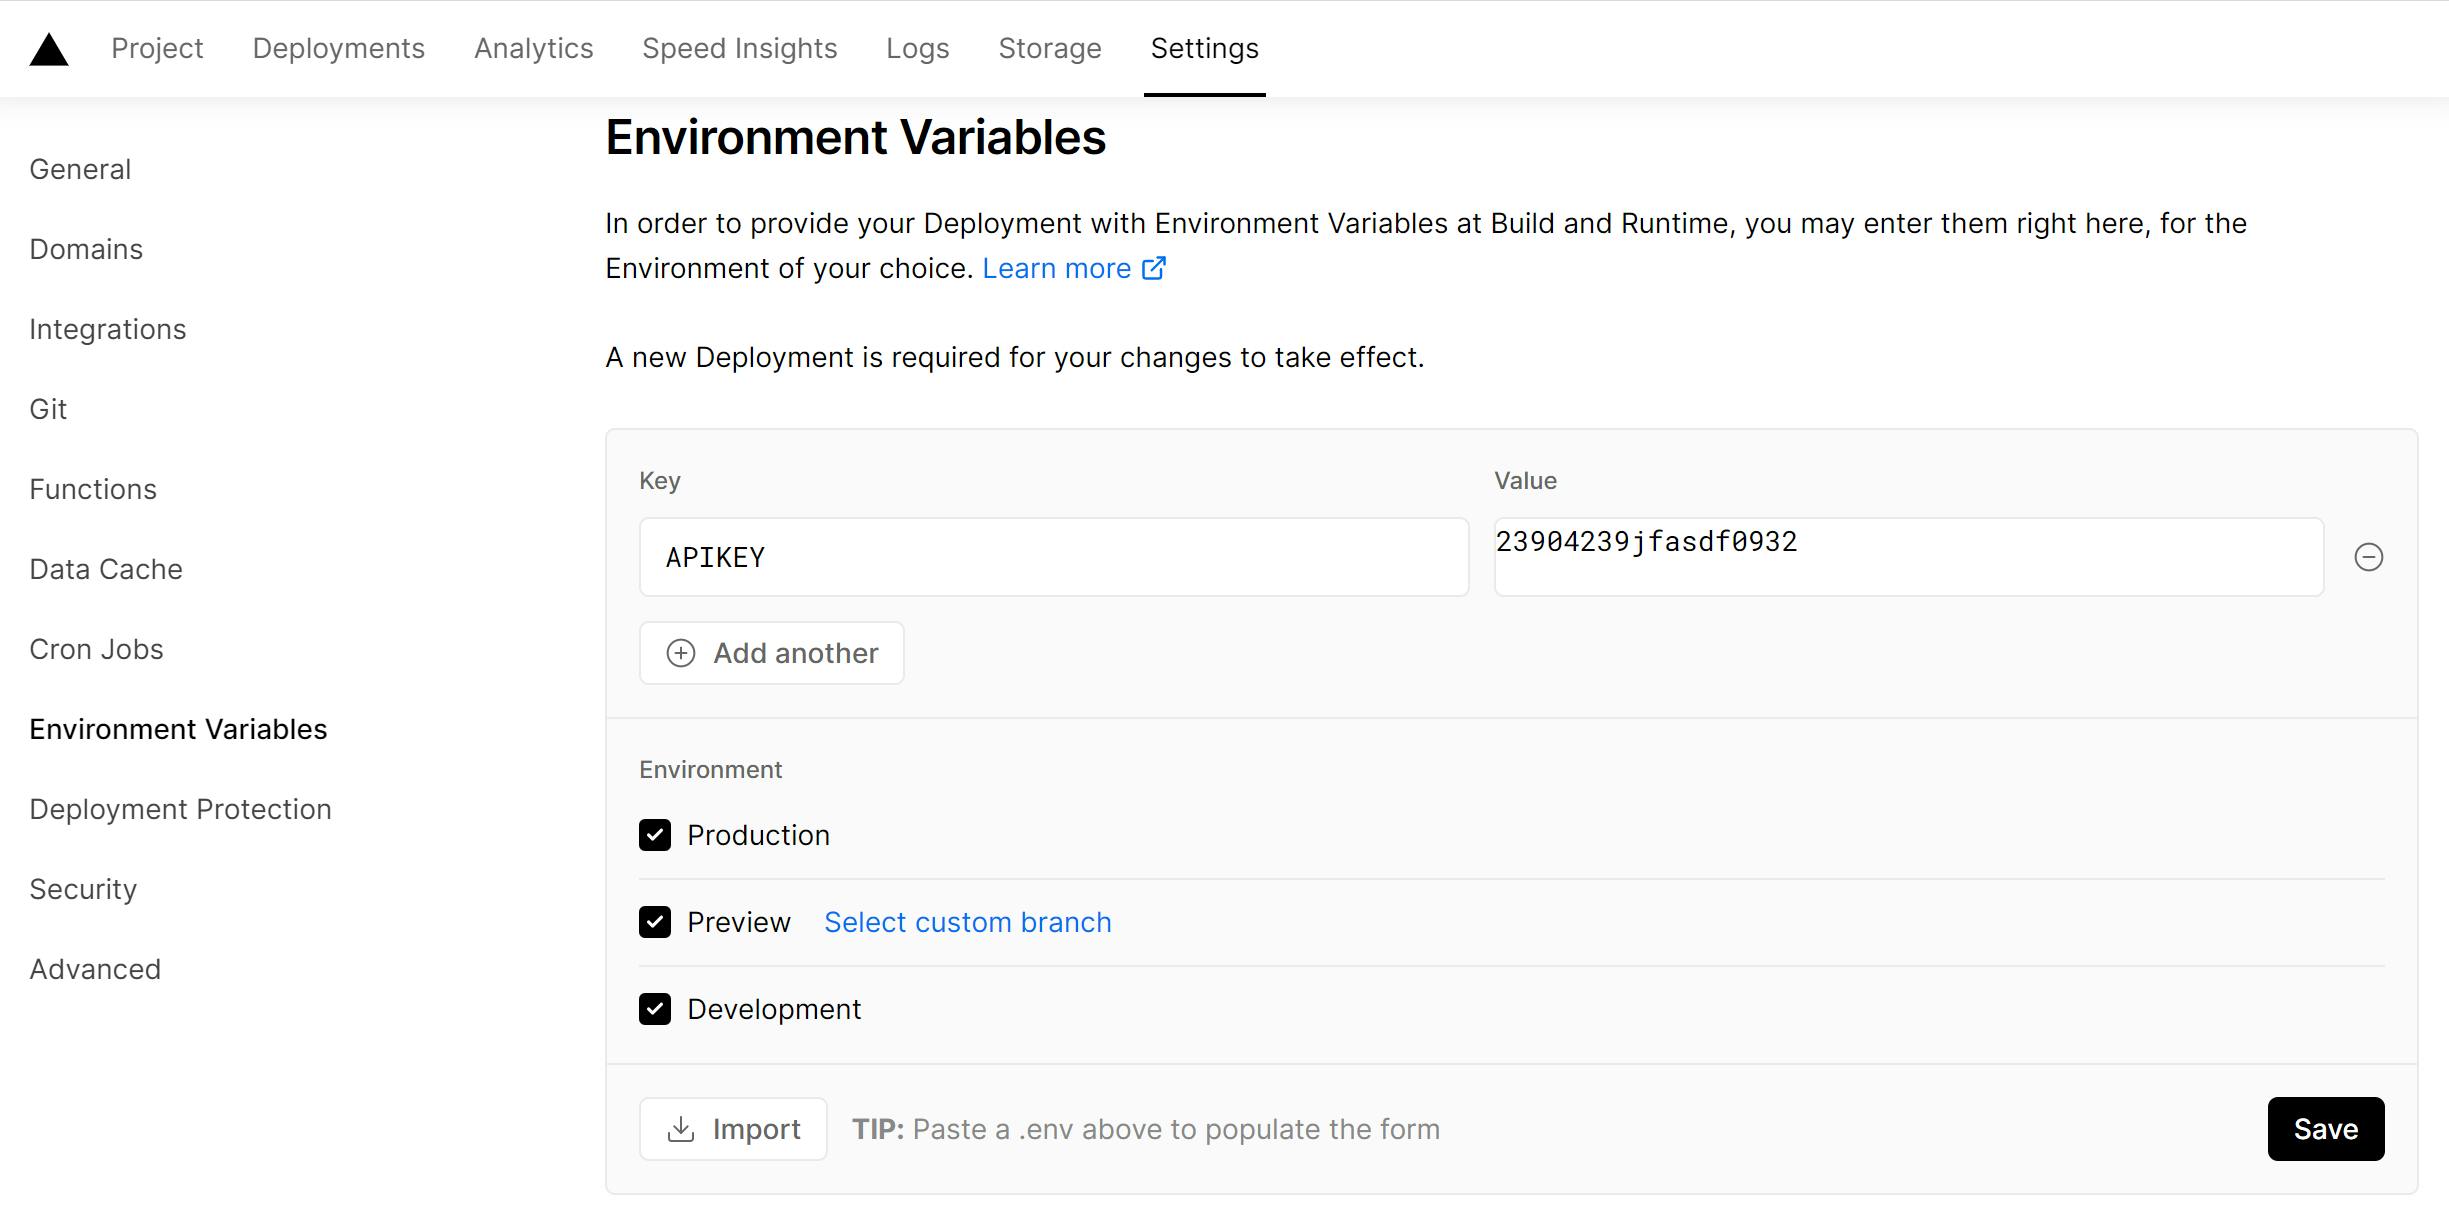
We will click on our webhook and go to the "Settings" option.
And we will look for the "Environment variables" option.
After being in this section, we will need to input our APIKEY.
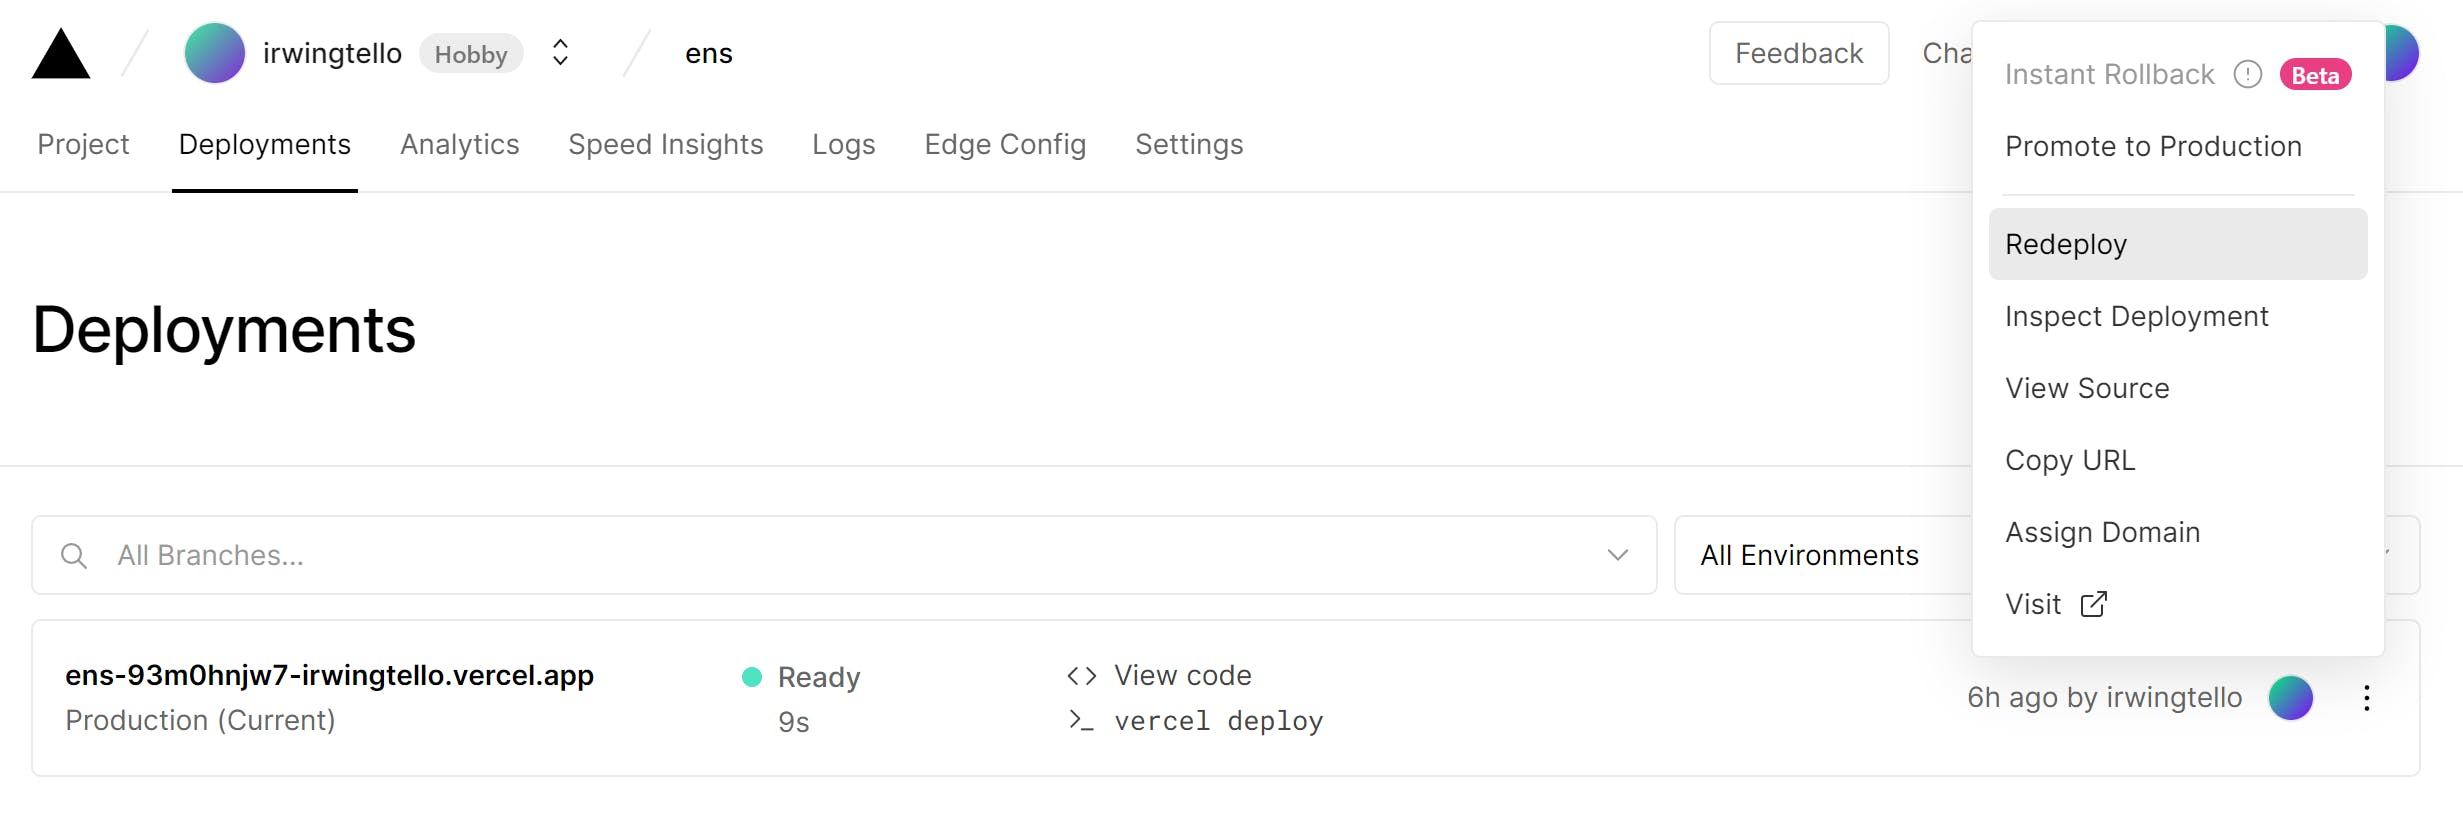
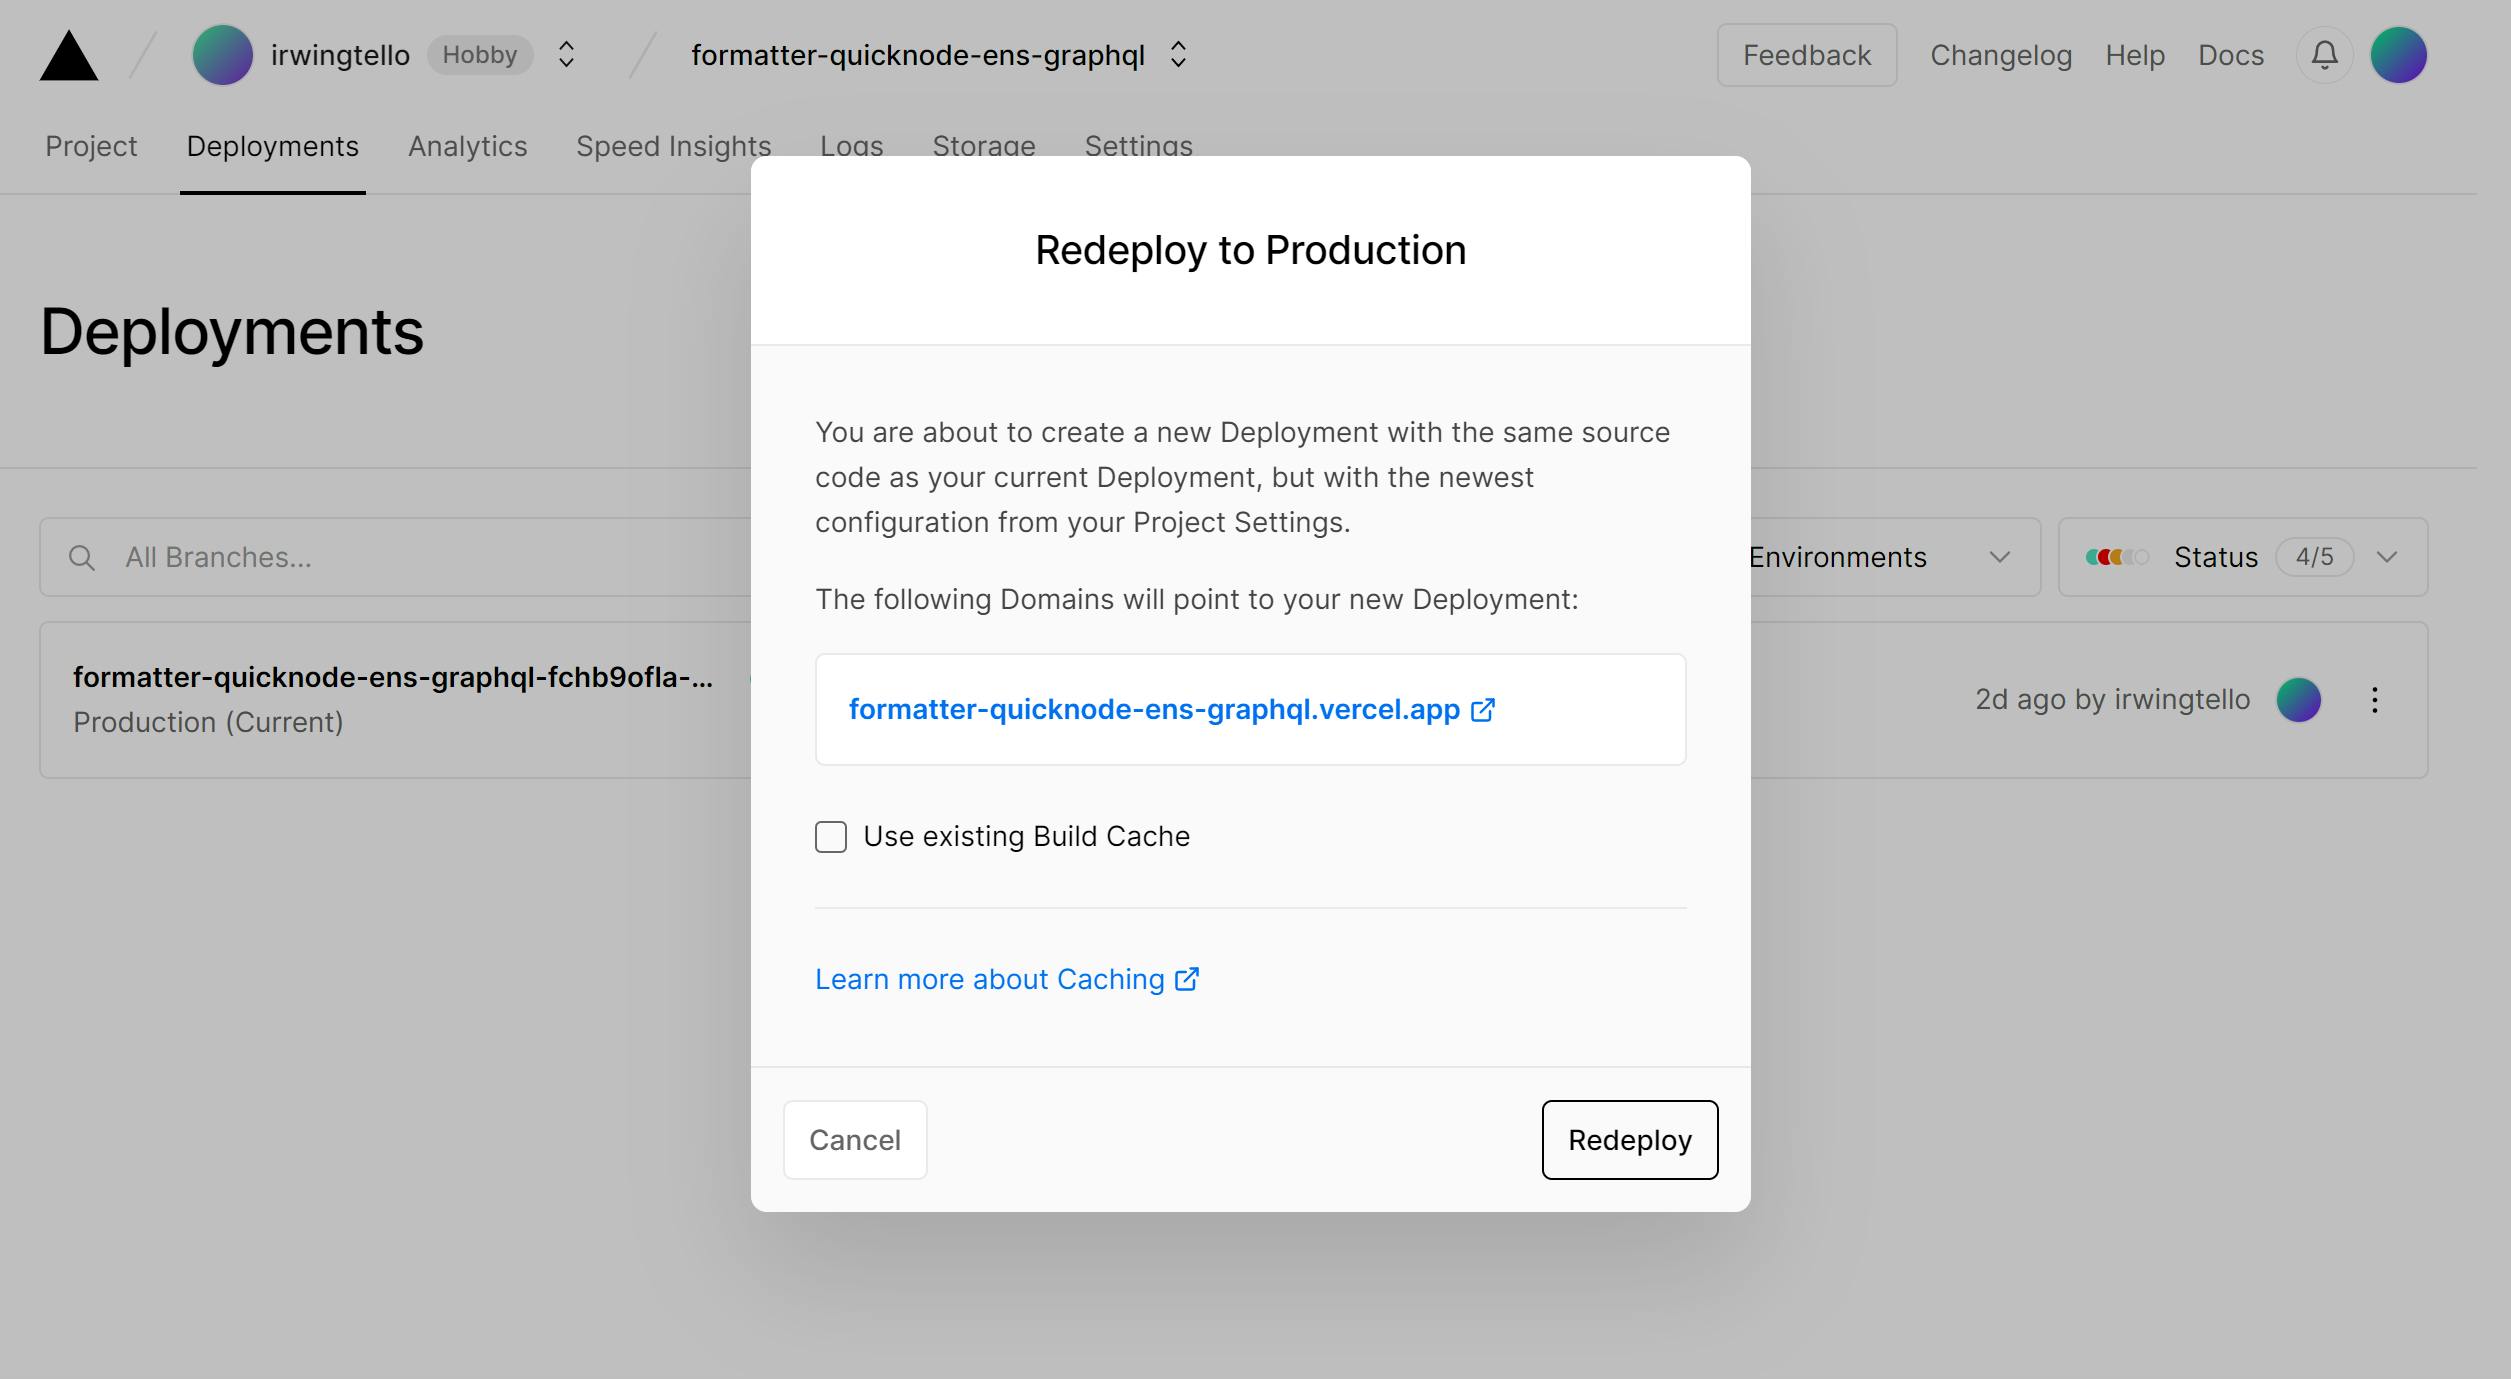
After defining our variable, the next step is to redeploy our service. To do this, please follow these steps:
Go to the "Deployments" tab in your service dashboard.
Locate the last deployment.
Click on the three dots next to the deployment.
Select "Redeploy" from the dropdown menu.
Wait for the redeployment process to complete.
Once our formatter is deployed, we need go to bubble.io in the "Plugin section"
Next, you will need to construct the request to retrieve the data from icy.tools.
Furthermore, I adapted the response to be compatible with bubble.io, although it's the same concept.
But don't worry, these changes won't affect the workflow if you have other ideas you'd like to try. 🙂
To retrieve our data we need to do these things:
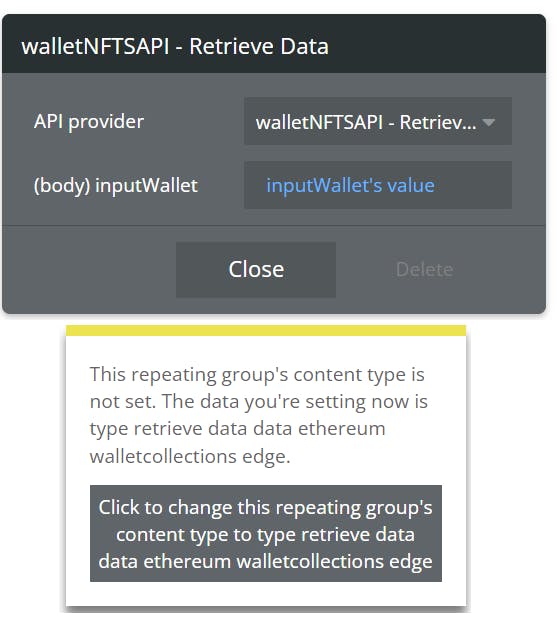
Change the api name in my case is "walletNFTSAPI".
Change the call name in my case is "Retrieve Data".
Change use as to "Data"
Change the data type to "JSON"
Change the call method to "Post"
Next to the "Method" Box change the service URL, remember we deployed our custom service, please write that URL.
Add a shared header
Key - Content-Type
Value - application/json
Change the body type to "JSON"
Add one parameter:
wallet - In this field you can put your ens address or ethereum address.
- Please uncheck the private field checkbox.

Once the value for the "wallet" attribute it's defined, click on the "Initialize call" button to proceed.
In the following steps, a screen displaying the retrieved value for our service will be presented, after that you need to click the “Save” button.

Once the data has been obtained, navigate to the "Design" section. Then, modify the content type in the repeating group to retrieve the attributes from the data. The resulting display should resemble the following:
In the data source field, search for the option "Get data from an external API"
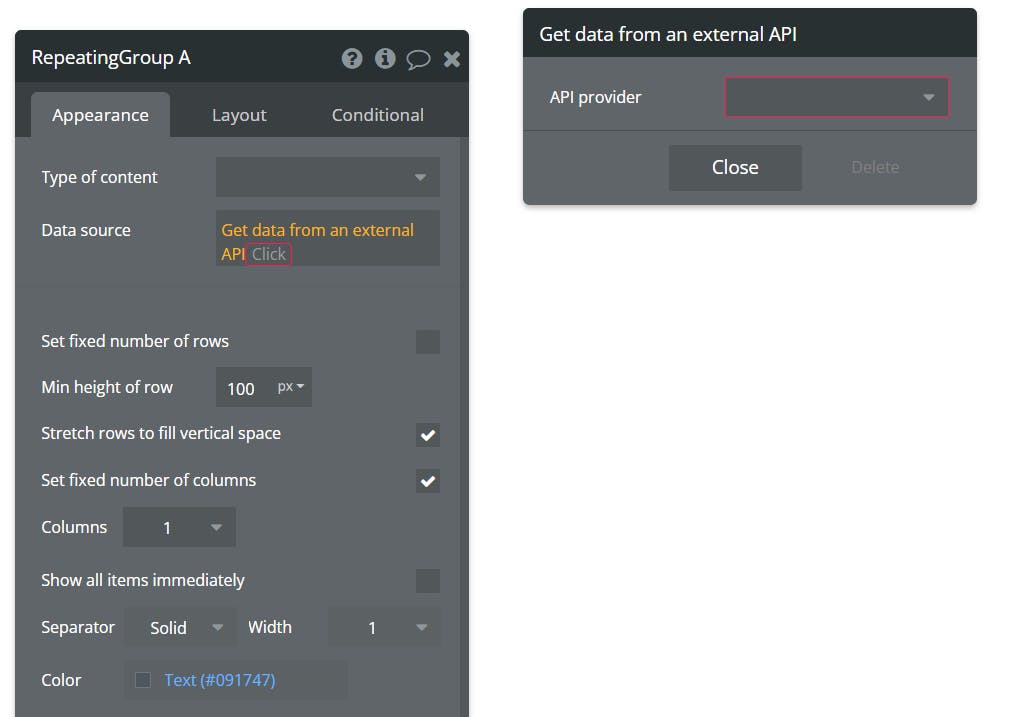
After that, you will see another option called "Get data from an external API"
In this field, you need to change the API Provider, we created this provider when we defined our petition.
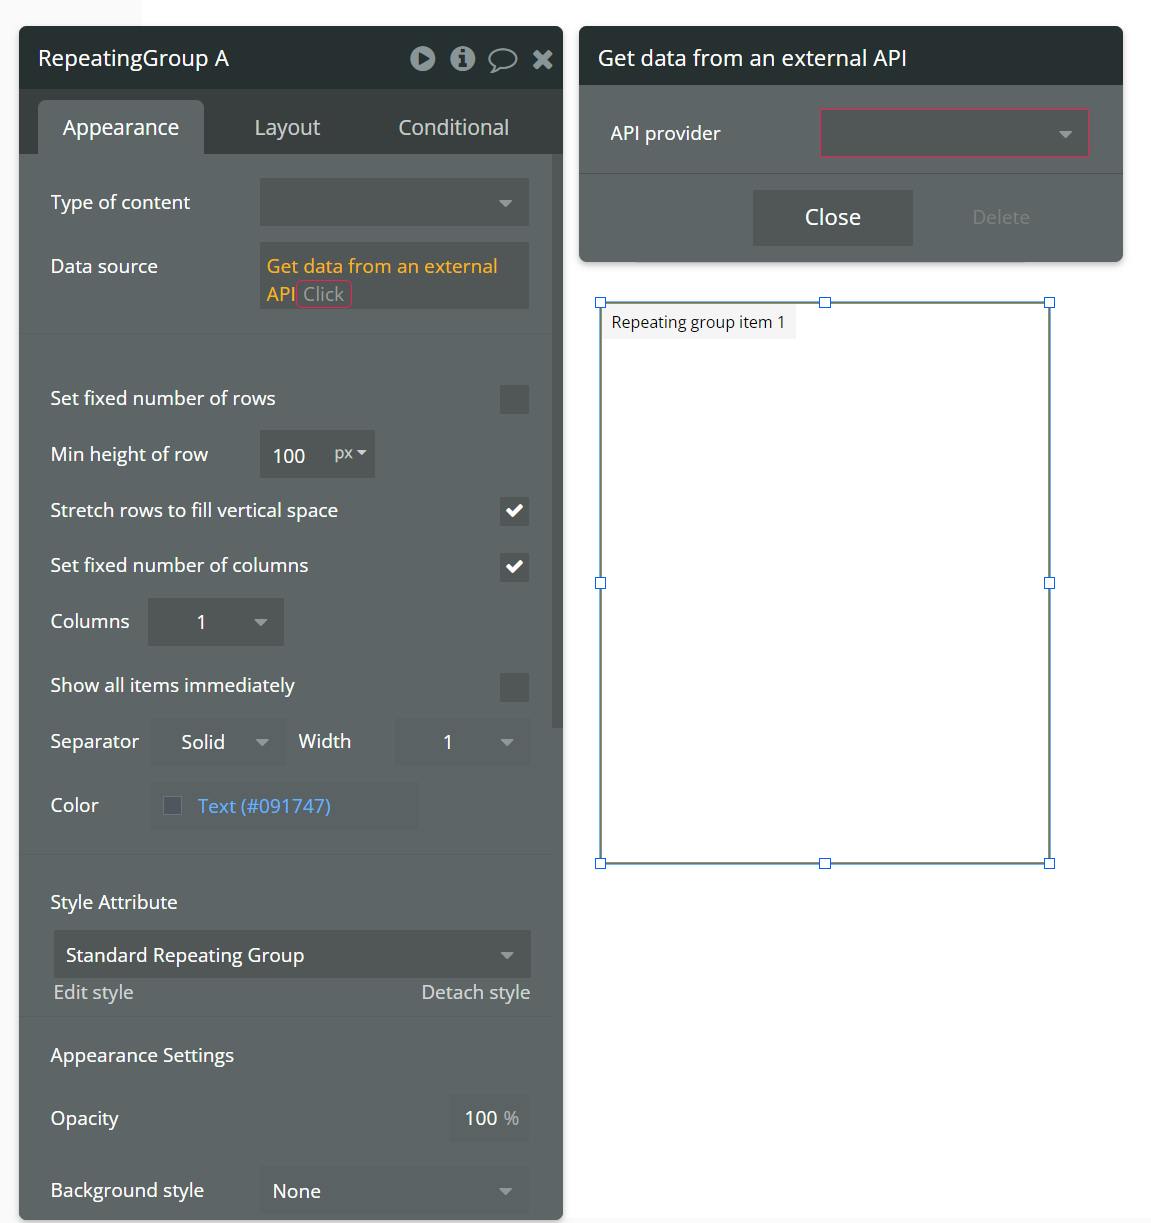
Then, you'll see another option:
In the pop-up, click on the button "Click to change this repeating group's content type to type retrieve data".
In the param "inputWallet", we need to retrieve the param from the inputWallet value.
In the pop-up, click on the button "Click to change this repeating group's content type to type retrieve data".
After defining the param, the data it's already configured to receive in our repeating group, but we need to retrieve the attributes.
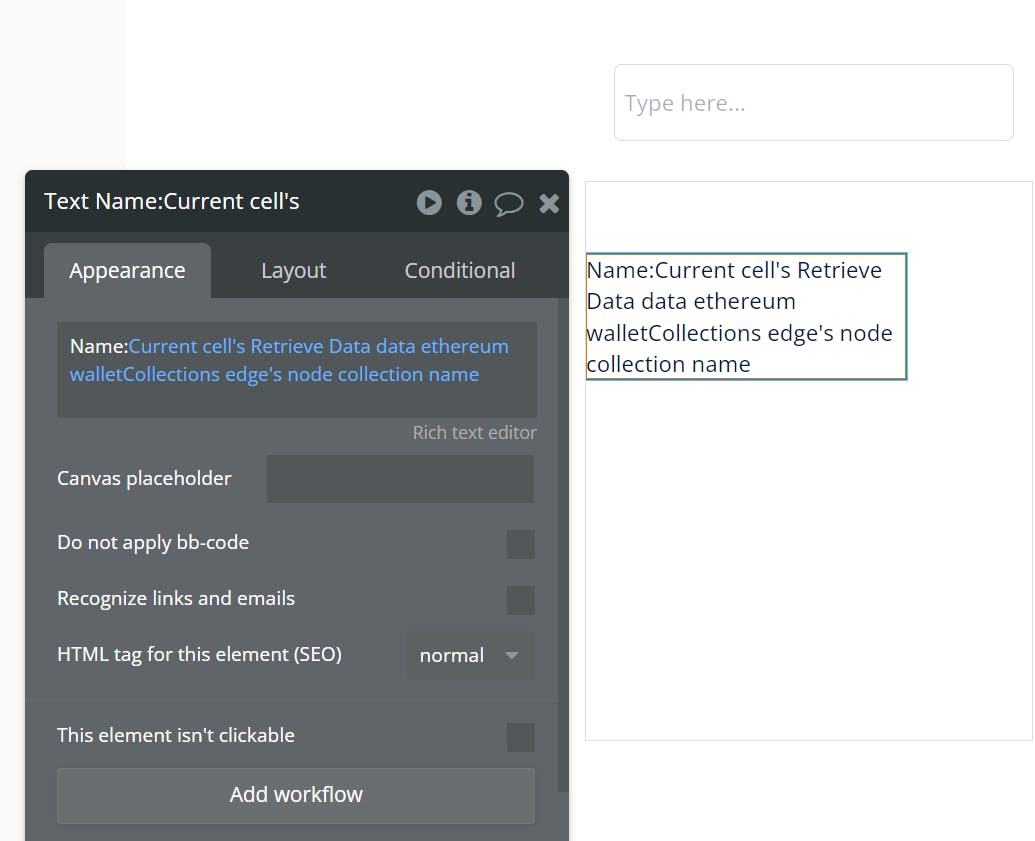
To add a text attribute, you need to drag and drop a text element inside.

You can add text inside the repeating group element. Next to the colon, we need to retrieve the first attribute from our data.
To do this, you need to select the option 'Current cell's Retrieve Data' from the drop-down menu. After that, the available attributes will appear, and you can select the desired one to display.
If you want to retrieve all the data from our service, you need to repeat the same steps for each attribute that you want to display.
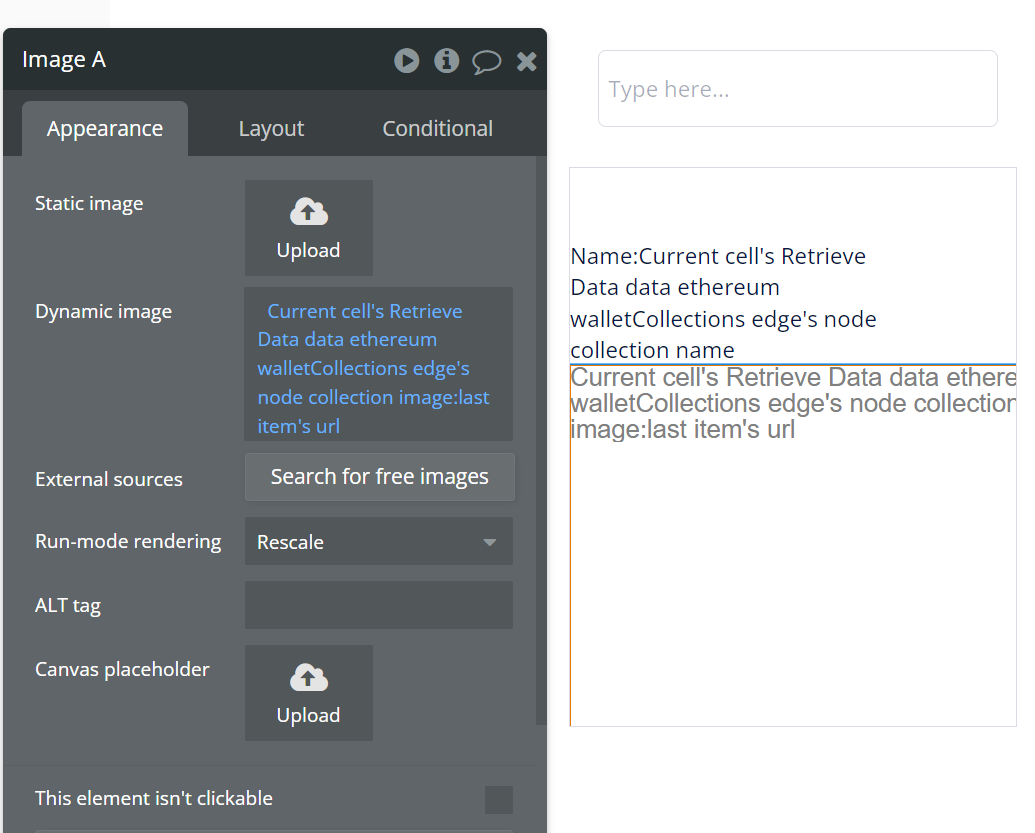
If you need to retrieve the image from your NFTs, you need to drag and drop the image element inside the repeating group:
After that, select the option 'Current cell's Retrieve Data images:last item's url' from the drop-down menu. This will display the largest image.
In my case, I personalized my repeating group like this:
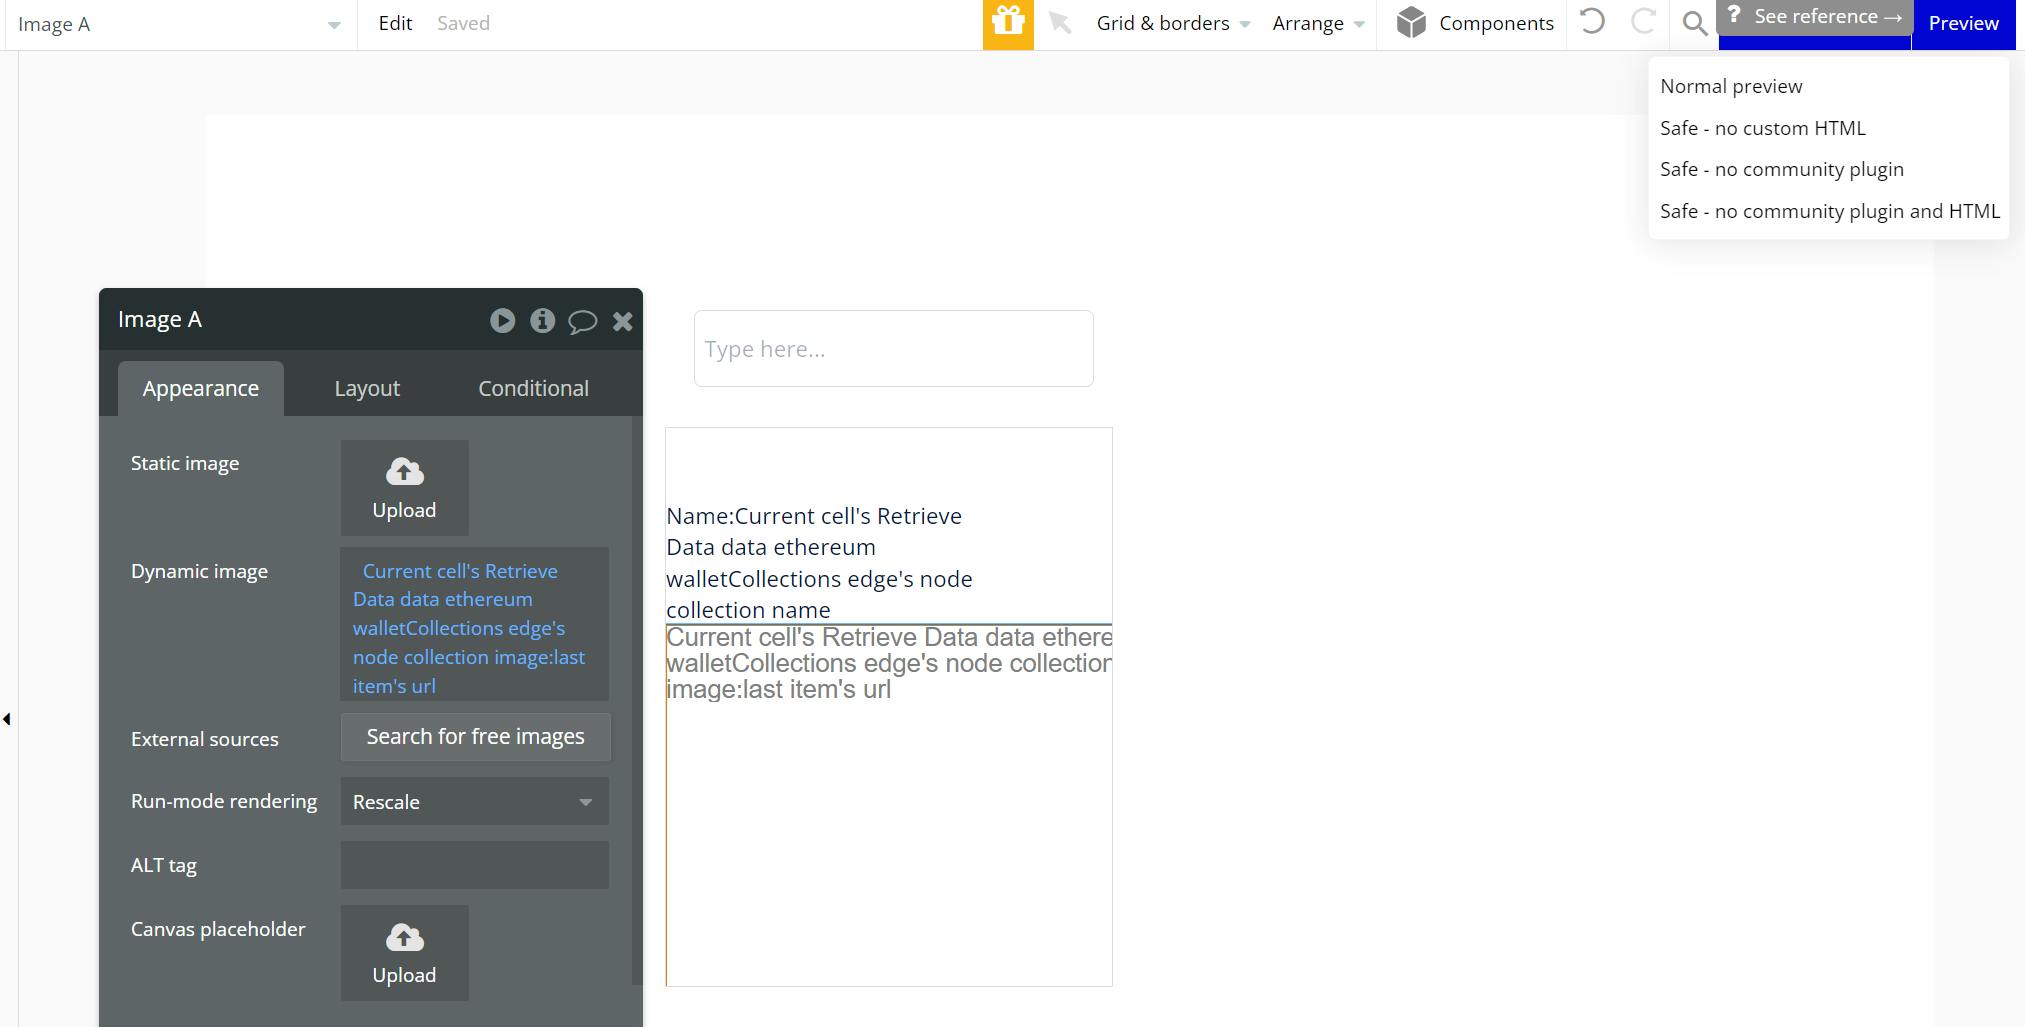
To view your results, please locate and click on the 'Preview' button in the menu.
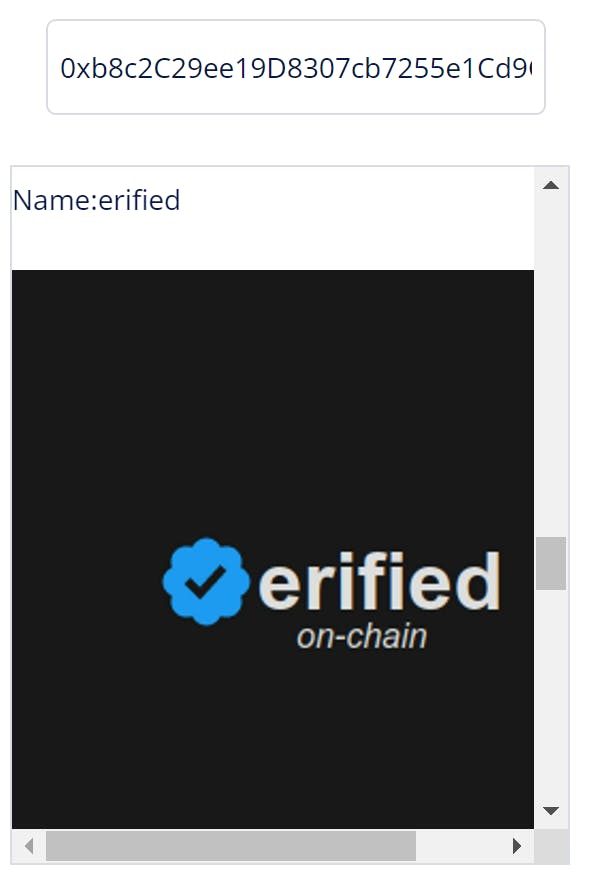
Your site will look something like this!
Conclusion
Great job! You've accomplished the construction of your no-code NFT visor.
We believe this project has provided you with a valuable learning experience and a chance to improve your skills in the captivating field of blockchain technology.
Keep up the fantastic work, and we eagerly anticipate witnessing your upcoming creations.
We ❤️ Feedback!
If you have any feedback or questions on this guide, let us know. Or, feel free to reach out to us via Twitter or our Discord community server.
We’d love to hear from you!
Author: Irwing Tello
Discord: https://discord.com/invite/ADjtsHVreT
Twitter: https://twitter.com/irwingtello
LinkedIn: https://www.linkedin.com/in/irwingtello/
Email: irwing@dfhcommunity.com
Website: dfhcommunity.com
Youtube: https://www.youtube.com/@irwingtellomx
You can support my work here:
https://www.buymeacoffee.com/irwingtello
BTC: 34kXK9CpTJP1PyHKw2kUD2bt6rtGcG5CHY
EVM Address: 0x8B98F8Ff69d2A720120eD6C71A9Bc5072b8Eb46D
Solana: Ey9oVFHW79giacRZaKxigYjeihMsY7ox8jxc7Hp1sJmS