
Retrieve any NFT from your EVM blockchain collection instantly and securely with a discord bot using QuickNode


Table of contents
- Overview
- What We Will Do
- What You Will Need
- What is QuickNode?
- What isDiscord?
- Creation of ourdiscordbot
- Obtaining information from QuickNode
- Creating a service to retrieve information for our Discord bot
- Setting up our service on Discord
- Exploring your first NFT Discord Bot on your community
- Conclusion
- We ❤️ Feedback!
Overview
When we're in the world of blockchain, we often hear about the great things one blockchain can do. So, we decide to create something on that blockchain.
For example the: Base, Polygon ZKEVM, Filecoin Virtual Machine , and more...
We discovered something common called the Ethereum Virtual Machine.
In simple terms, it's like a place where we can deploy our smart contracts. However, sometimes, some smart contract actions don't work together because each blockchain has its own rules.
However, we realize that there aren't many tools available to help us, and the tools provided by new companies often don't work well.
I've taken steps to assist you. If you're curious or new to this, you can use this tutorial to understand and build on this solution.
You can build this:
Let's goooo on this journey! 🚢
Disclaimer: This tutorial only works if your smart contract has the standard methods for ERC721.
 function balanceOf(address) external view returns (uint256)
 function totalSupply() external view returns (uint256)
 function tokenOfOwnerByIndex(address,uint256) external view returns (uint256)
 function tokenURI(uint256) external view returns (string)
What We Will Do
- Configuring our bot service to retrieve data from QuickNode.
What You Will Need
What is QuickNode?
QuickNode is here to assist developers and businesses in this complicated field. Forget about the challenges of handling blockchain infrastructure.
Their nodes are well-known for their dependability and smooth operation. QuickNode ensures they always have the latest software.
They offer more than just nodes; they provide a wide range of helpful services.
Furthermore they have tools for retrieve data from NFTs on these blockchains:
These tools are professional and specialized. They are working to add more blockchain, so in the meantime, you can use this tutorial.
What isDiscord?
Discord is a super popular platform where you can chat using voice, video, and text. It's a place loved by people aged 13 and older, and it's like a big, friendly hub where you can connect with friends and communities.
Whether you're up for some casual chit-chat, want to set up gaming sessions, work on projects together, or just hang out with like-minded folks.
Discord is the perfect space for all your communication and social fun! 🎉
Creation of ourdiscordbot
To activate your Discord bot, you will need two specific values: CLIENT_PUBLIC_KEY and BOT_TOKEN, please save these values, we will need them in this section: "Creating a service to retrieve information for ourDiscordbot".
Here are the steps to obtain these values:
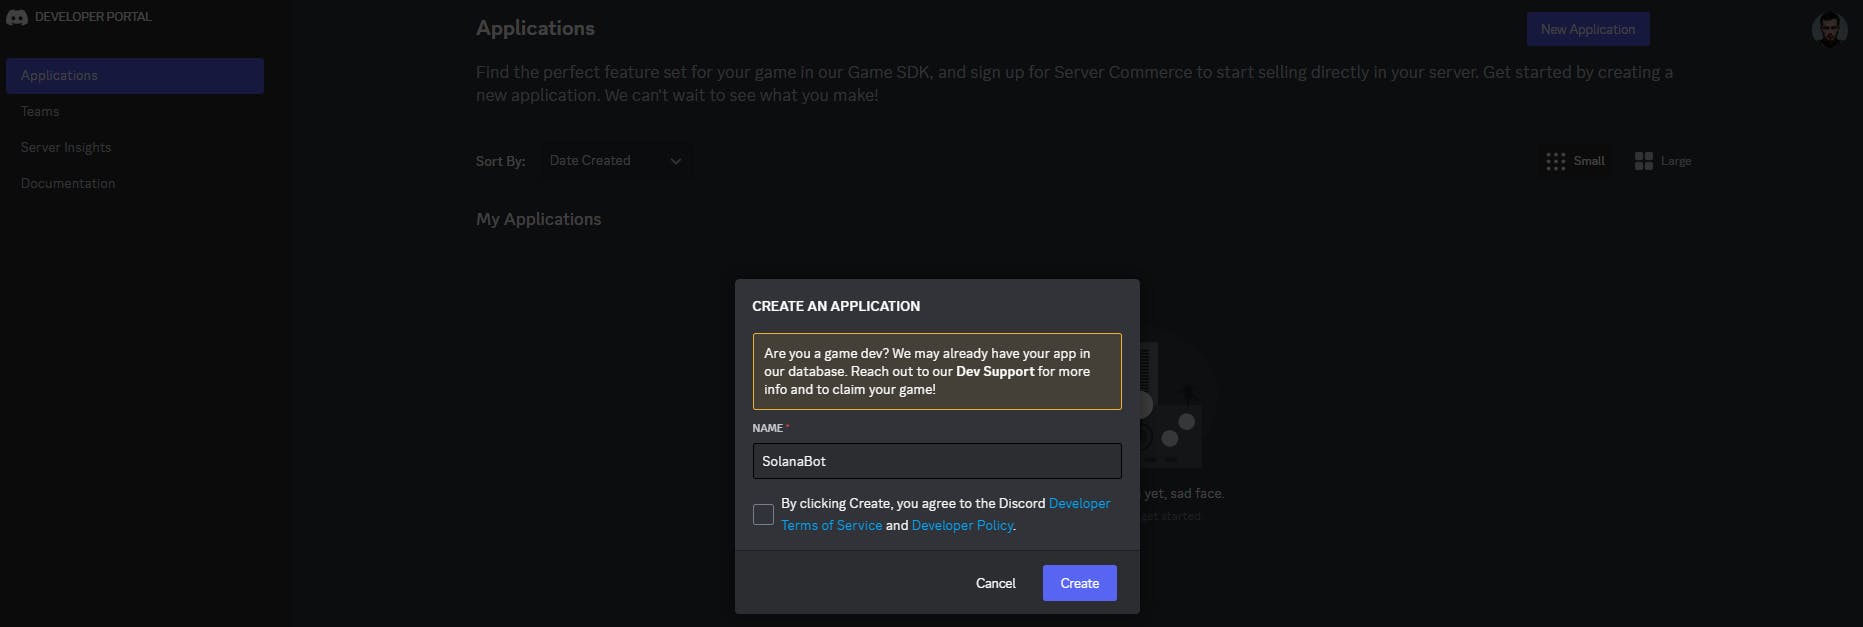
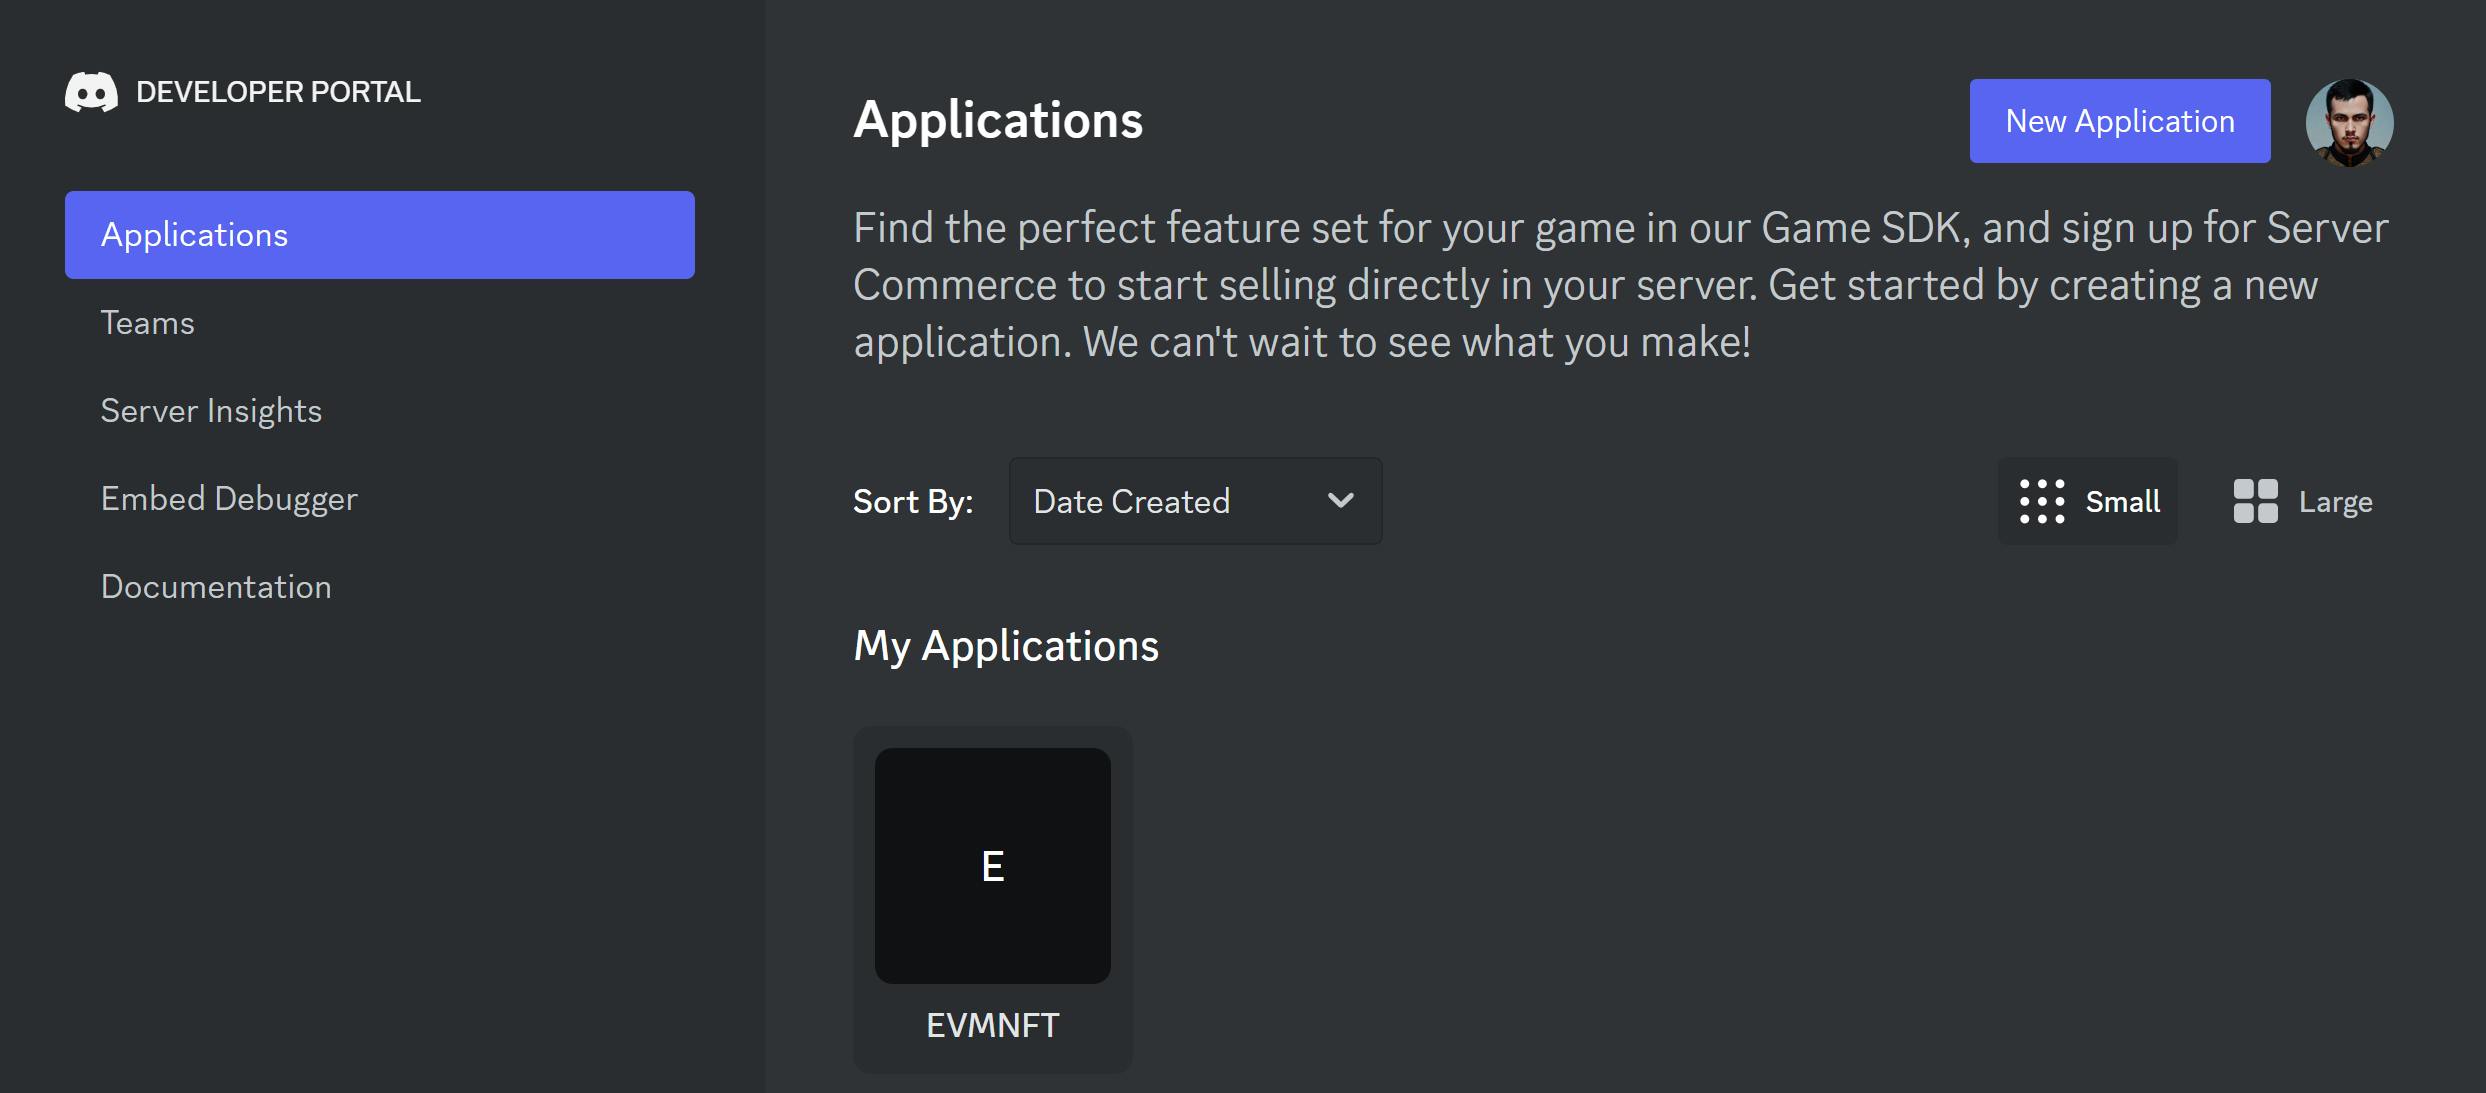
Go to the Discord Developer Portal website. You can access it by visiting discord.com/developers/applications and logging in with your Discord account.
Once you are logged in, click on the "New Application" button to create a new application for your bot. Give your application a name that represents your bot.
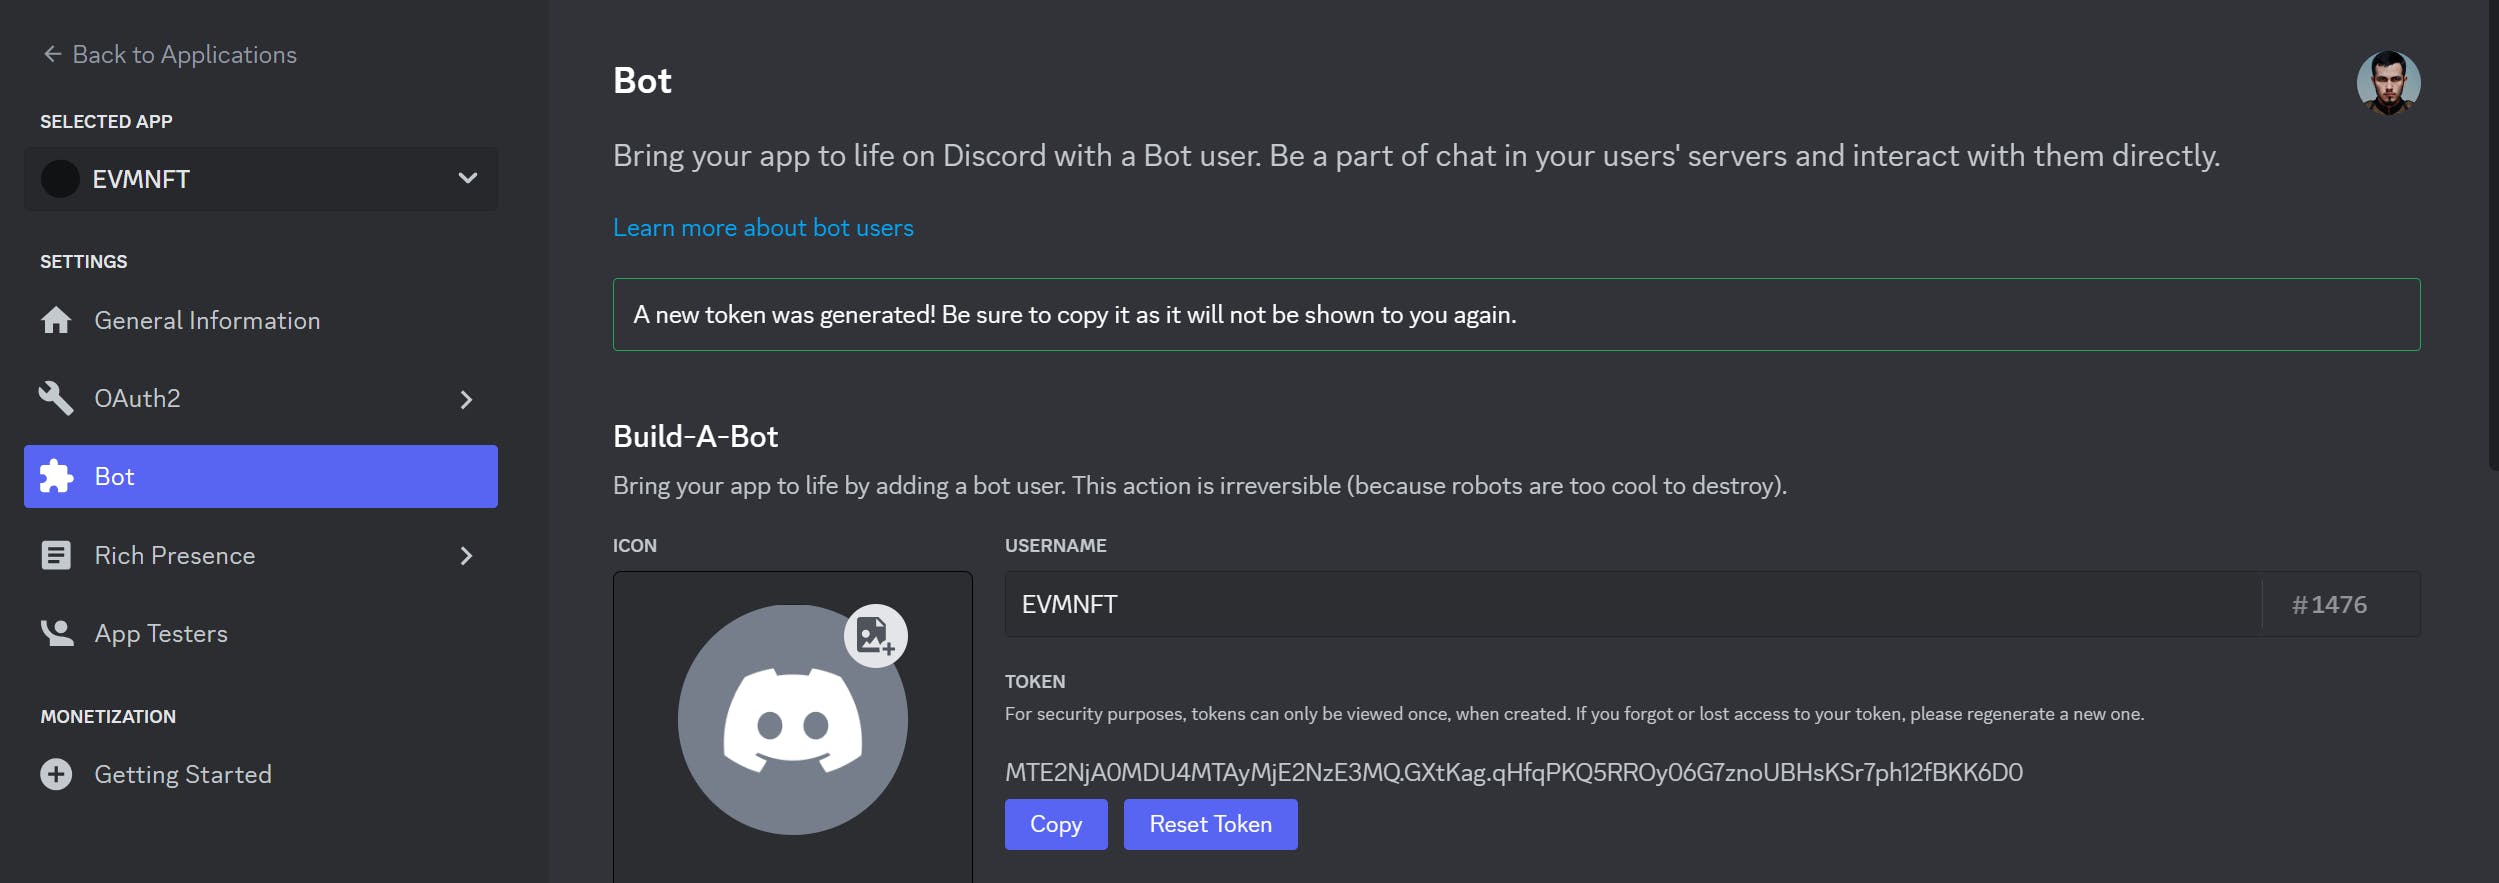
In the left sidebar, select "Bot" under the settings for your application.
Under the "Token" section, you will find your BOT_TOKEN.
Click on the "Reset Token" button.
This token acts as your bot's authentication to the Discord API. Keep this token secure and do not share it publicly.
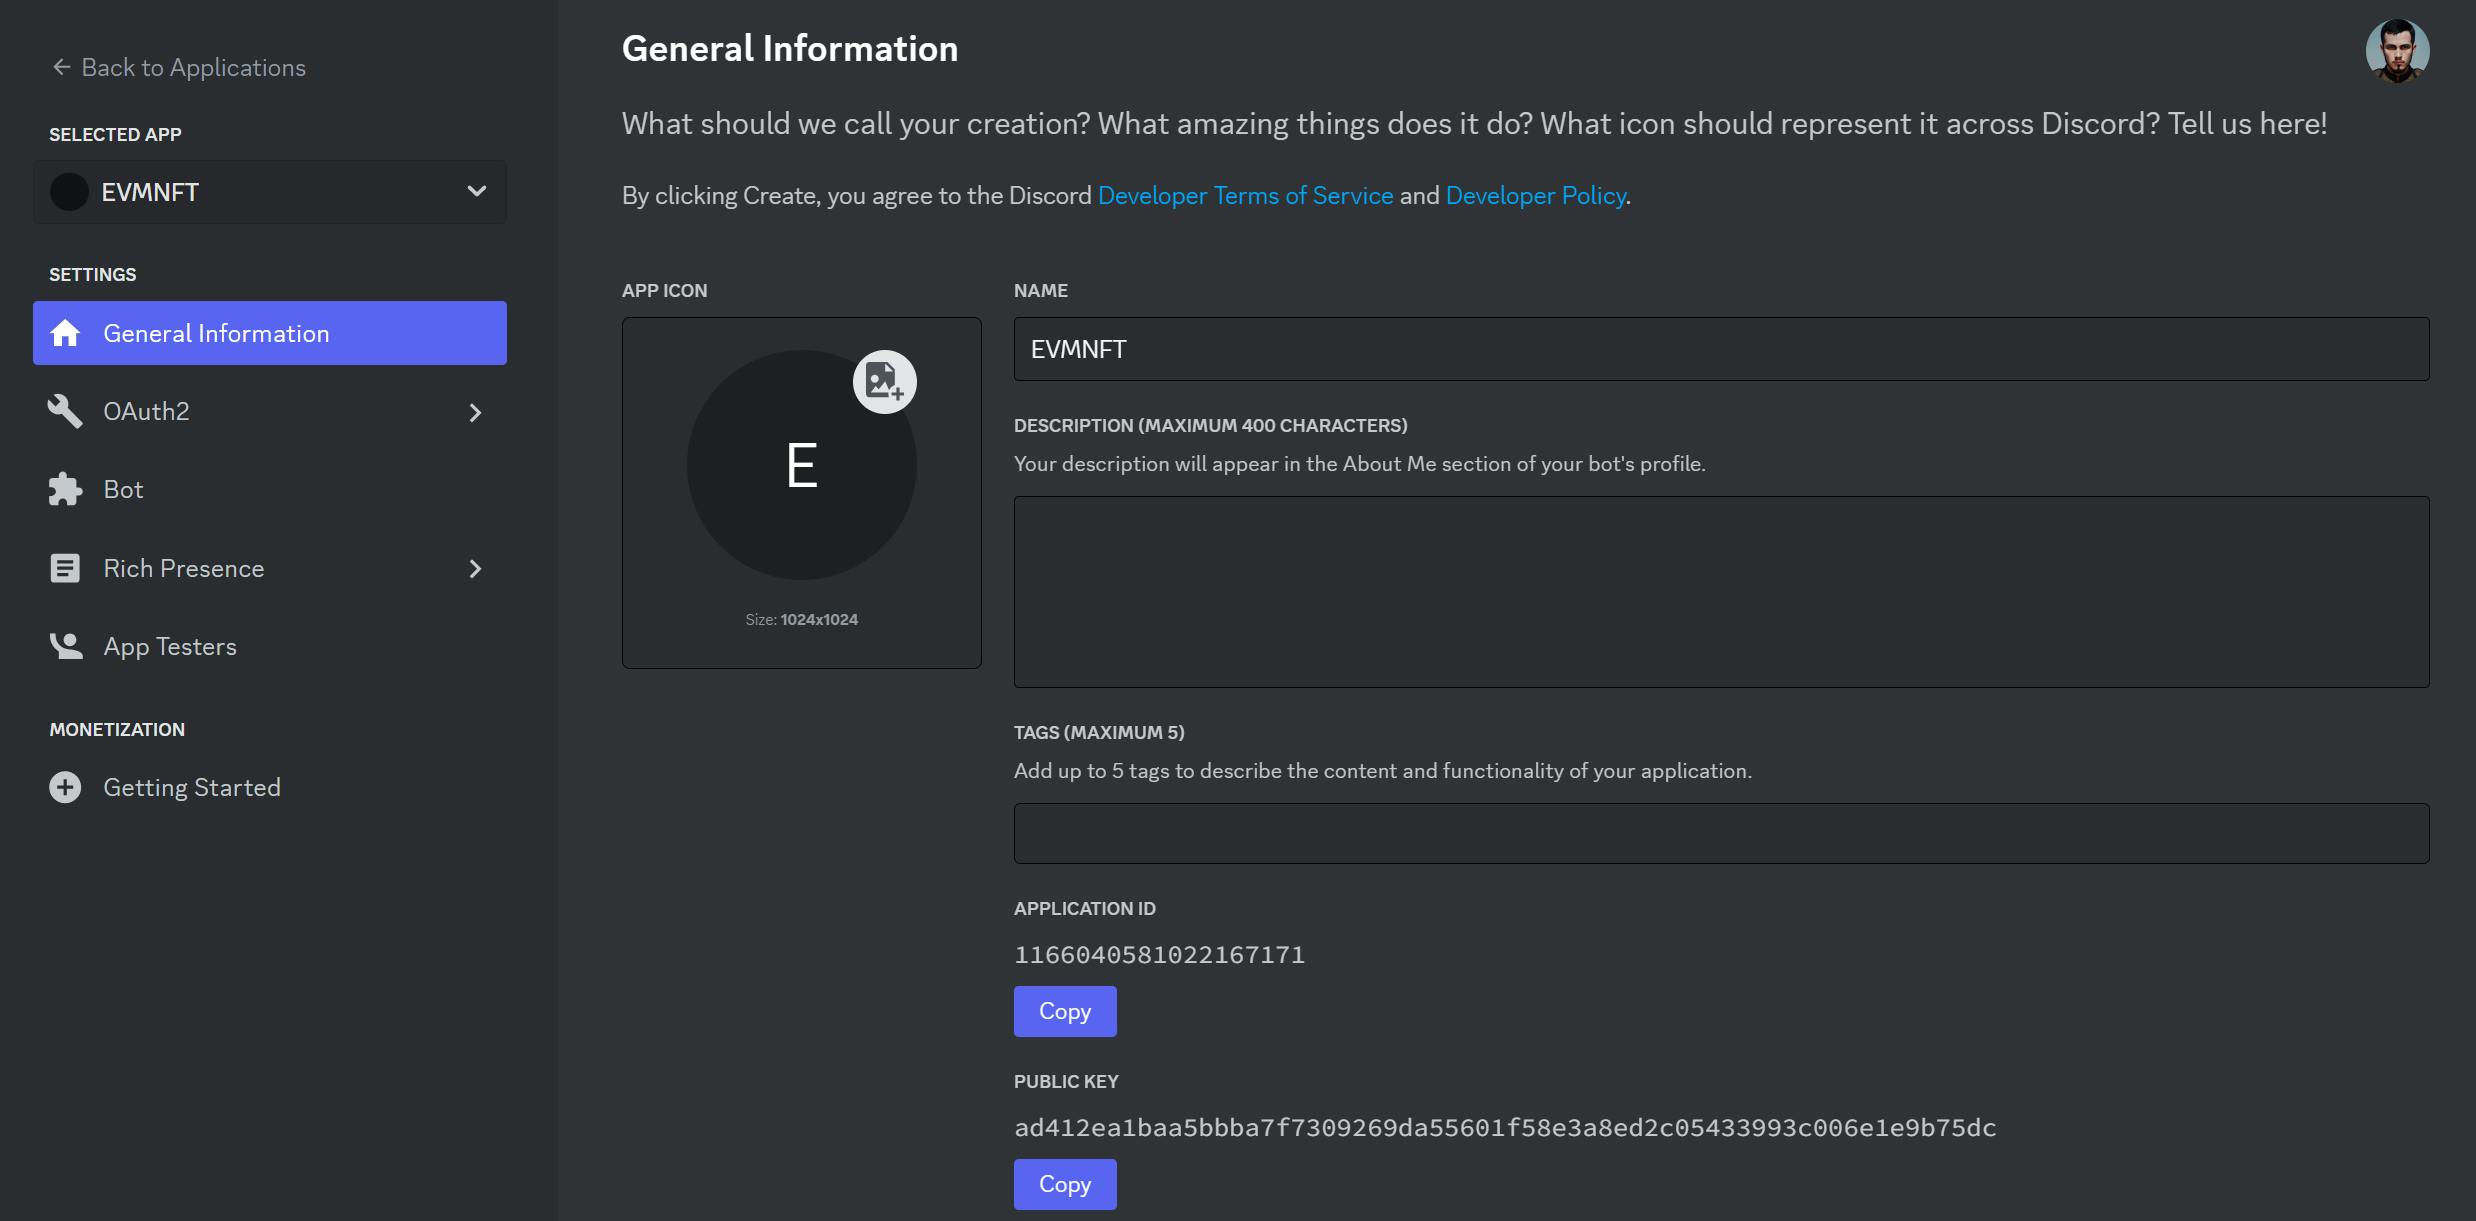
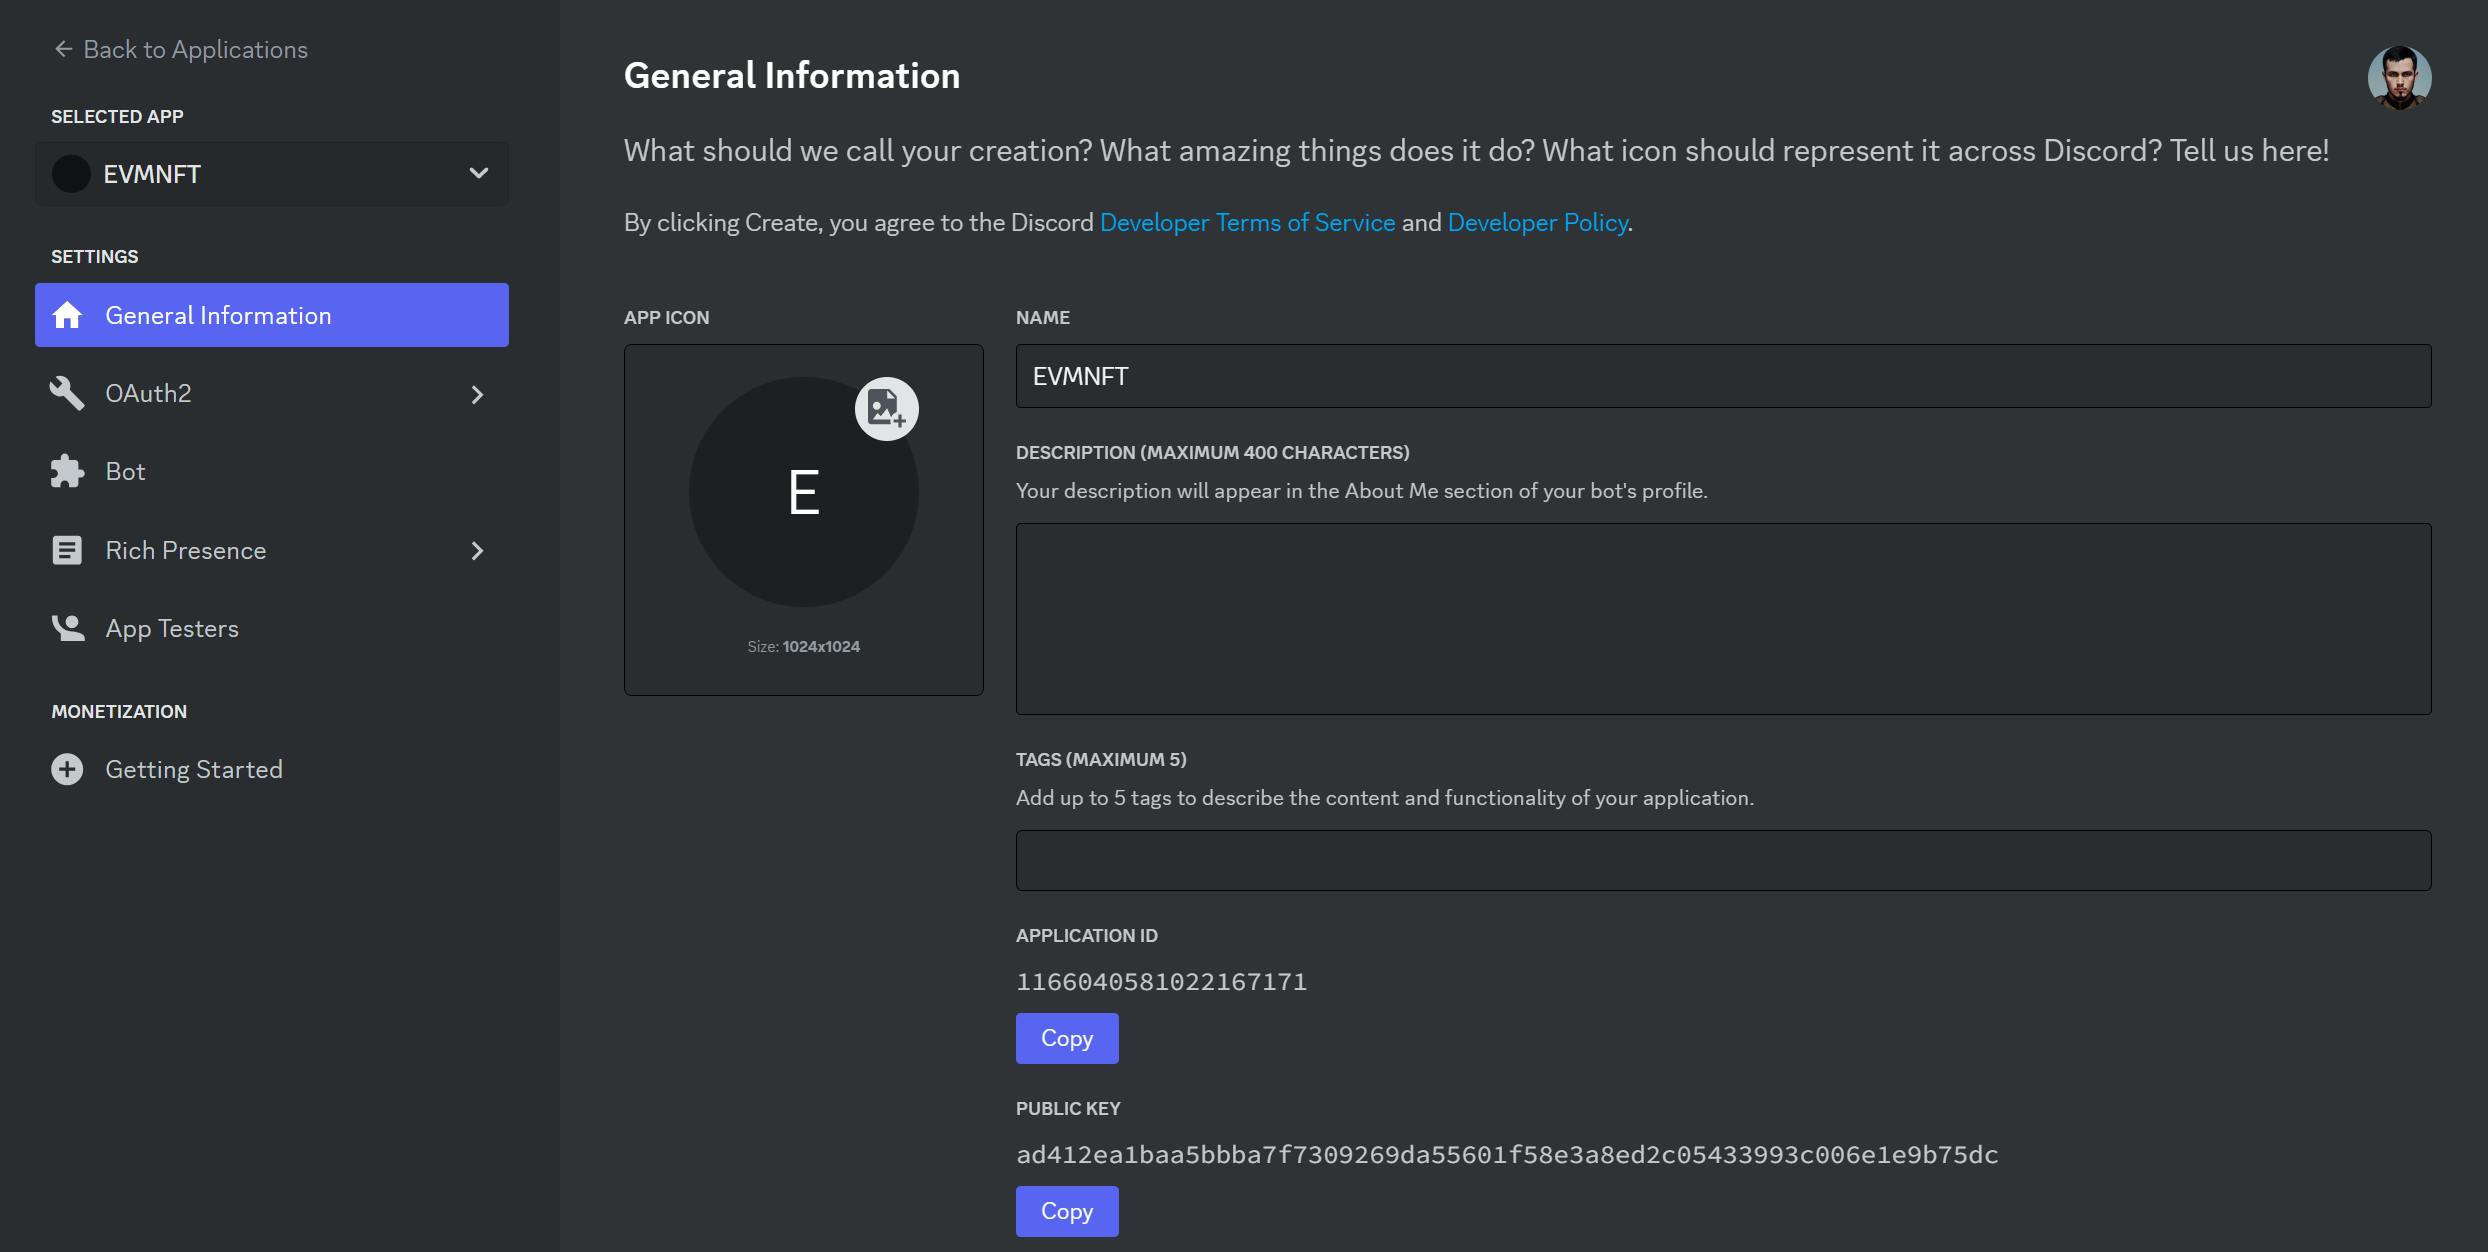
To obtain the CLIENT_PUBLIC_KEY, you need to go to the General Information setting. Search for "Public Key" and copy the value.
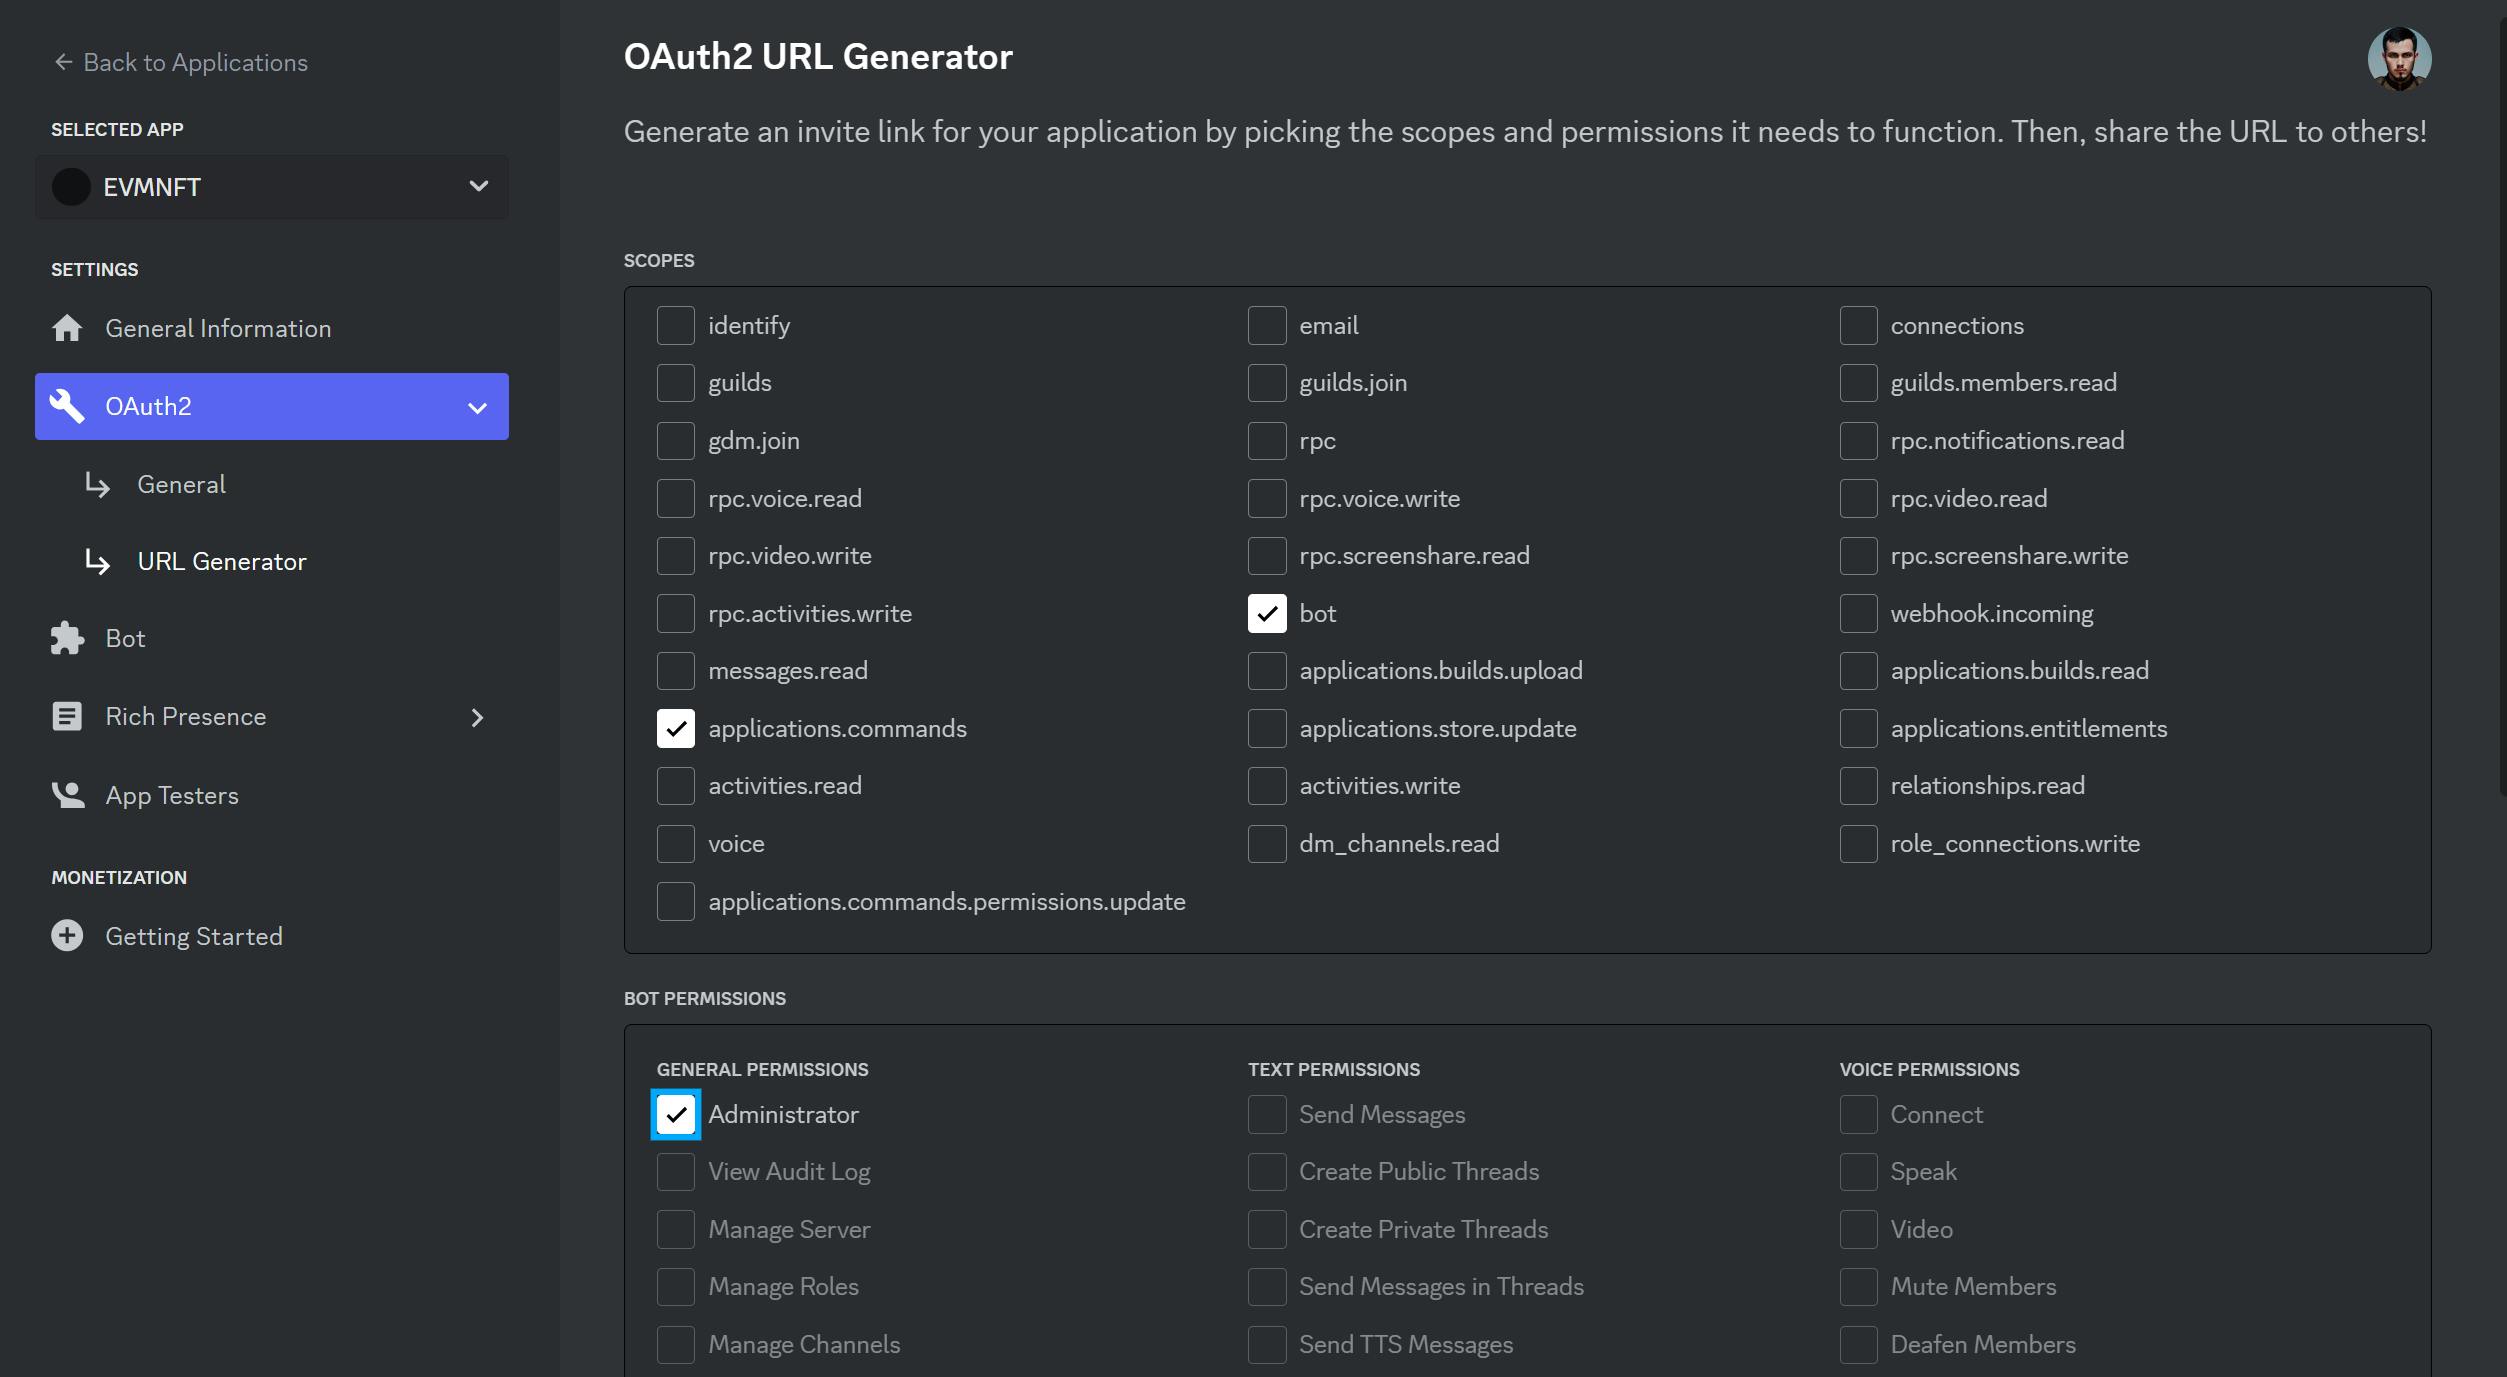
After that, you need to invite your bot to your discord, to get the invitation, go to the "OAuth2" section and search for the "URL Generator" sub-section.
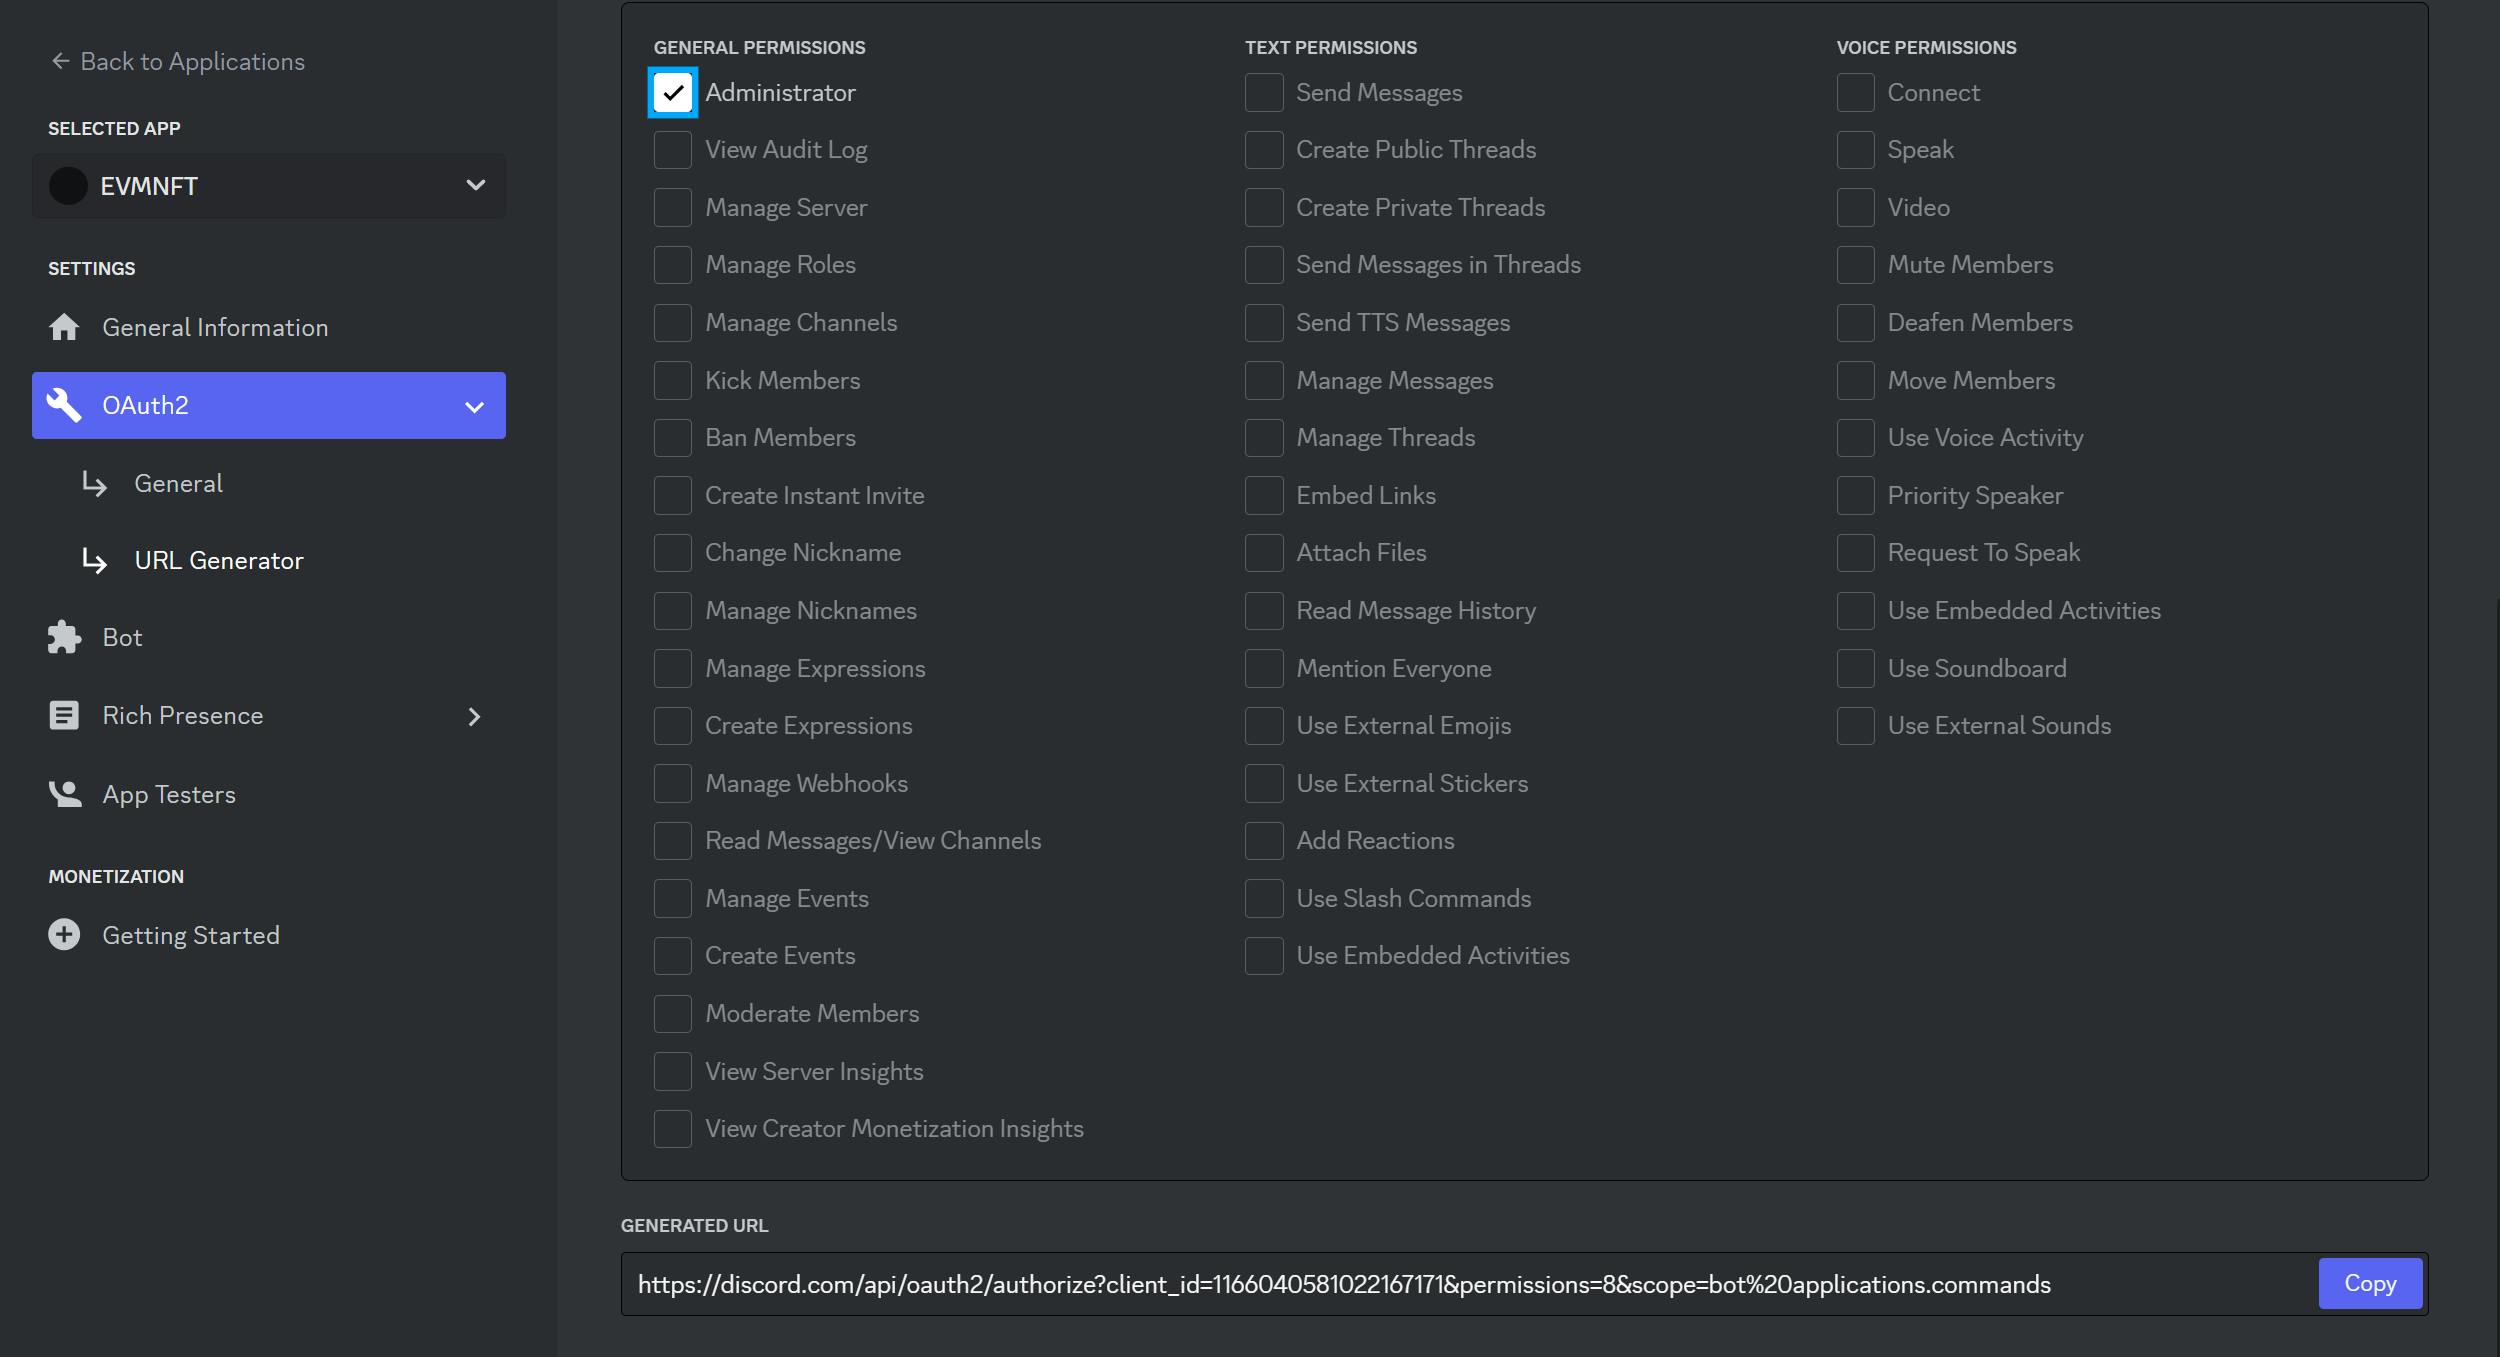
In this section, you need to check the "bot" and "applications.commands" options. After that, you can see the Bot Permissions, and check the "Administrator" option.
At the bottom, you need to copy this invitation URL.
In consequence, you need to copy the generated URL and paste it into your browser, and press enter:
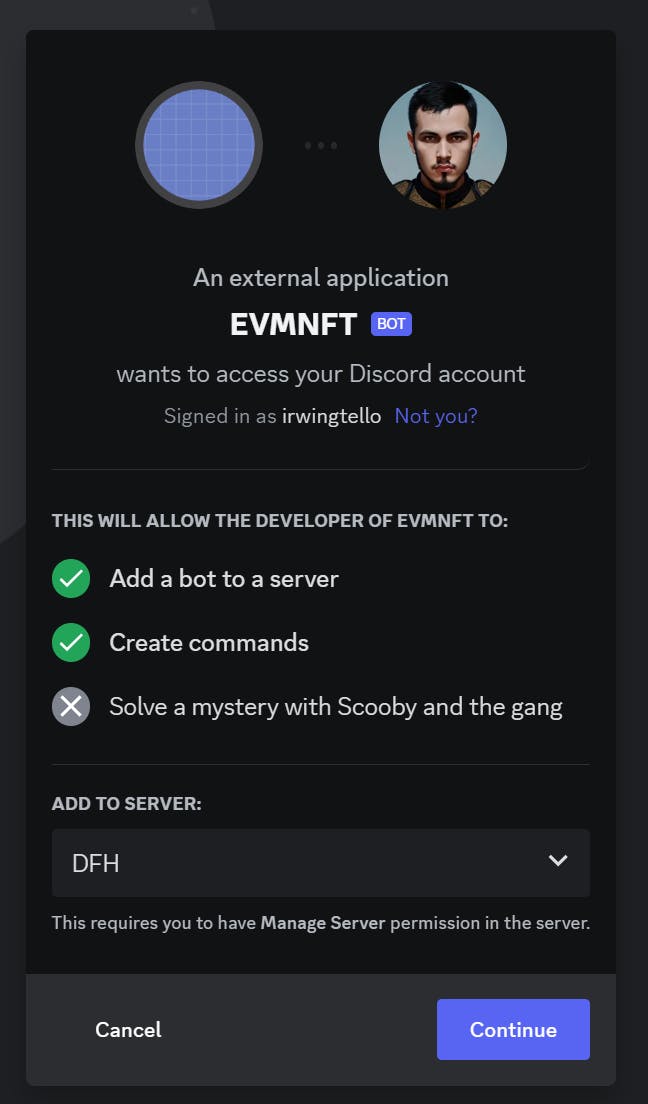
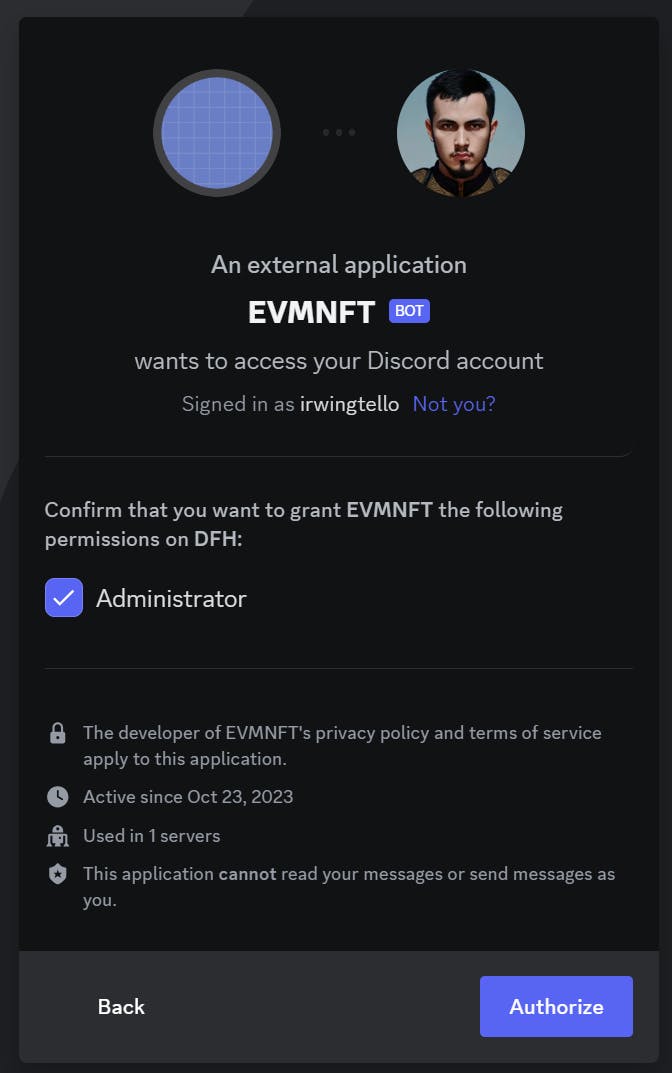
You will see a similar screen to the previous image and finally, you can see your bot on your community.
To retrieve the information from our discord bot, you need to create these two commands:
/info <wallet>
You can retrieve the NFT balance.
/retrieve <wallet>
You can retrieve the information from your NFTs.
To create the commands, you need to go to:
https://www.site24x7.com/tools/restapi-tester.htmlCreating the command "/info":
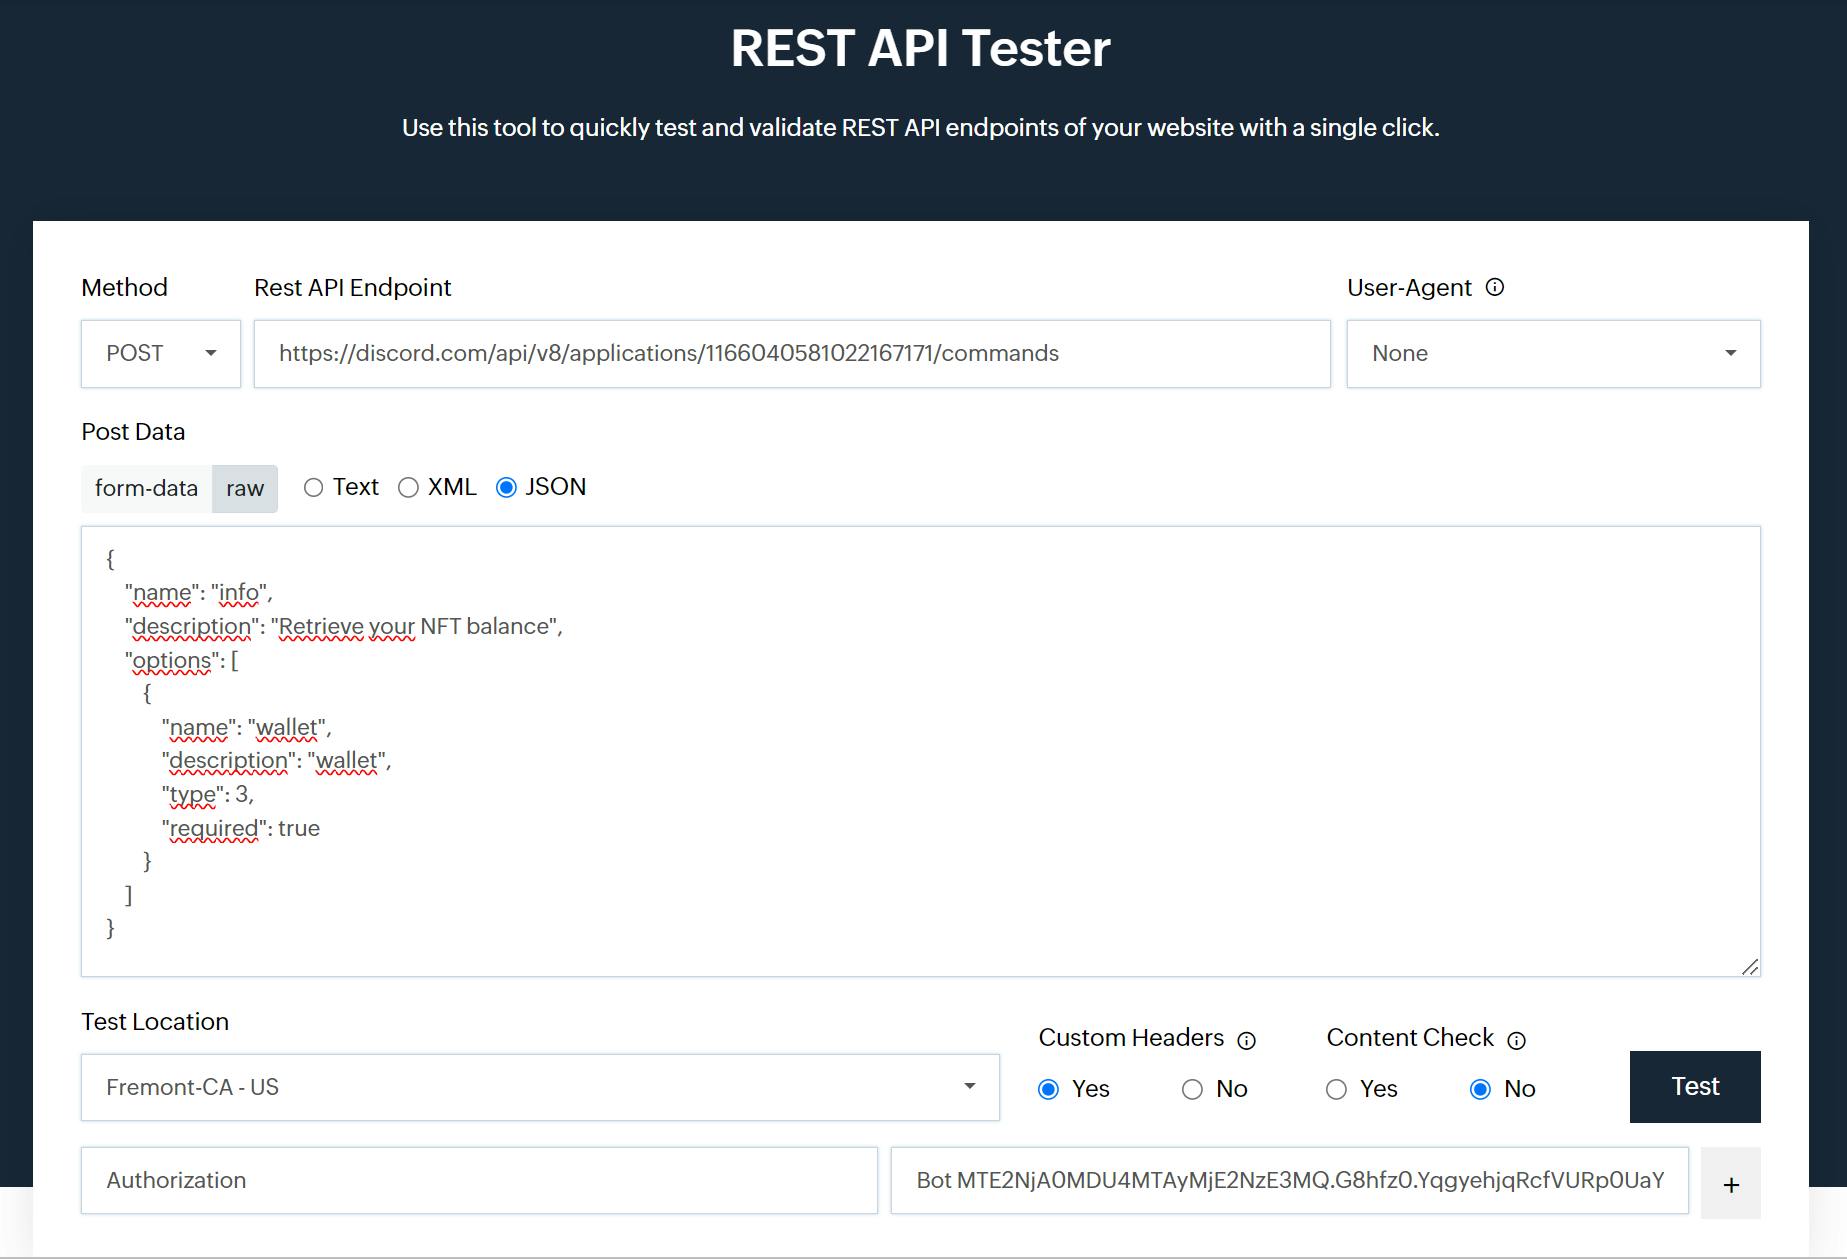
In "Method", you need to change the option to "POST"
In "Rest API Endpoint", you need to copy this URL and change the "Application ID" for the parameter returned in the following steps above:
In "Post Data" you need to check the "JSON" parameter.
Verify if the "raw" option is selected.
Copy this code and paste it as in the image above.
 {
     "name": "info",
     "description": "Retrieve your NFT balance",
     "options": [
         {
             "name": "wallet",
             "description": "wallet",
             "type": 3,
             "required": true
         }
     ]
 }
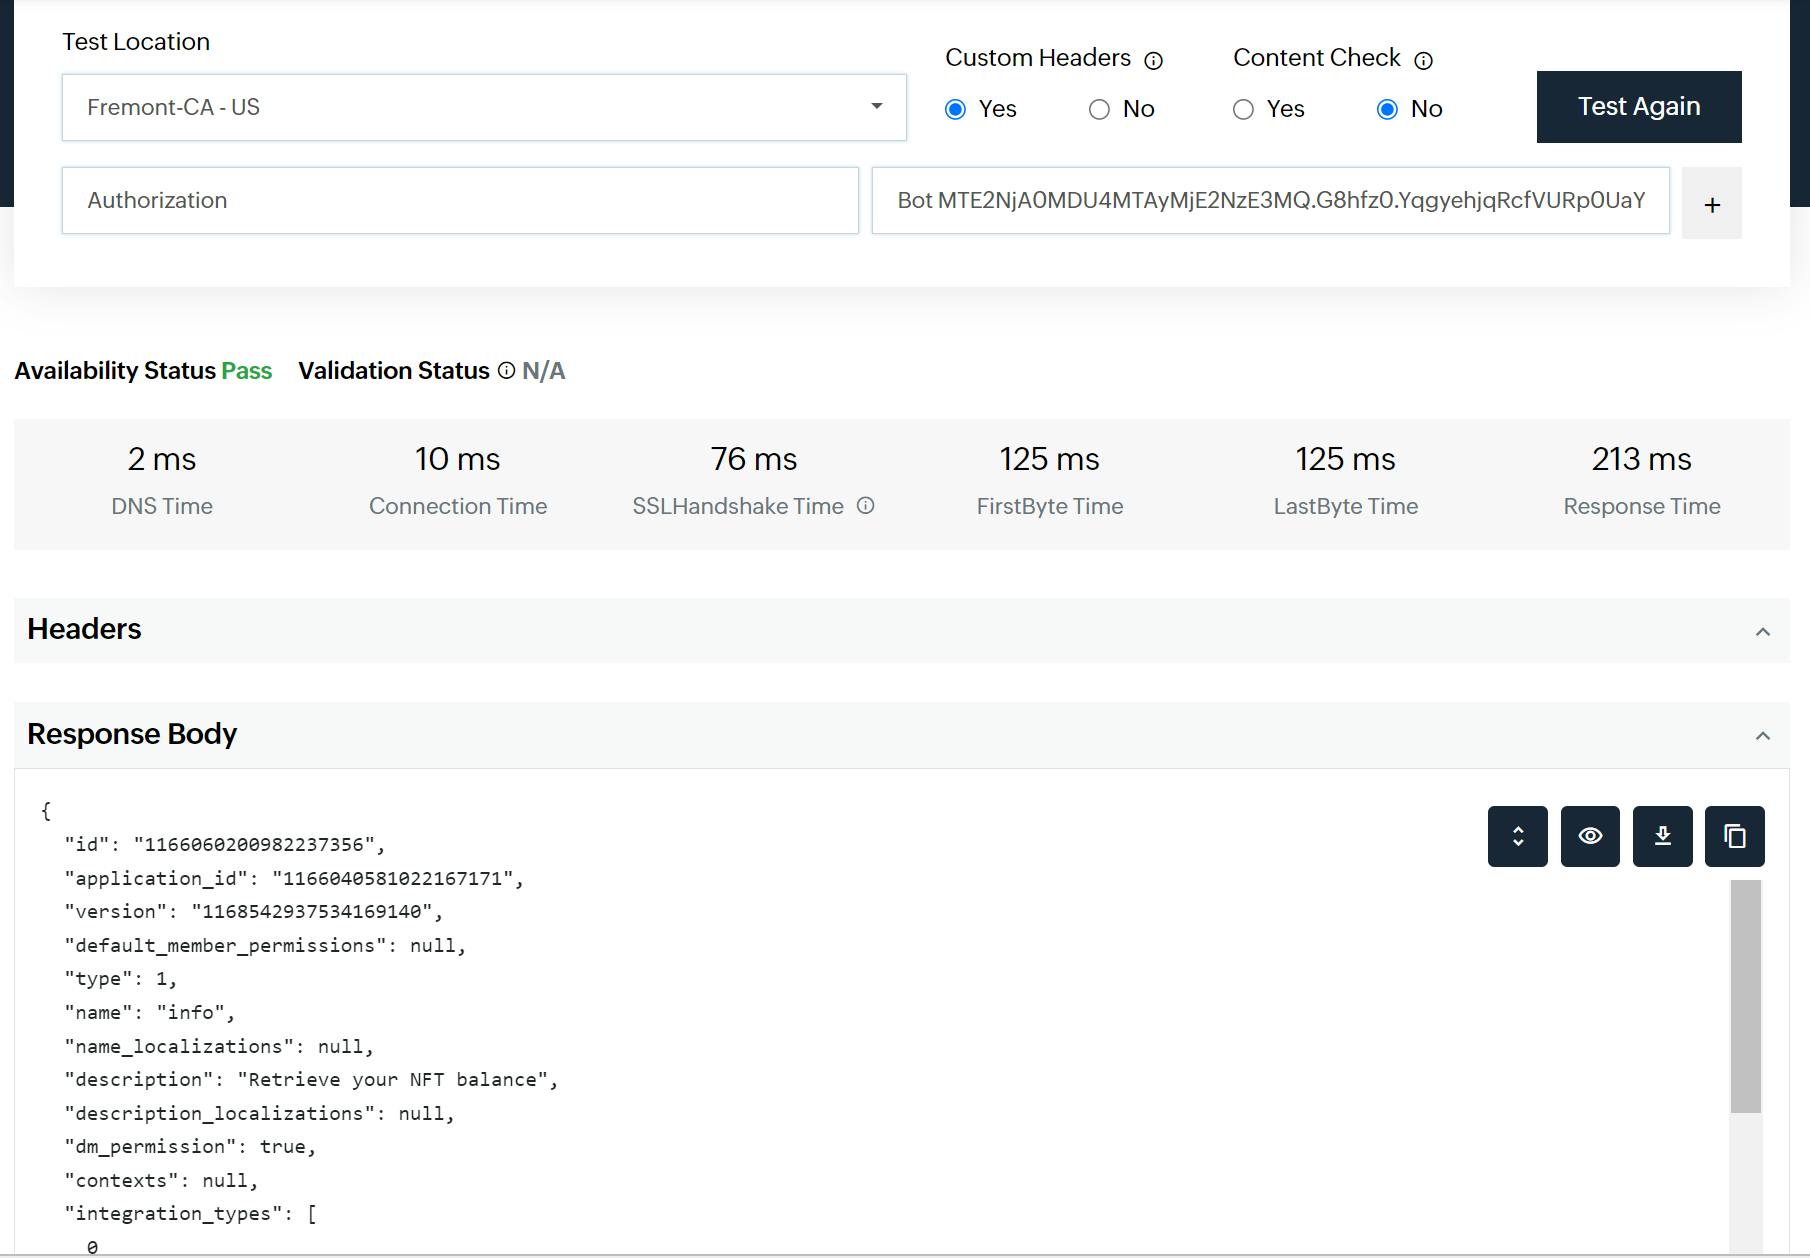
In "Custom Headers" you need to check the "Yes" parameter.
You will see two fields "Name" and "Value".
In Name, write "Authorization".
In Value, Bot <Token>.
- You need to change it with the parameter returned in the steps mentioned above.
Click on the "Test again" button.
To view the response to this petition, you can scroll down.
Creating the command "/retrieve":
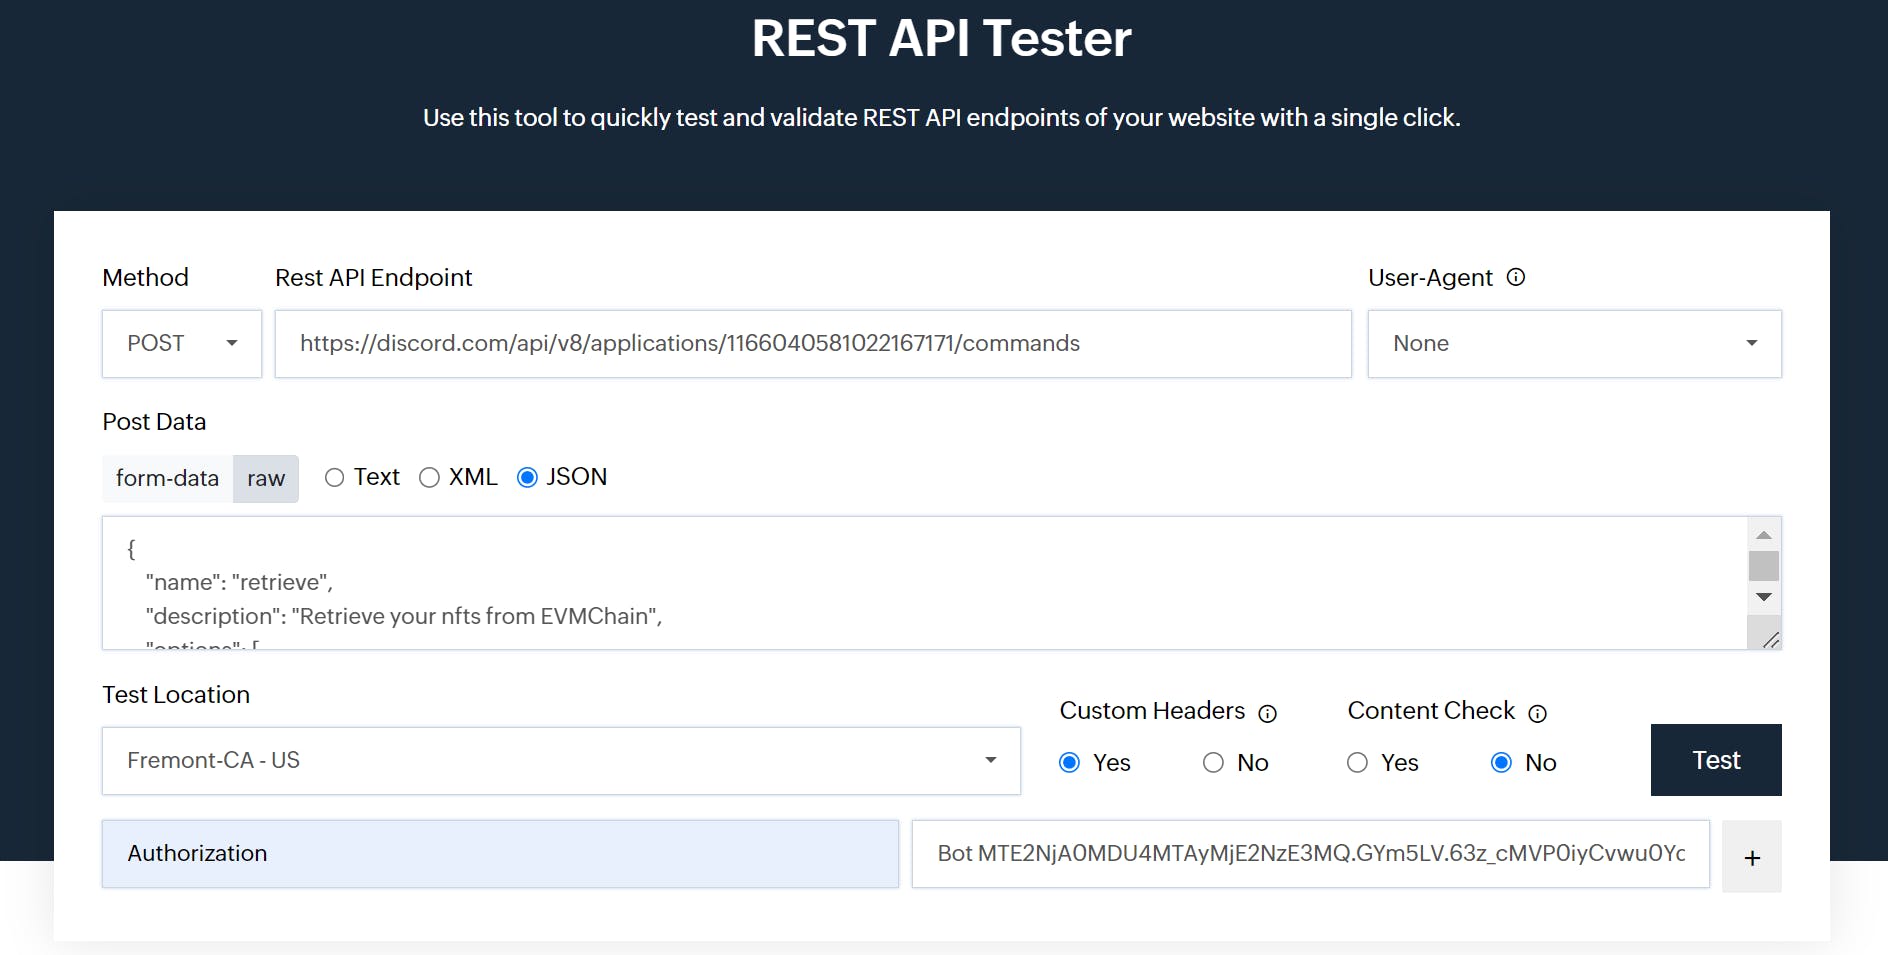
In "Method", you need to change the option to "POST"
In "Rest API Endpoint", you need to copy this URL and change the "Application ID" for the parameter returned in the following steps above:
- [discord.com/api/v8/applications/[APPLICATIO.. ID]/commands
In "Post Data" you need to check the "JSON" parameter.
Verify if the "raw" option is selected.
Copy this code and paste it as in the image above.
 {
     "name": "retrieve",
     "description": "Retrieve your nfts from EVMChain",
     "options": [
         {
             "name": "wallet",
             "description": "wallet",
             "type": 3,
             "required": true
         }
     ]
 }
In "Custom Headers" you need to check the "Yes" parameter.
You will see two fields "Name" and "Value".
In Name, write "Authorization".
In Value, Bot <Token>.
- You need to change it with the parameter returned in the steps mentioned above.
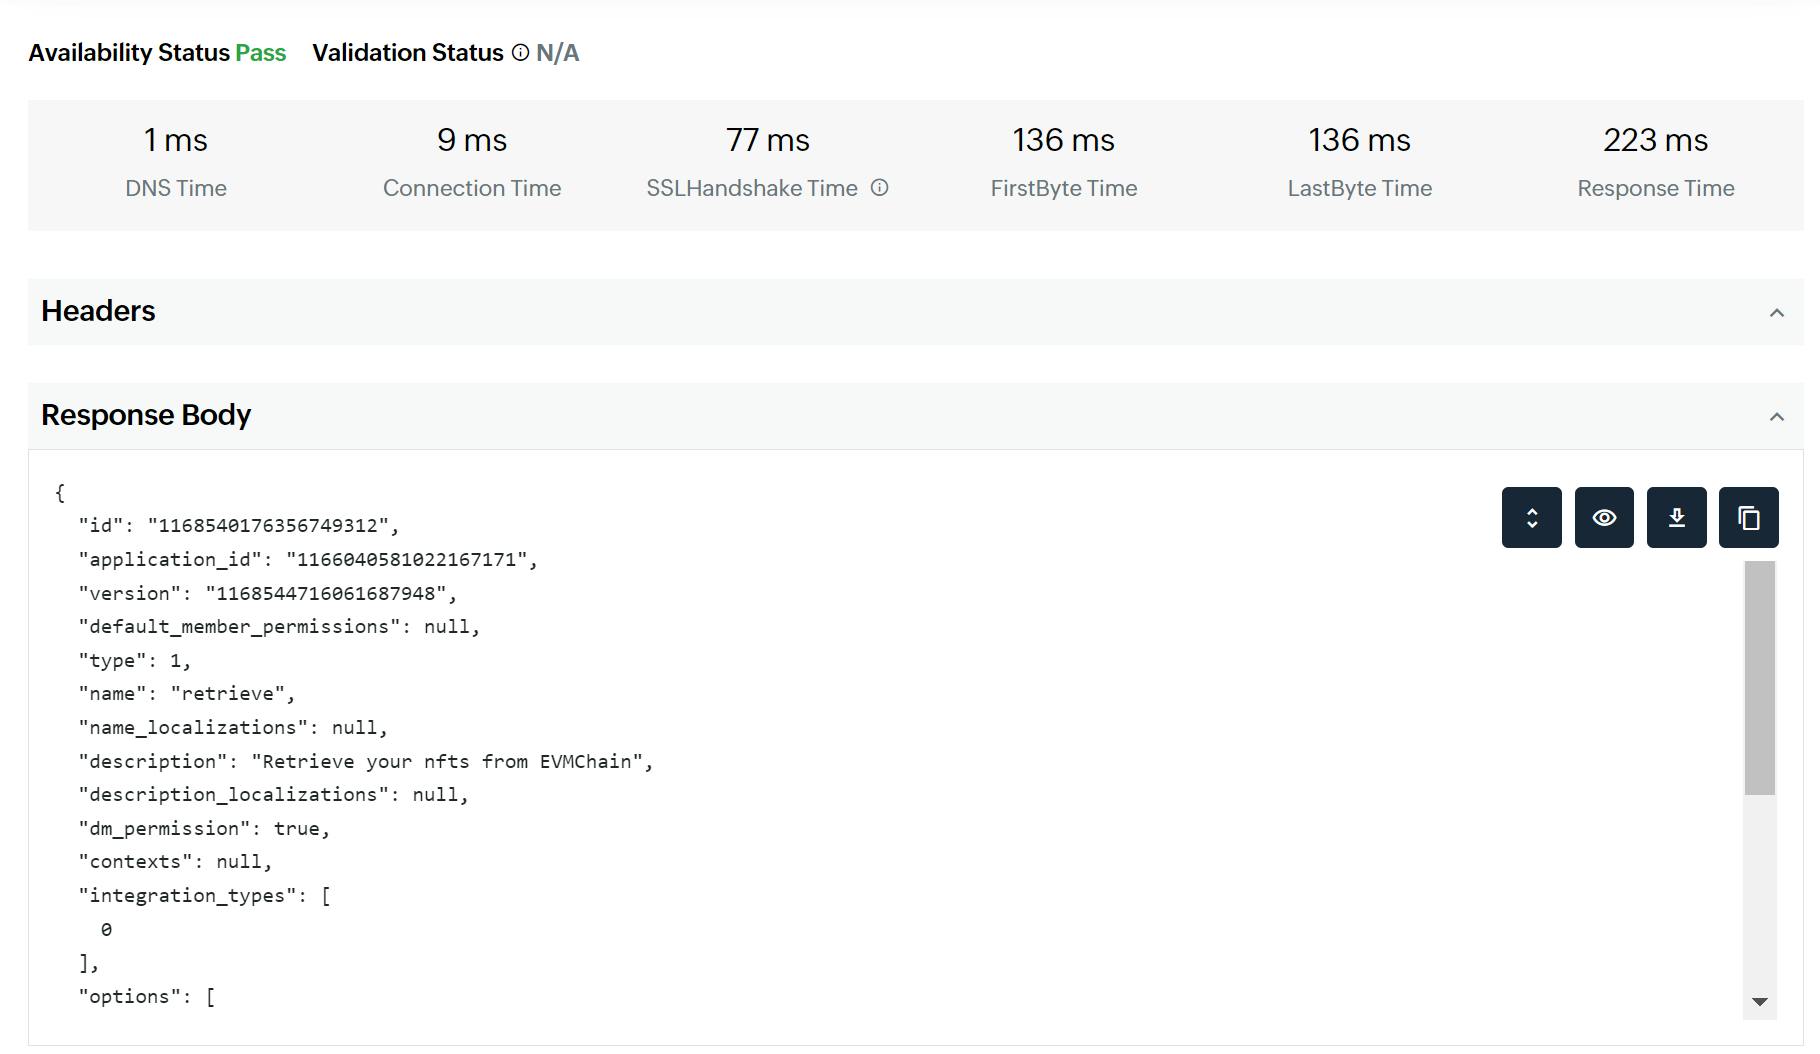
Click on the "Test again" button.
To view the response to this petition, you can scroll down.
Obtaining information from QuickNode
Obtaining QUICKNODE_RPC_URL value:
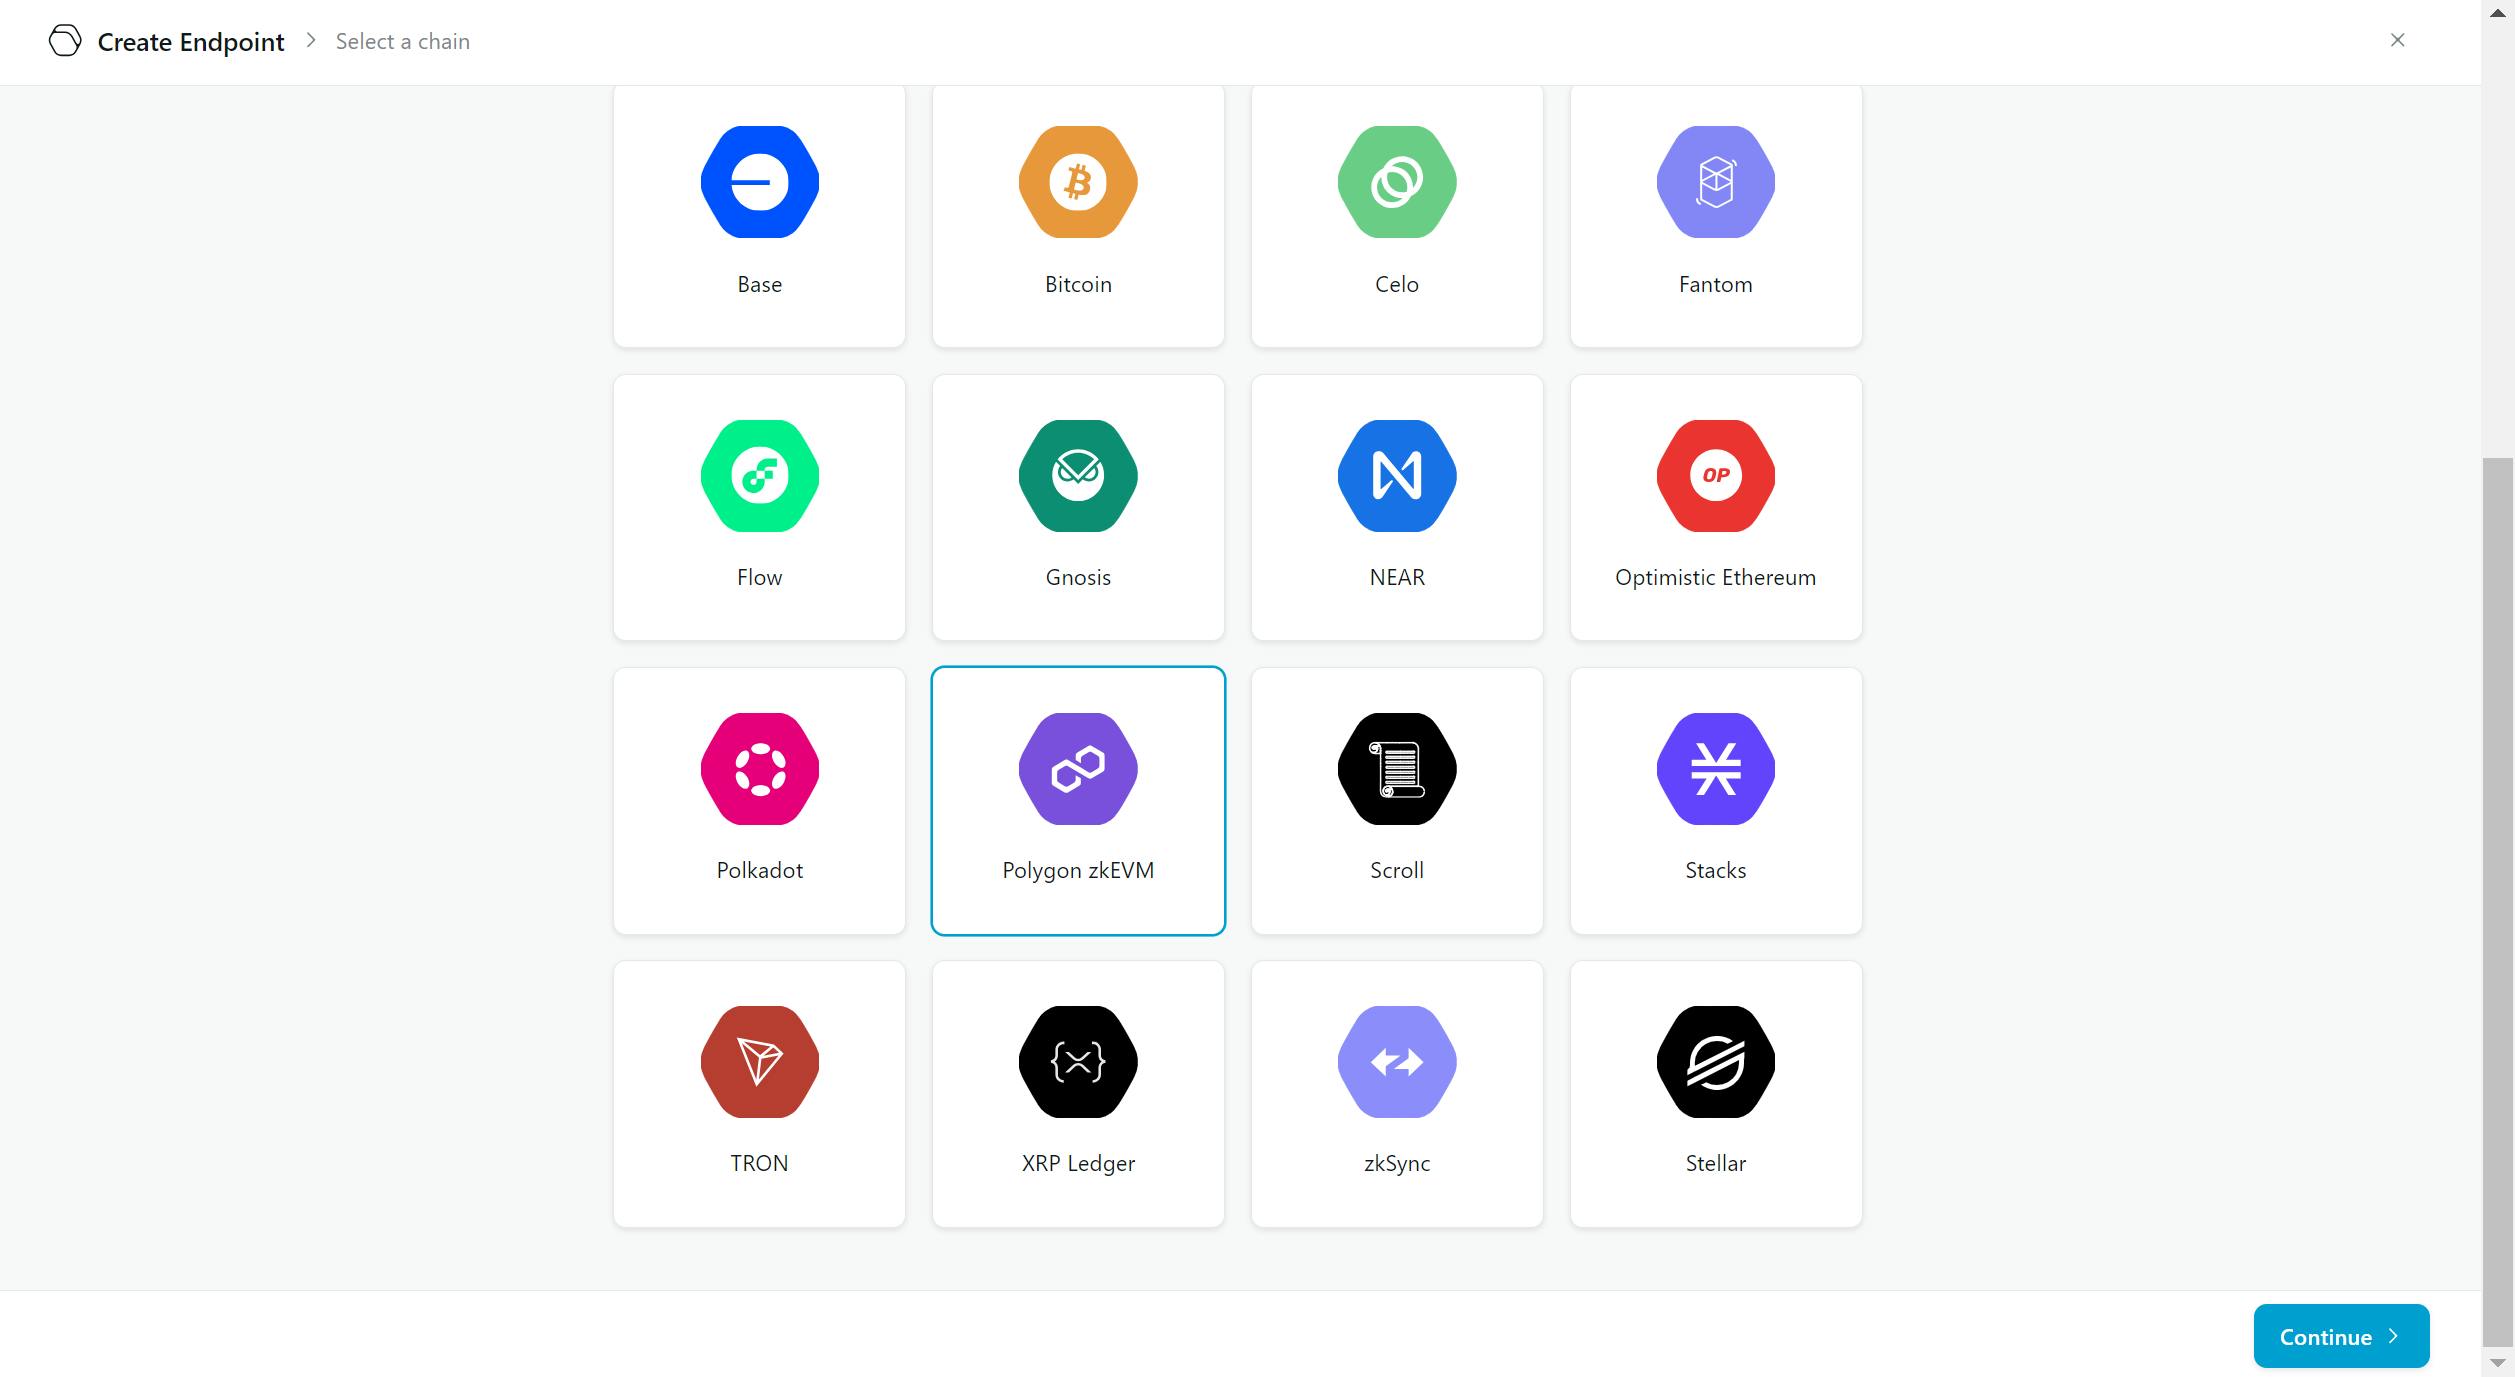
Let's go to QuickNode'sdashboard, please go to the 'endpoints' section, and click the 'Create endpoint' button.
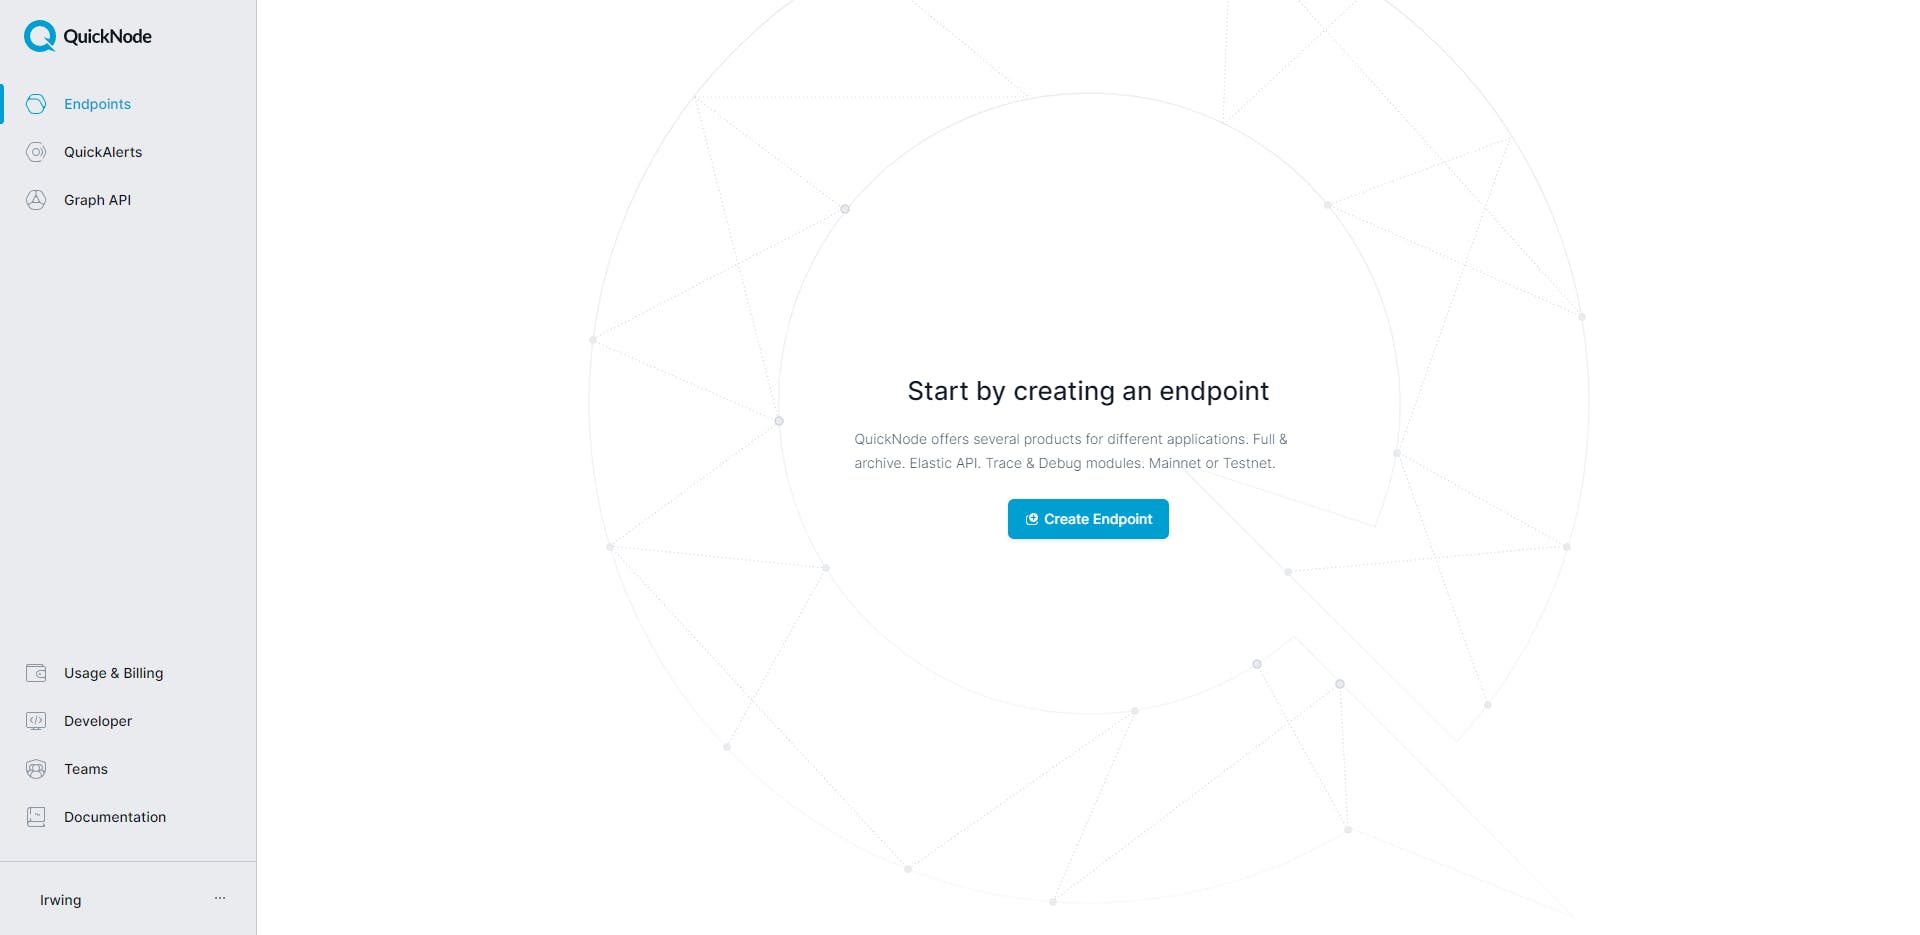
Click on your desired blockchain.
Choose your preferred network.
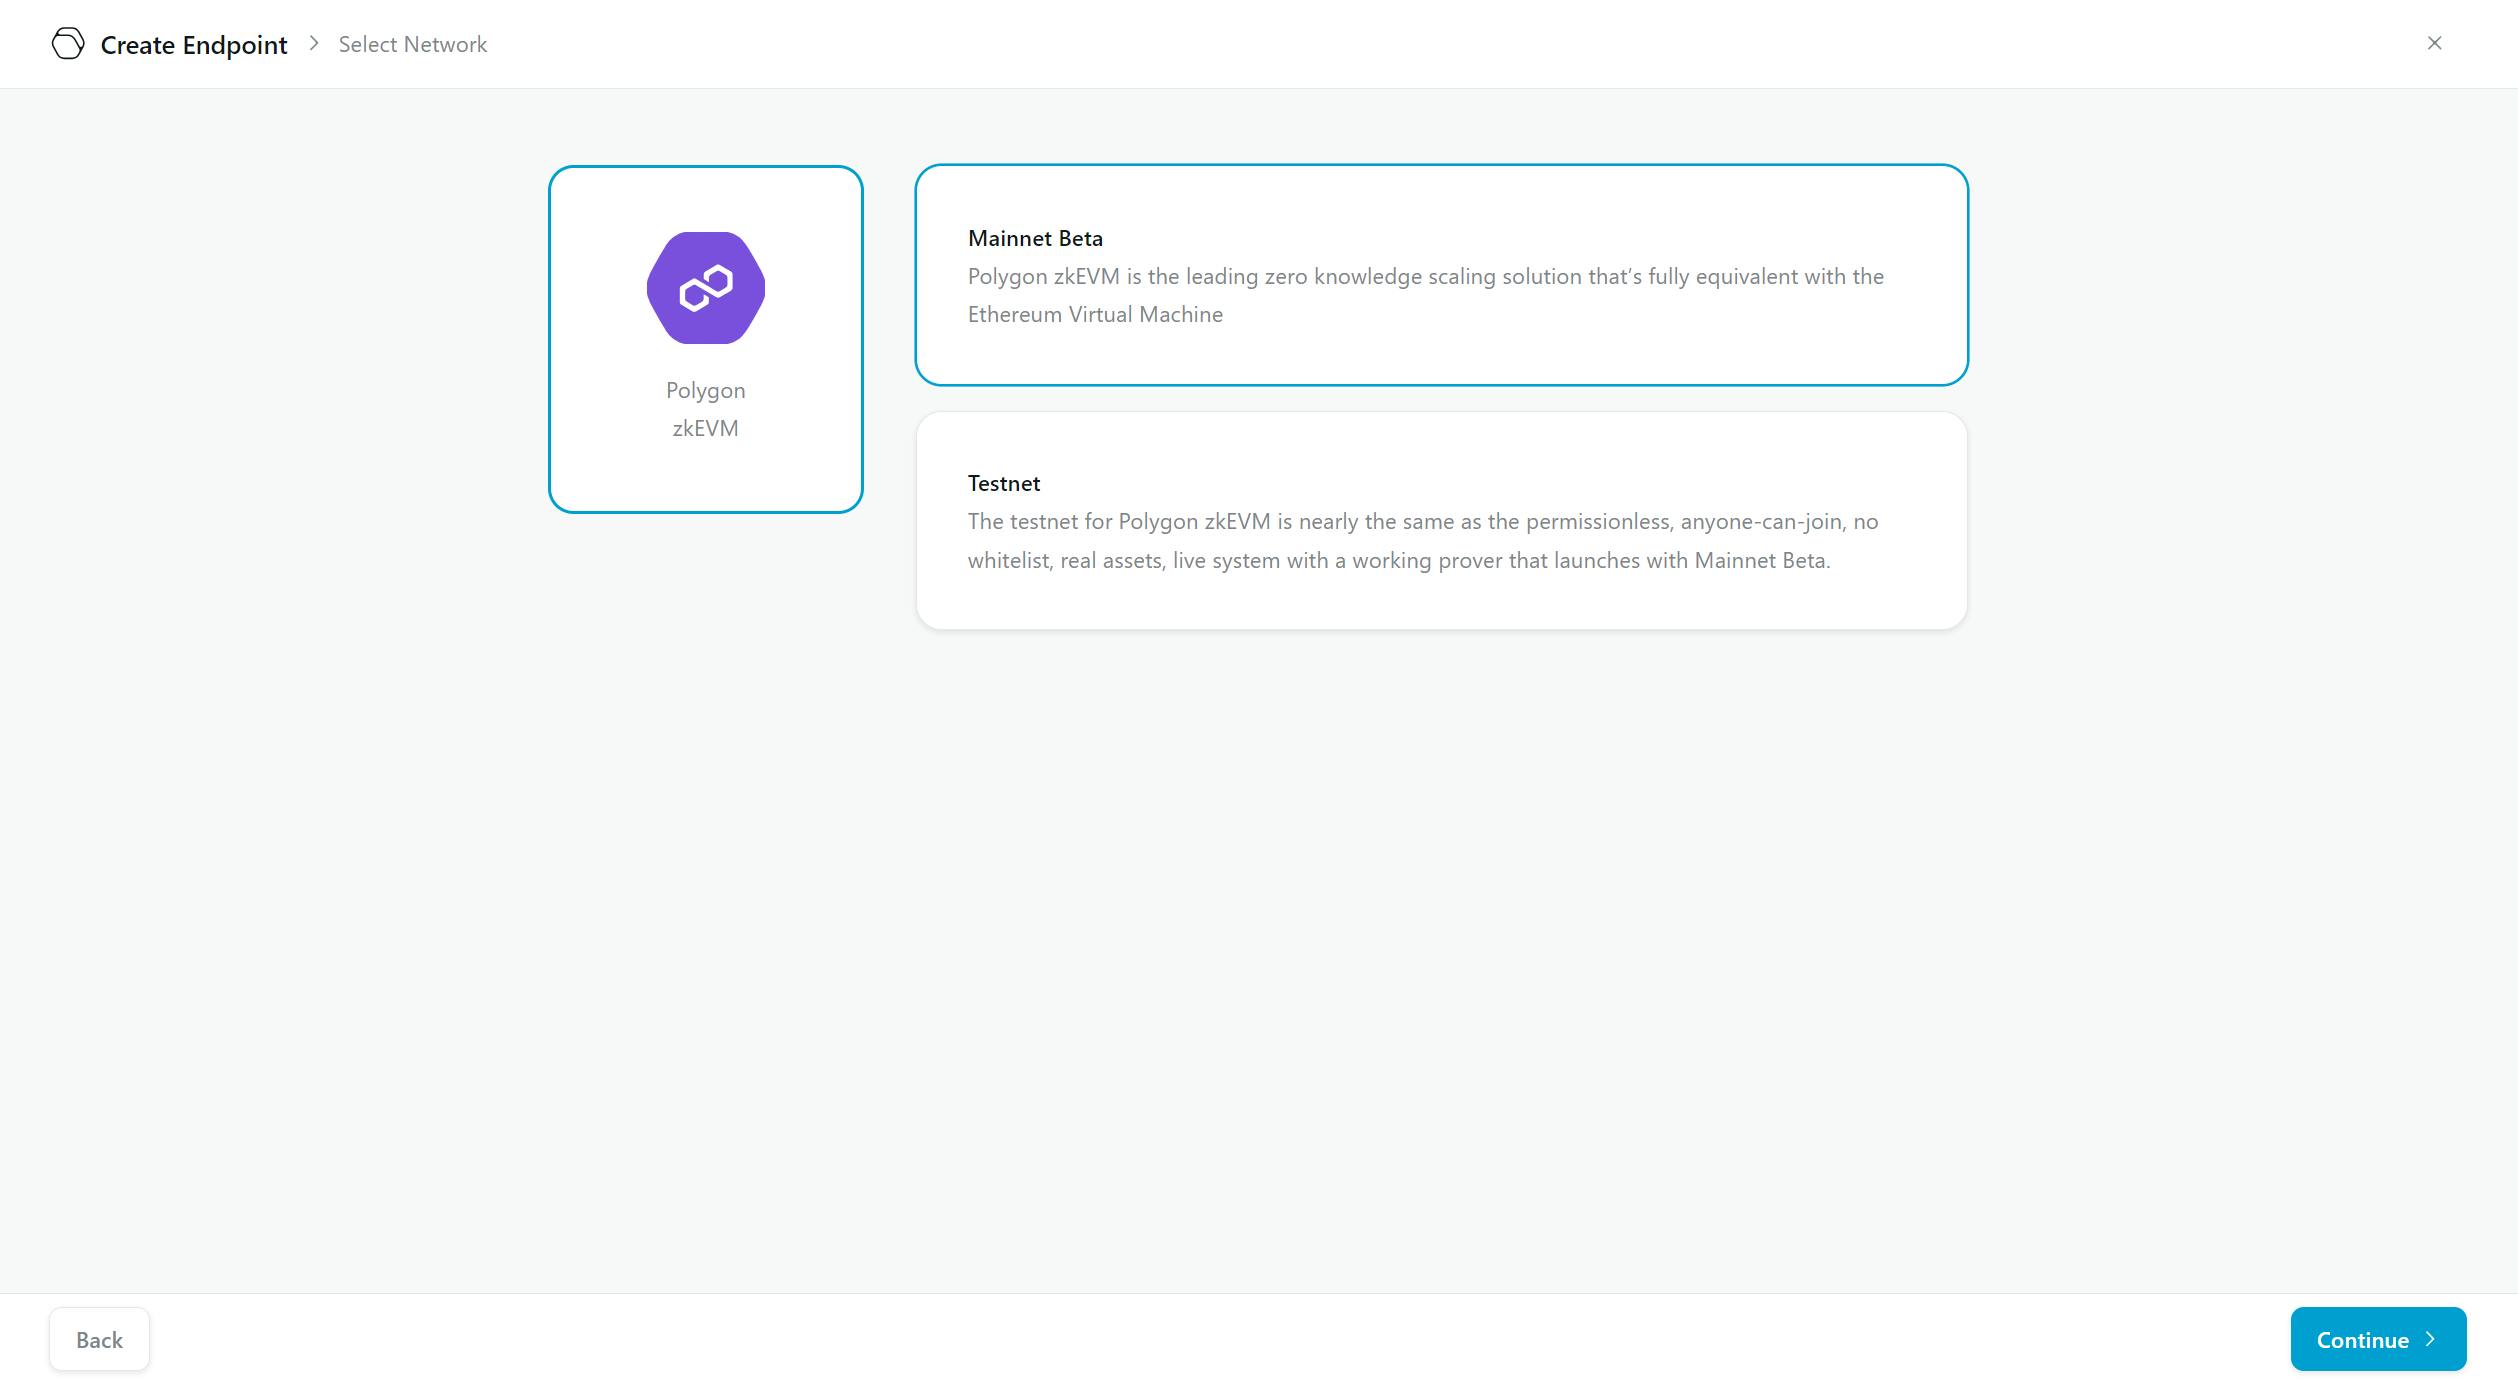
Now, copy the HTTP Provider URL

Creating a service to retrieve information for our Discord bot
You need to go to Render:
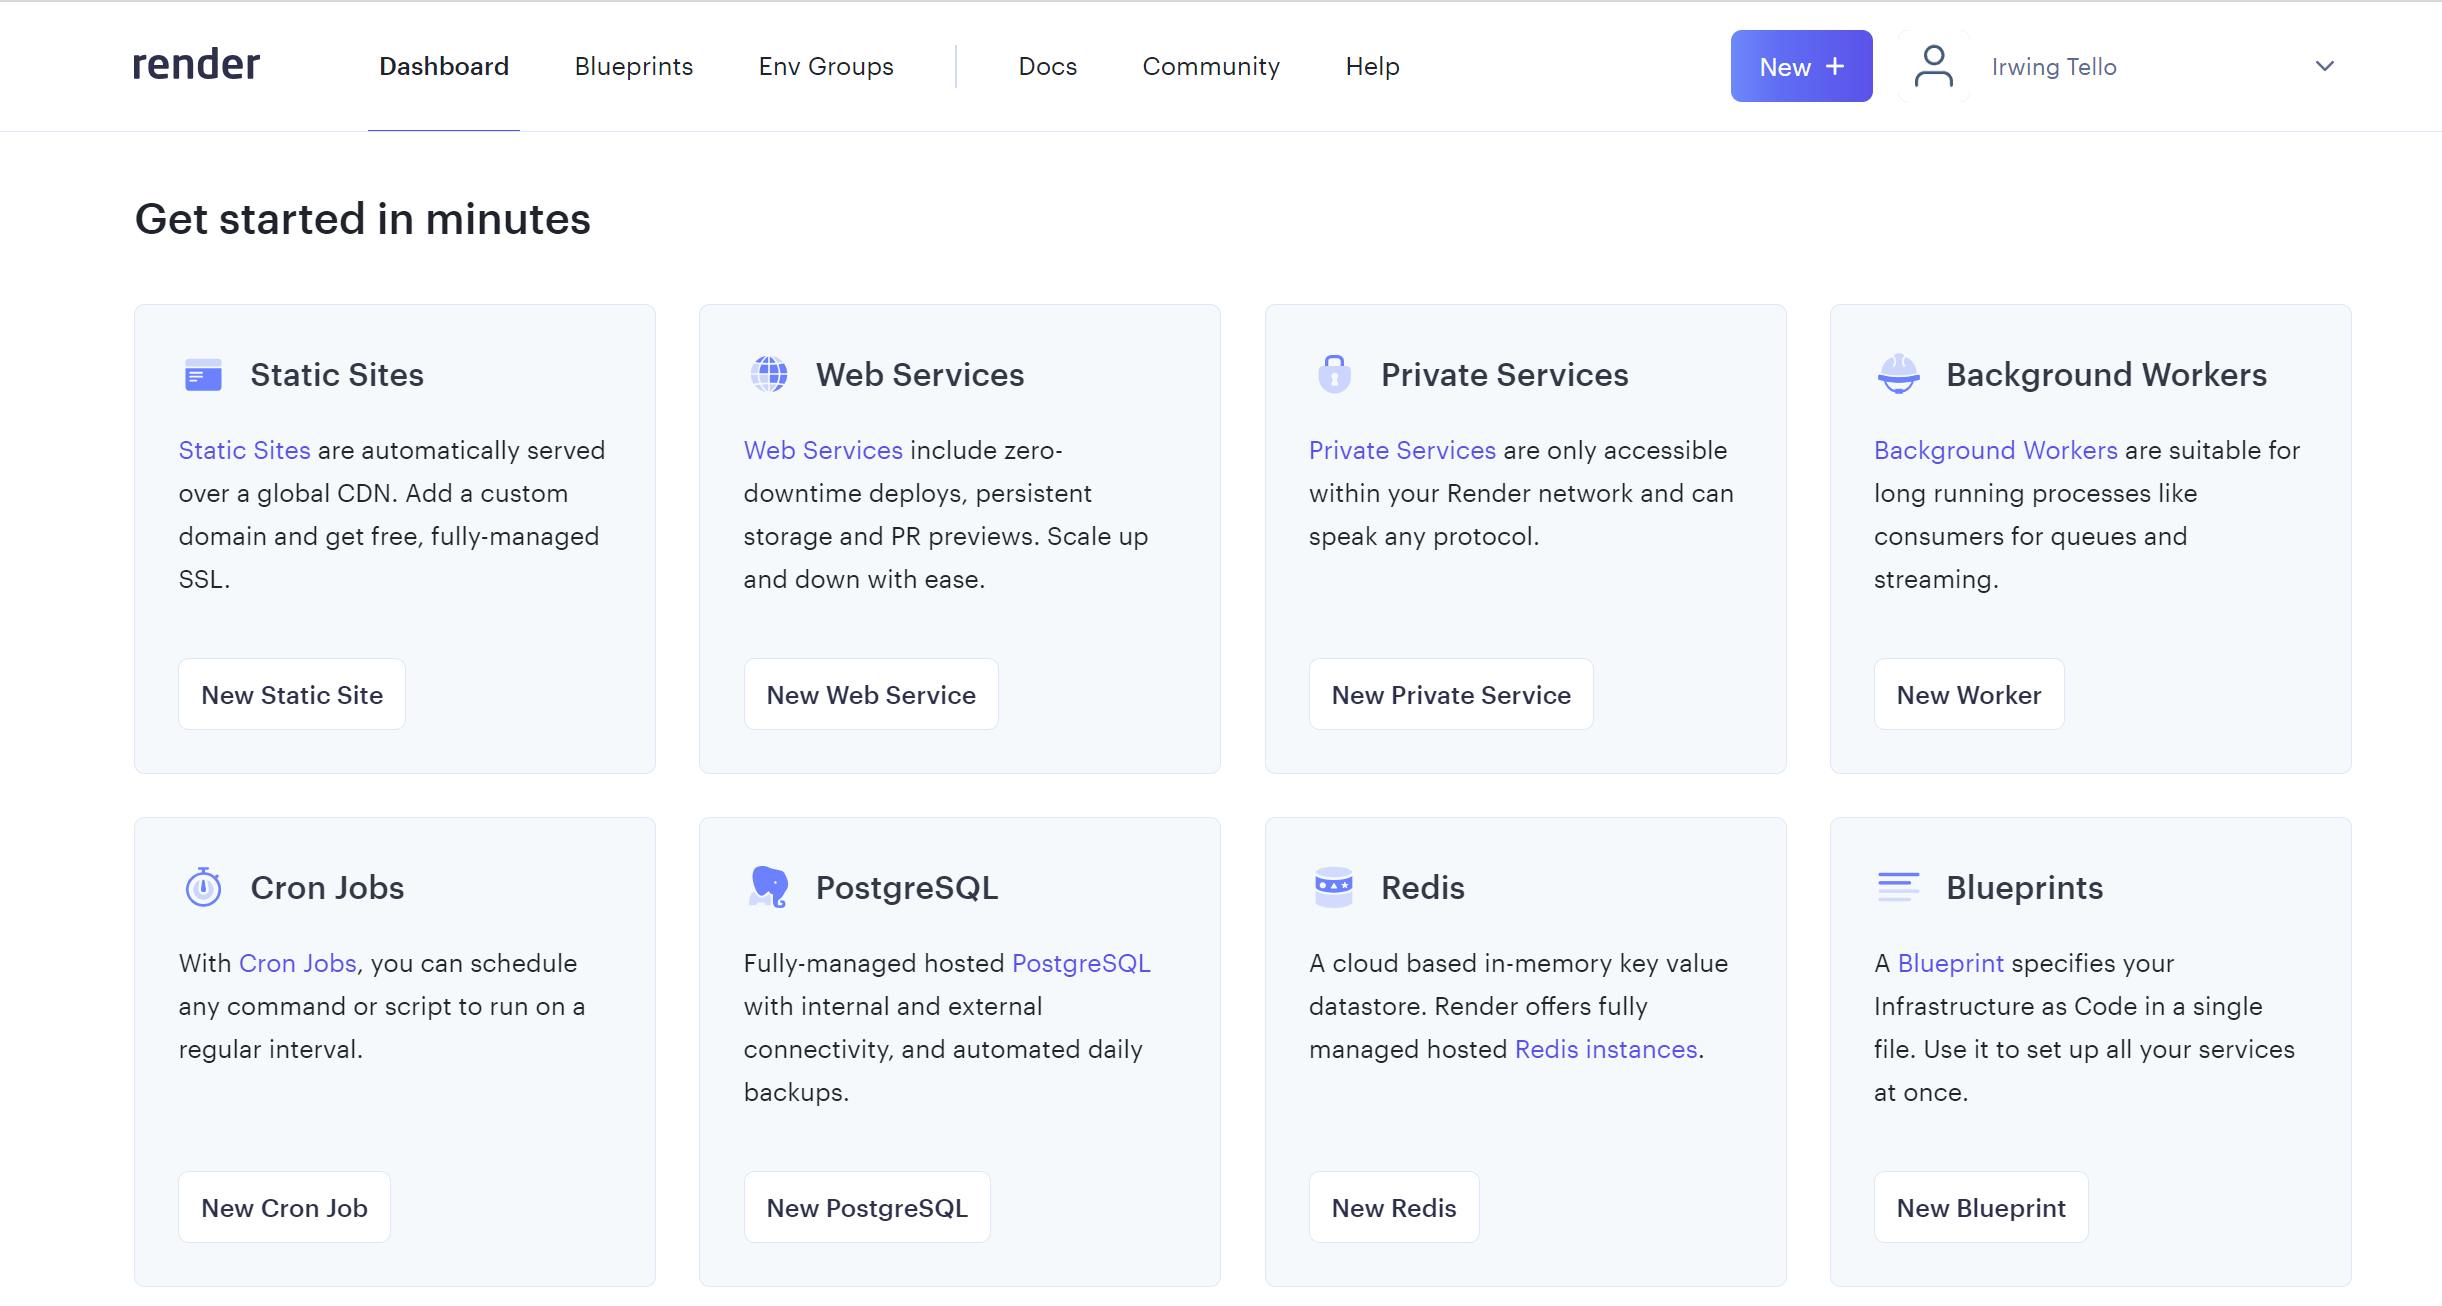
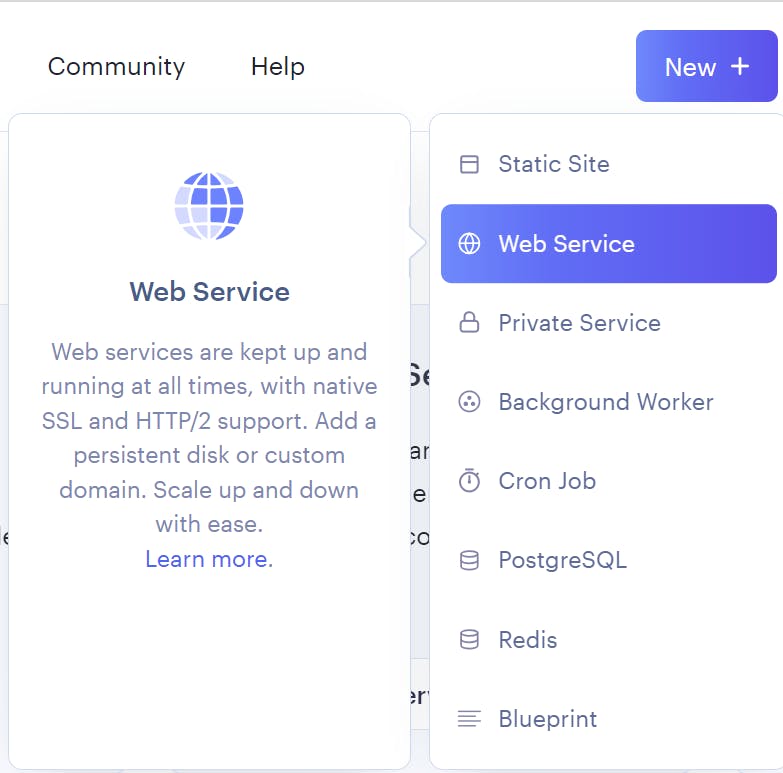
Afterward, you need to click on "New". In the subsequent steps, you will need to click on the 'Web Service' option.
You will see this dashboard:
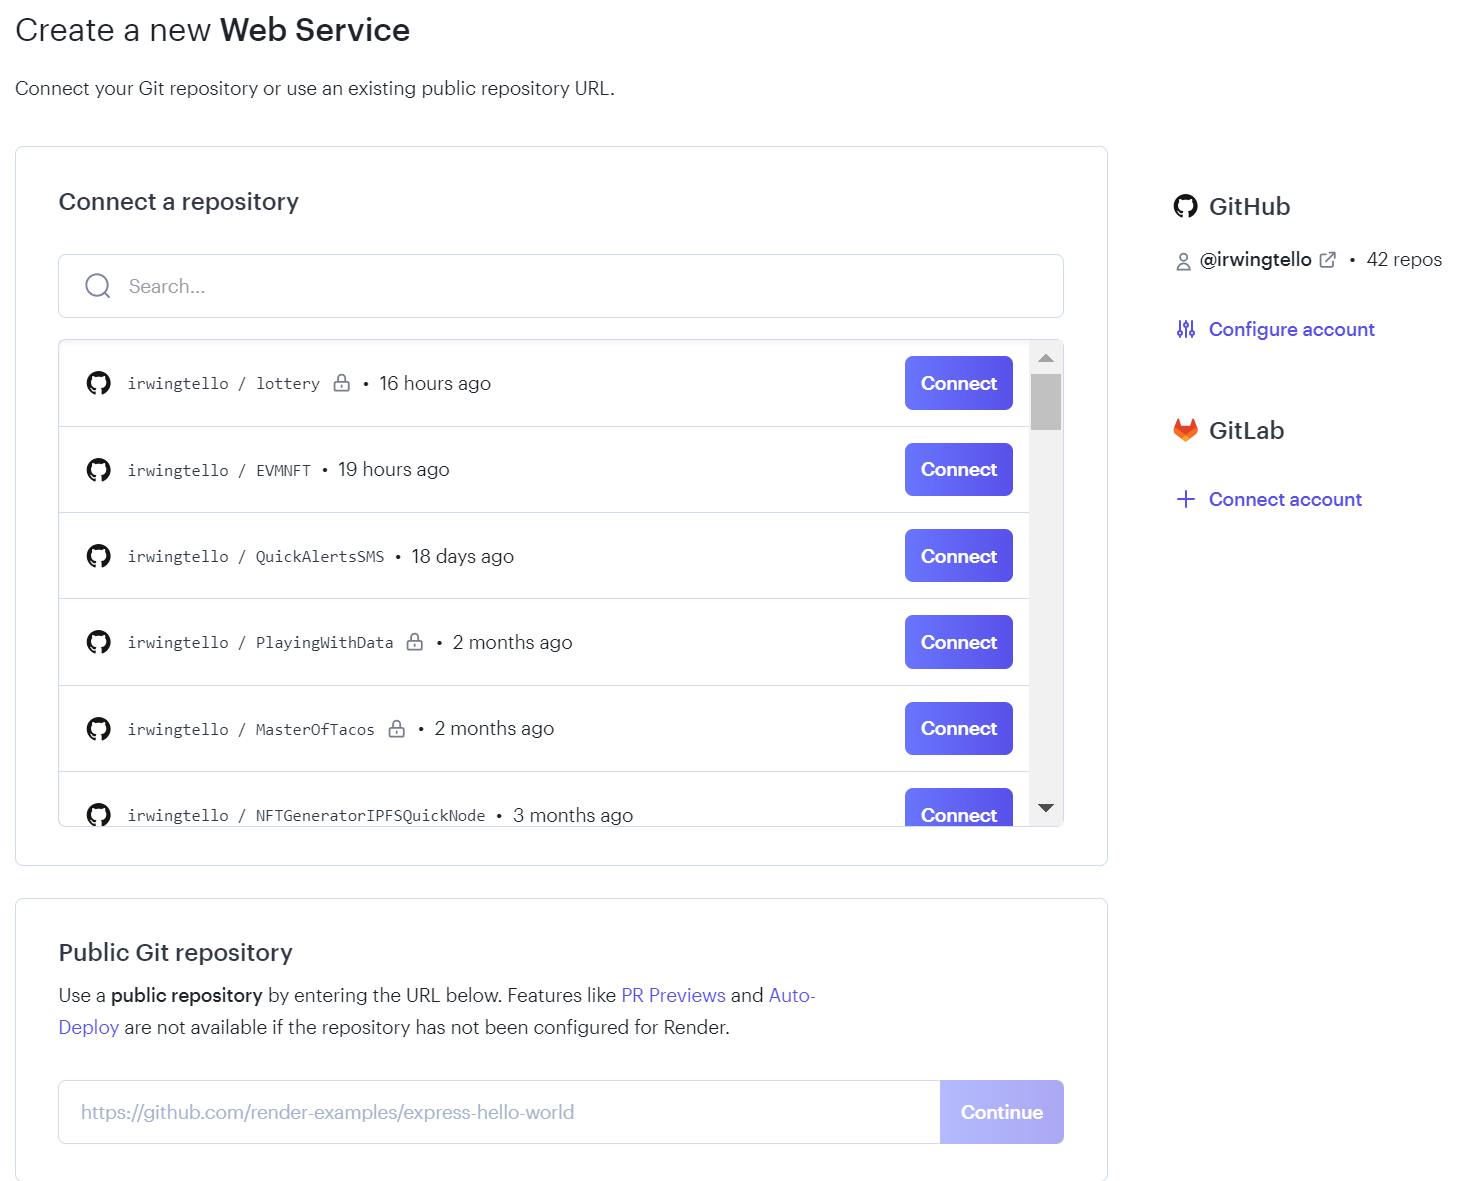
In the Public Git Repository section, you can find a white box where you need to paste this code and click on the "Continue" button:
https://github.com/irwingtello/EVMNFT
After that, please change the data from these fields:
Name - You can choose any name
Build command - npm install
Start command - node bot.js
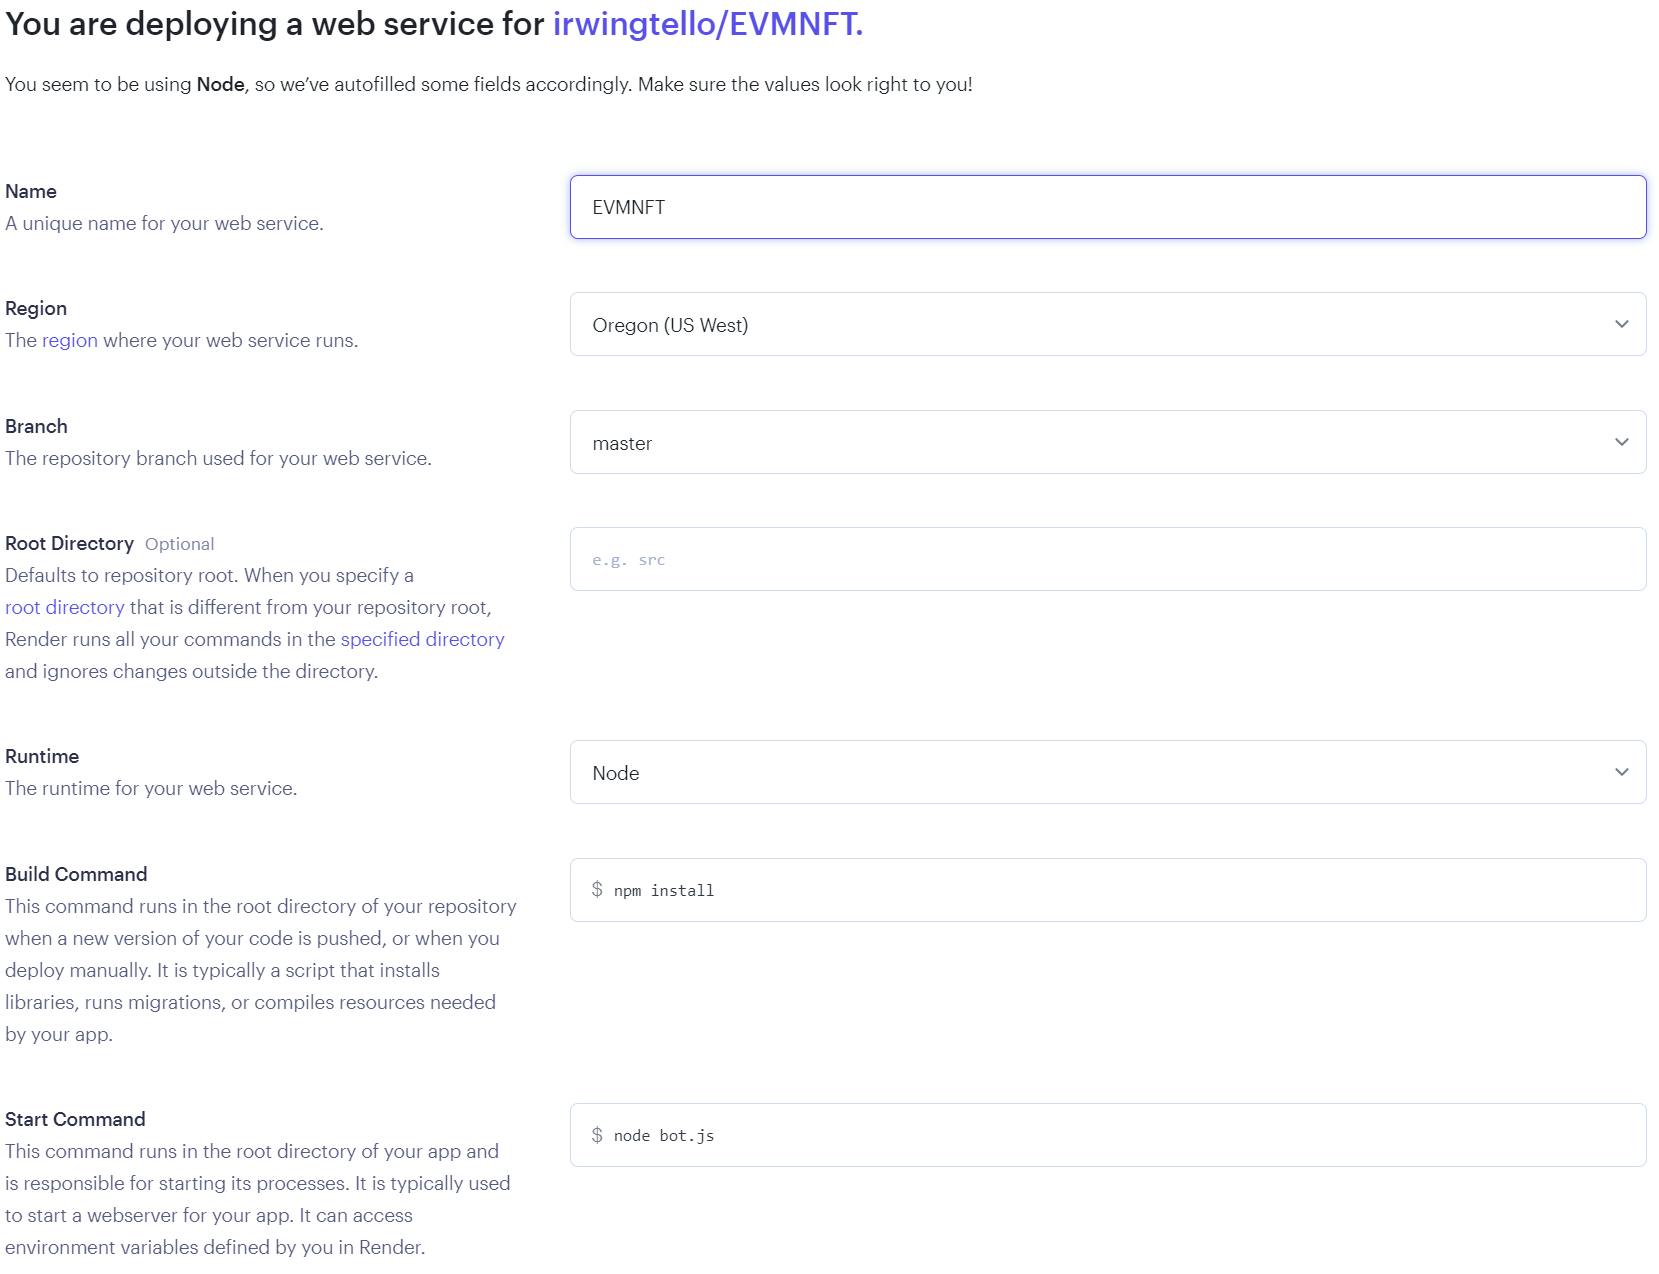
After filling the data, please scroll down.
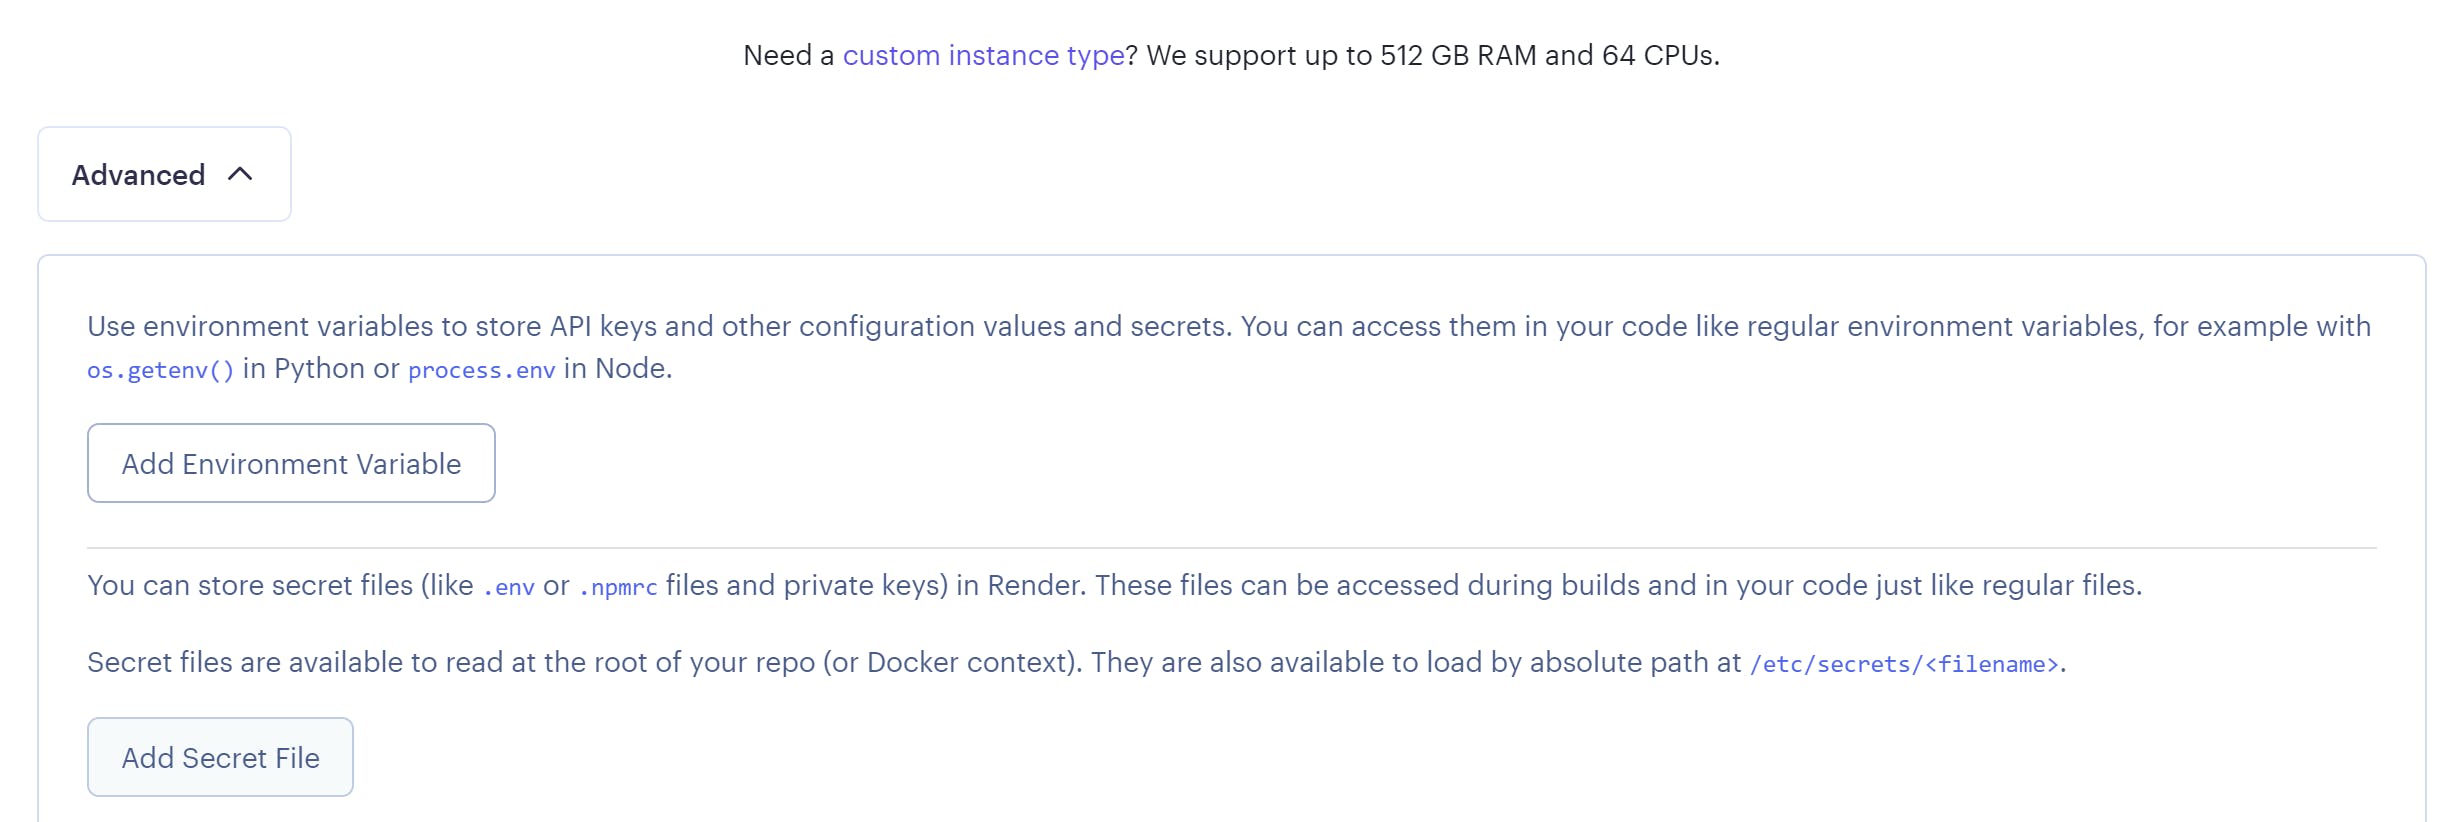
And fill your .env variables with the values that you recovered in the last steps.
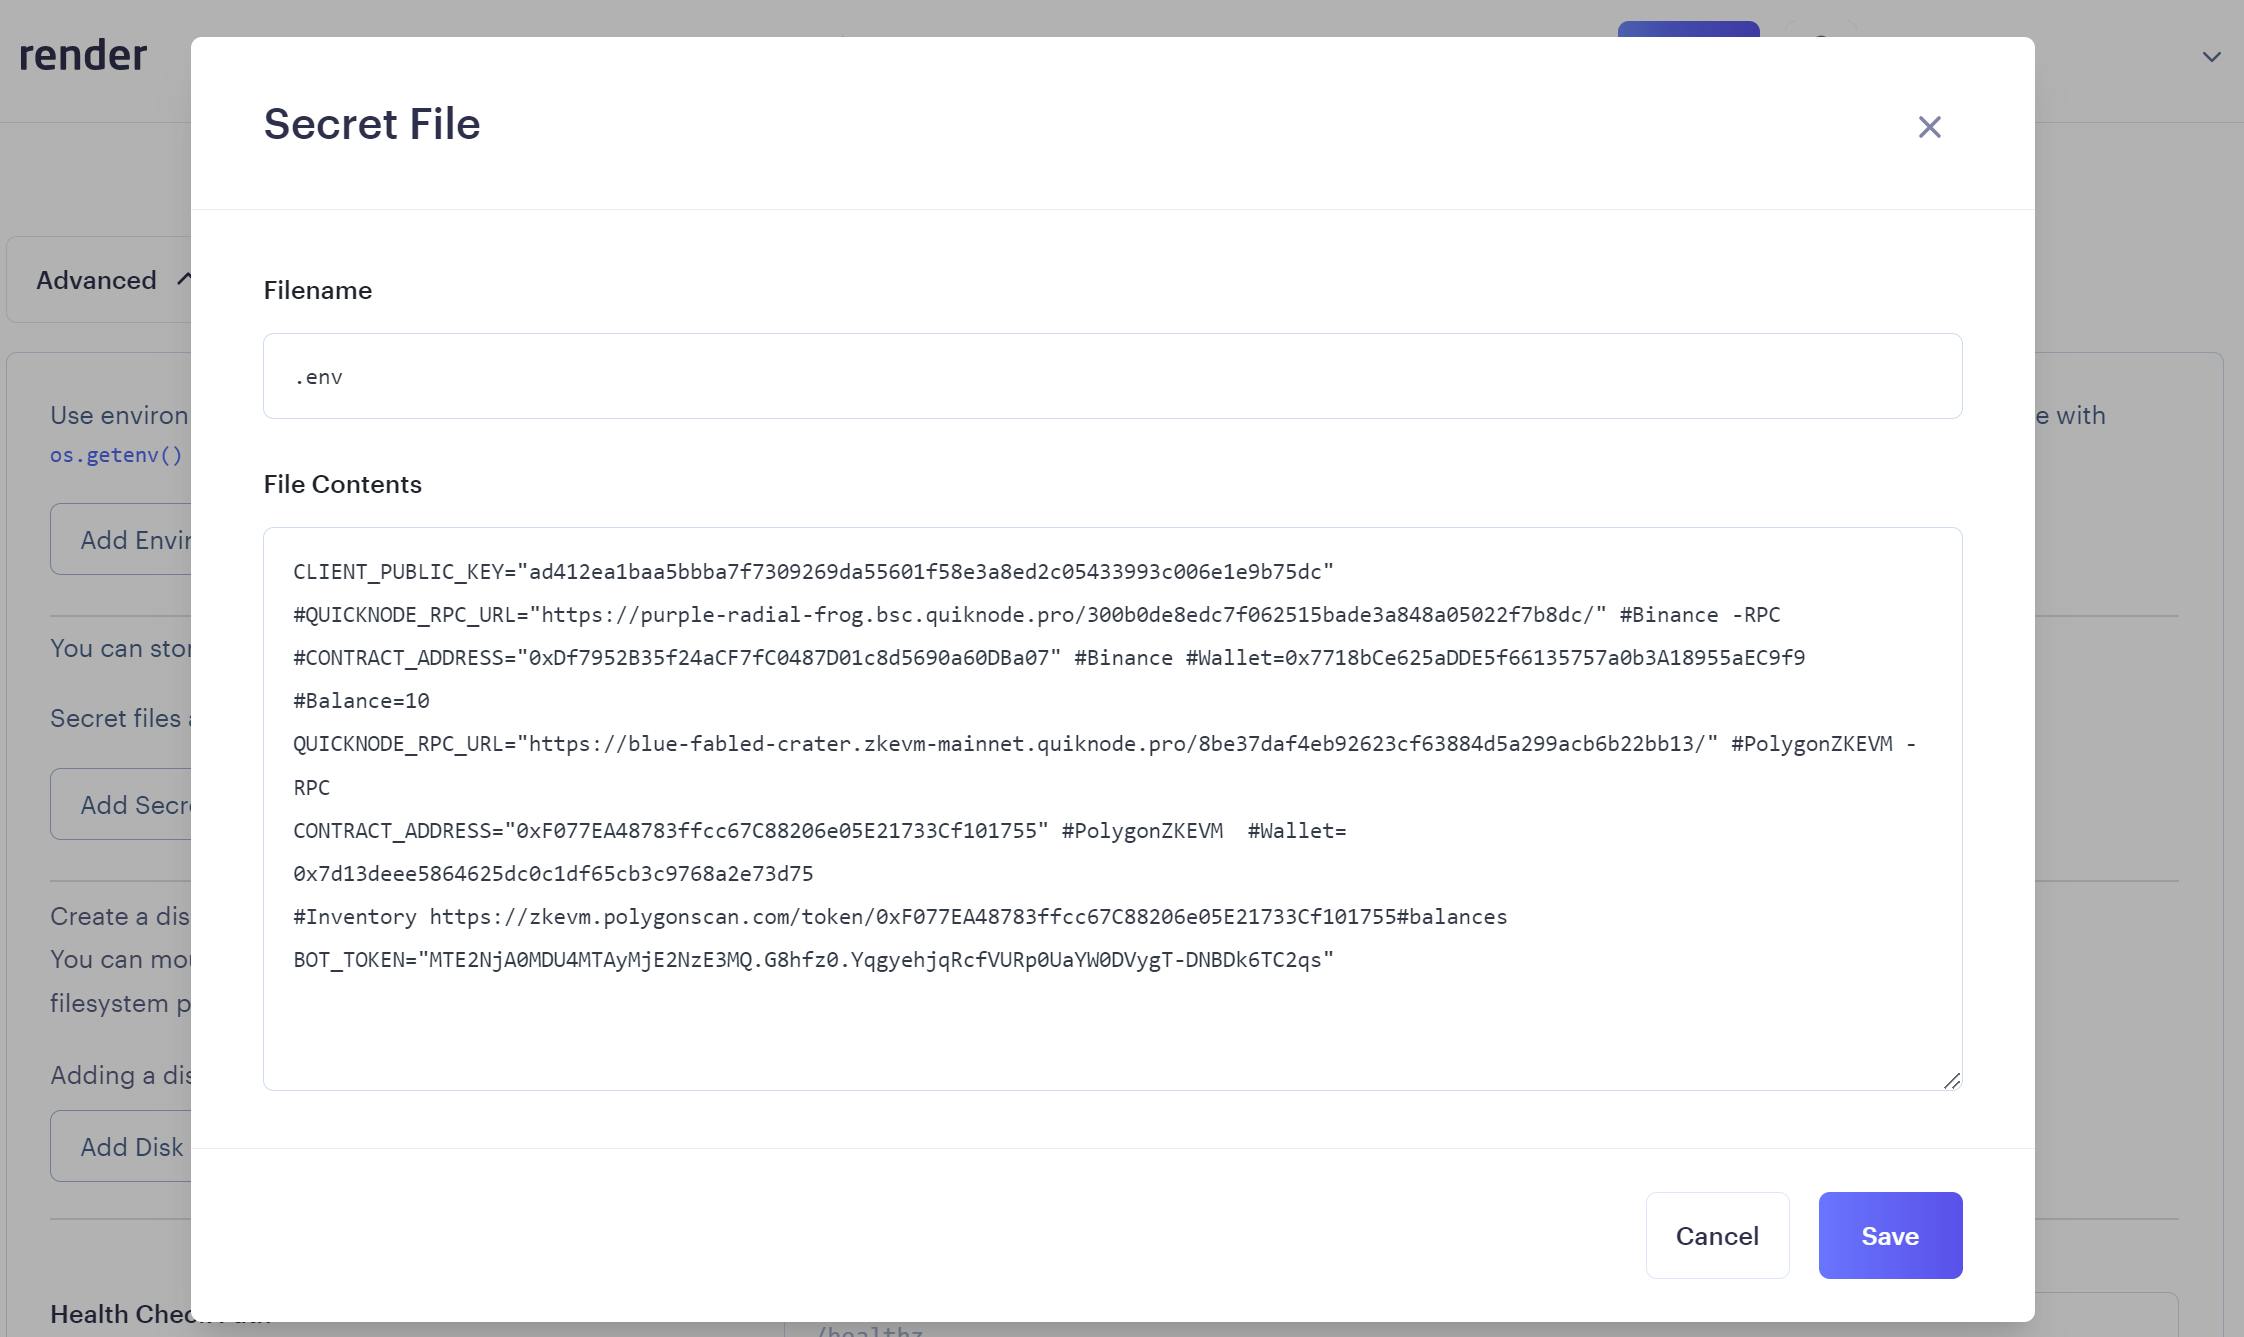
You need to change these values:
In Filename, you need to write the name ".env".
In File Contents, you need to write the next lines:
QUICKNODE_RPC_URL="Your quicknode rpc url"
CONTRACT_ADDRESS="Your contract address"
BOT_TOKEN="Your discord bot token"
CLIENT_PUBLIC_KEY="Your discord public key"
Afterward, click on the "Create Web Service" button and you will see the next screen.
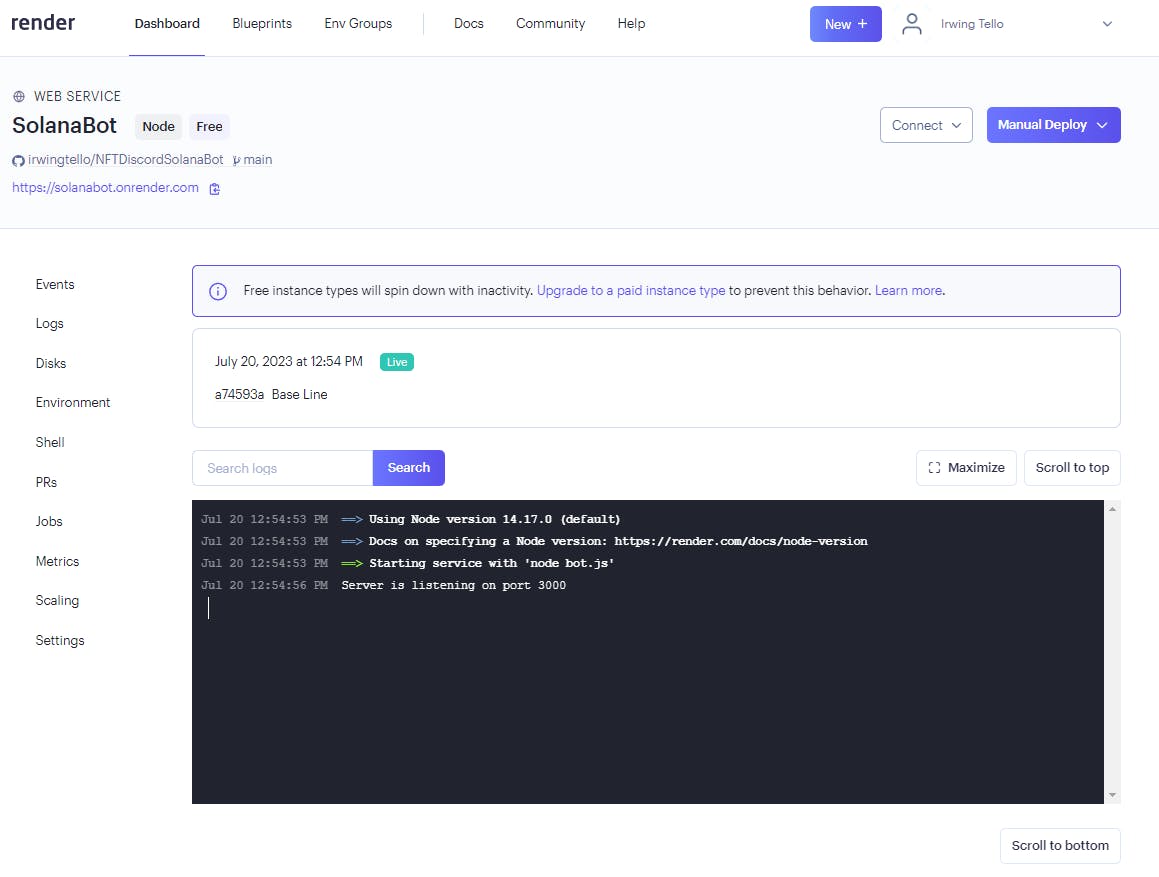
Congratulations!. You now have your first bot service online. We need to copy the URL for this bot and paste it into our bot configuration on Discord.
In my case, this is my URL:
Setting up our service on Discord
I will save you time!, you need to go to the Discord Developer Portal:
https://discord.com/developers/applications/
Click on the name of your Bot.
After that, you need to go to the "General Information" section and change the "Interactions Endpoint URL".
You need to paste the URL generated by render.com and add the path "/interactions"
Example:
https://evmnft.onrender.com/interactions
In the consequent step, you need to click the button "Save changes".
After that, you can use your bot in your community!
Exploring your first NFT Discord Bot on your community
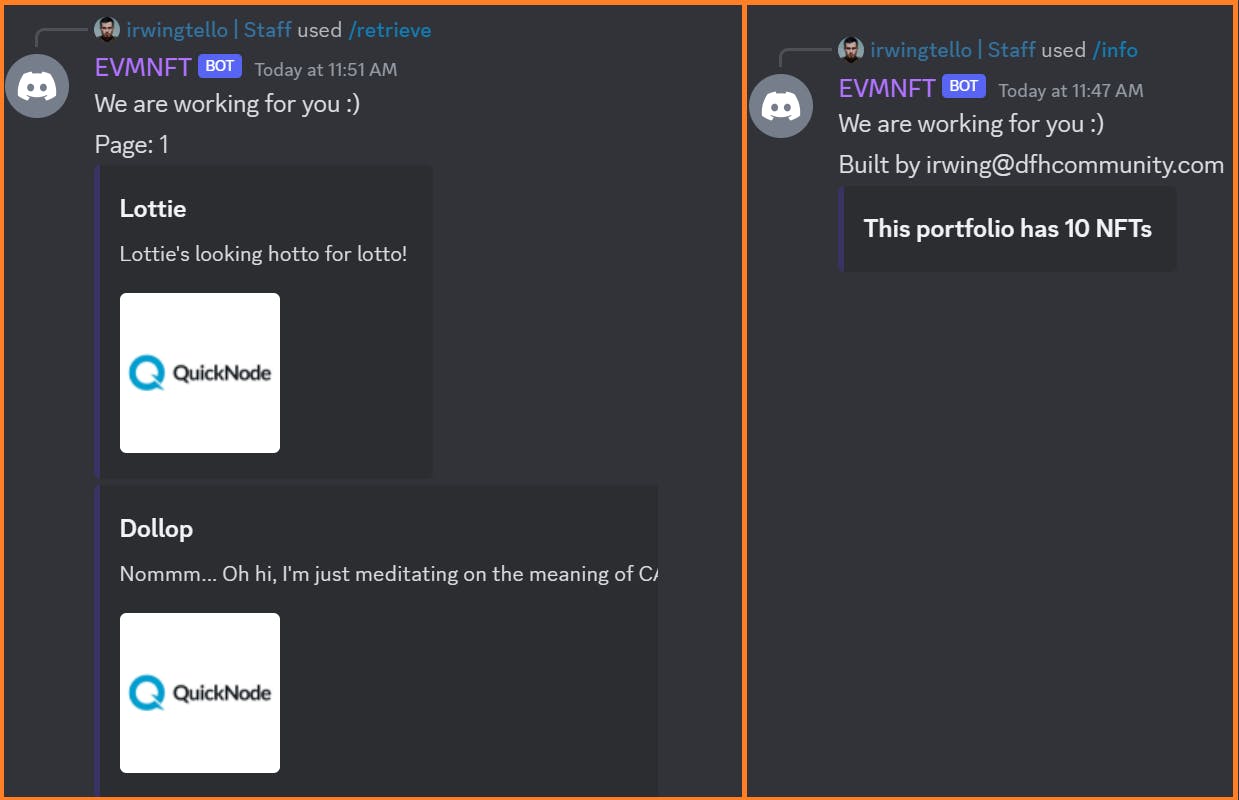
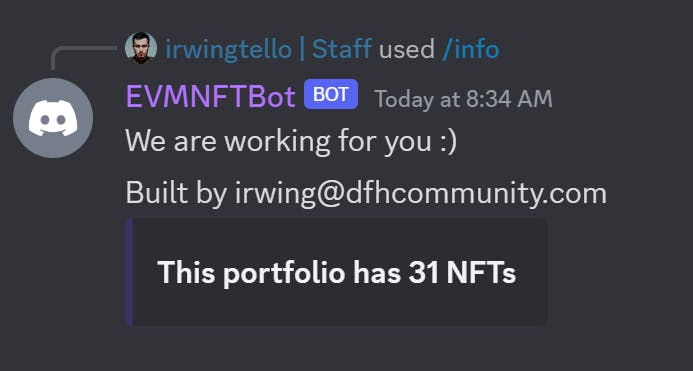
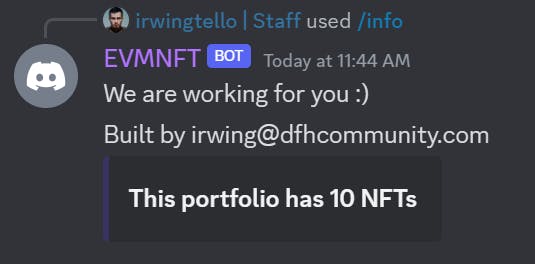
Go to any channel on your discord and write this first command: /info, to know how many nfts you have.

After that, you will see this result:
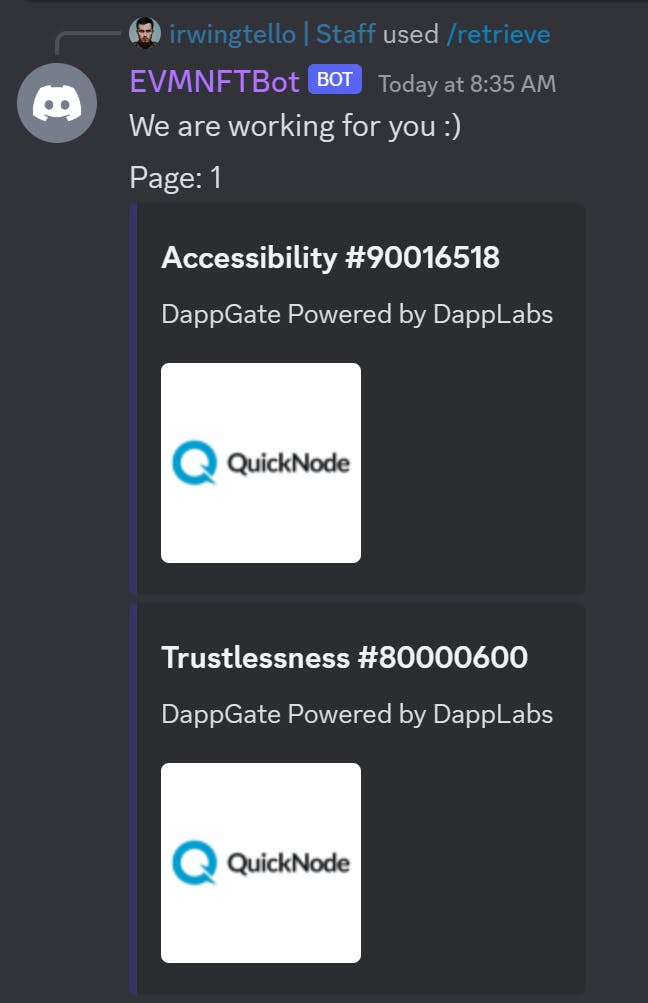
Now you have the total pages where you can find your nft data, then you can use this command /retrieve:

As a result, you will be able to see your NFTs:

Conclusion
As you embark on your journey with your very first NFT EVM Discord Bot, keep in mind that your imagination is your best friend in this creative adventure.
Don't hesitate to put your personal touch on the commands and interactions.
This will not only make your bot more engaging but will also add a special touch that your community will love.
In the world of NFT EVM Discord Bots, the sky's the limit for your creative ideas, and you have the power to shape an experience that's truly one-of-a-kind for your community.
We ❤️ Feedback!
If you have any feedback or questions on this guide, let us know. Or, feel free to reach out to us via Twitter or our Discord community server.
We’d love to hear from you!
Author: Irwing Tello
Discord: discord.com/invite/ADjtsHVreT
Twitter: twitter.com/irwingtello
LinkedIn: linkedin.com/in/irwingtello
Email: irwing@dfhcommunity.com
Website: dfhcommunity.com
Youtube: youtube.com/@irwingtellomx
You can support my work here:
buymeacoffee.com/irwingtello
BTC: 34kXK9CpTJP1PyHKw2kUD2bt6rtGcG5CHY
EVM Address: 0x8B98F8Ff69d2A720120eD6C71A9Bc5072b8Eb46D
Solana: Ey9oVFHW79giacRZaKxigYjeihMsY7ox8jxc7Hp1sJmS